


Hey, I've just triggered with profiling overlay you see in the top-right of the attached screenshot, and I cannot find how I enabled it. It would be nice to use since I was using my own custom profiler (printing stats) so far but this one has a nice graph and shows clearly when I drop to 30 FPS.
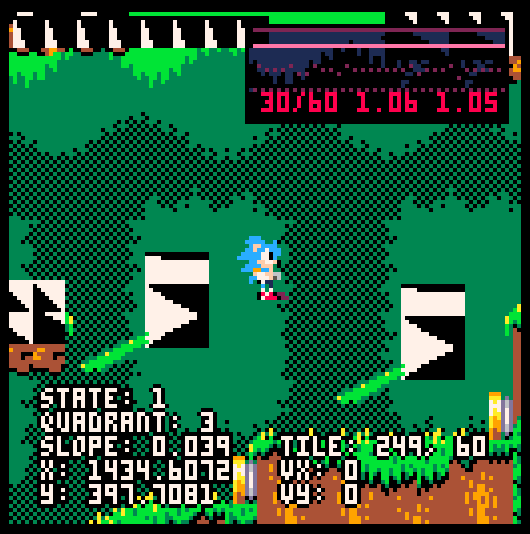
It really is an overlay, not part of the game. As a matter of fact, taking a screen capture with F1 with ignore the overlay!
As a hint, I was reload my game with a script that sends keystrokes Ctrl+R to the PICO-8 window. Maybe I pressed something else, or the keystrokes were not correctly registered at that time, and it triggered another shortcut; which I cannot find at all in the documentation!
Note: this happened in the editor, not the runtime binary version of PICO-8.
 1 comment


This is my port of an Android mobile game made by myself and my classmates for our Mobile Games unit.
0 comments

State Machines
A wrote (a couple variations of) a simple state machine manager. The code is on github under an MIT license. There are a couple demos down at the bottom of the page.
- state-machines-du (107 Tokens): each state has its own draw and
update methods - state-machines-st (111 Tokens): each state has setup and teardown
methods which are run only when the state is entered and exited
respectively
Usage
Creating a state machine
To create a new state machine use the 'new' method:
sm = state_machine:new() |
Adding states
After creating the machine itself you need to add states. A state
consists of four things:
- A unique name or identifier: Most likely a string but can be
anything as long as it's unique. - A transition function: This function is called once per cycle
and should return the identifier of the state the machine
should switch to. - An update (or setup) function: The update function is called
once per cycle and should update variables, etc. associated
with the state. For state-machine-st.lua, this is instead a
setup function which is only run once each time the machine
enters this state. - A draw (or teardown) function: The draw function is called
once per cycle and should draw everything relevant to the
state. For state-machine-st.lua, this is instead a teardown
function which is only run once each time the machine exits
this state.
Add a state to the machine using the 'add_state' method:
    sm:add_state(
       -- identifier
       'a state',

       -- transition function
       function()
          if btnp(5) then
    	 return 'some other state'
          else
    	 return 'a state'
          end
       end,

       -- update function
       function()
          if timer then
    	 timer += 1
          else
    	 timer = 0
          end
       end,

       -- draw function
       function()
          print(timer)
       end
) |
Using the state machine
-
state-machine-du.lua
Once you've created a state machine and added some states using it
is simple: Set the initial state then call the update and draw
methods.
        function _init()
           sm:set_state('a state')
        end

        function _update()
           sm:update()
        end

        function _draw()
           cls()
           sm:draw()
end |
The update method calls the current state's transition function
and changes the current state if necessary and then calls the
current state's update function. The draw method calls the current
state's draw function.
-
state-machine-st.lua
The setup/teardown version is basically the same except there is
no draw method and the update method does a bit more work, so all
you need is this:
        function _init()
           sm:set_state('state 1')
        end

        function _update()
           sm:update()
           -- whatever other update stuff you need to do.
        end

        function _draw()
           cls()
           -- whatever draw stuff you need to do.
end |
The update method in this version also calls the transition
function. If a state change is necessary, then the current state's
teardown function is called, then the current state is changed,
and finally the new state's setup function is called.
Demos
basic-sm
A very basic state machine with two states. Press X/V to switch from state 1 to state 2, Z/C to switch from state 2 to state 1.
2 comments

A bit of a stupid question, but I wanted to make sure since the price says it's $14.99 and $19.99 for Pico-8 and the bundle. I wanted to make sure so I can get it here (I believe £12 and £16.)
1 comment


Press the arrow keys or the dpad to move the map around!

Have you ever wanted to use larger sprites on Pico-8 and it just got too complicated? Well do I have the tool for you!
Say hello to my MetaTile system, with tools!
While developing a game I created a meta tile system as well as tools I use to facilitate easier development. The tools themselves are very crude, but effective. In the following post I will show you how to use the tools and implement the system in a game of your own!
Download the tool at this link.
This contains a few files that need to be extracted to your Pico-8 carts directory. You can find that on windows by typing %appdata% into your file explorer and finding the Pico-8 folder.
4 comments


Really quick and easy issue to fix:
The HTML anchor for the tables API is the same as the anchor for tables in the Lua quickstart. Clicking the tables API link in the contents takes you to the quickstart section, and not the API one.
0 comments

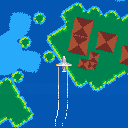
I found myself flying across the Atlantic recently and tried to capture the vibe in a wee Pico8 vignette.
2 comments


this is my attempt in making a tetris clone.
i just wanted to play tetris
help
left/right to move the tetromino left and right
up to rotate
z to drop tetromino
x to hold
older versions:

[hidden]
 0 comments

Yo @zep,
On discord and here on the BBS, we get a lot of people who basically need to get to the auto-backup of a cart they've lost somehow. It'd spare a lot of time writing blurbs like this if people could simply type "backups" and have it work like the "folder" command except it drops them in the 'backups' folder instead of 'carts'.
2 comments

Flying Game wip
I took part in a small casual gamejam with friends over the weekend and although I wasn't able to make it to a computer on the second day, I had fun and made a little flying demo.
I'd love to continue this thing and figure out how to make it a full game.
Directional buttons control direction, X to barrel roll
1 comment

Hi!
I investigated so many times last years to find a good PICO-8 mobile hardware. On this BBS there are many posts talking about that but they are often involving complex solutions (I already had a Raspberry PI and did not want to spend the time again to setup and configure one) or are outdated, so I was giving up.
But I recently found that nowadays there are a ton of simple handheld devices able to run PICO-8 very easily. So I'm adding a new post to the collection, hoping it will help someone. You can find some of those devices in this guide but there are much more: if you dive into the channel of the guy who wrote this guide, you will find a bunch.
Personally I decided to buy a RG351m. PICO-8 runs beautifully on it and setup was super simple. The first time I tried a PICO-8 game I thought the screen was a bit too small but I got used to it very quickly. It's so fun to spend a couple of hours creating a game and then having it running on a real handheld game console right after! Discovering and playing games with Splore in the bed in also a great experience!
5 comments


Hi, newbie here, i was wondering if there is a website or somewhere where we can download pico 8 sound samples? I have seen other posts where people list sound effects, but they are in mp3 or other formats. Is there a way to convert an mp3 to pico format?
Thanks
1 comment

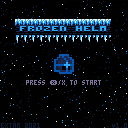
Journey into the Temple
Frozen Helm is a retro Metroidvania. It was made for RNDGAME JAM II from 16/07/2021 to 01/08/2021.
Guide Tulok through the Temple of the Ancestors, fighting malevolent skeletons and exploring the icy ruins.
Harness the power of ice
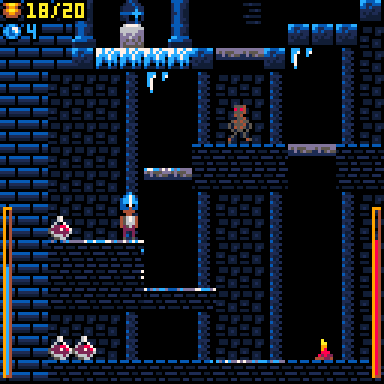
Tap Z to create a blast of frost that freezes nearby enemies
Hold Z to hurl ice spears
Master your powers
Experience Story Mode to learn the secrets of the temple and blast through the game in Speedrun mode.
Version History
1.1
-more enemies
-more pickups
-tweaked level layout and enemy placement in a couple of places
7 comments


I've tried a few guides to try and make a quick booting PICO-8 cartridge for RetroFlag GPi Case (https://www.retroflag.com/GPi-CASE.html), most of them seem outdated and not completely easy IMHO.
I'm pretty familiar with LAKKA (https://www.lakka.tv/) - a retroarch distro that supports plenty of devices and is based on OpenELEC, so uses a very lightweight quick booting goodness.
So, here goes a small guide:
- Download a compatible LAKKA image for the GPi-Case: (https://le-builds.lakka.tv/GPICase.arm/Lakka-GPICase.arm-3.2.img.gz) OR a later one if this post gets too old.
- "burn" the image to a micro-sd (16Gb should be more than enough).
- Put it back in the GPi-Case and let it boot at least once so that it can resize the partition.
- Once booted and in retroarch, goto Settings -> Services -> Enable SSH
- Still in Settings, goto Wifi, and connect to your local Wifi.
- Go back to the main menu, and select Information -> Network to view the IP address you got.
10 comments


A small 48 hour jam game for using a single button to play a game.
My first Pico-8 jam entry!
 0 comments


Hello~~
I have just found about PICO-8 recently and I must say this is a neat little platform to play around :D
So after scrolling the manual a few times, I realize that PICO-8 got the 128 bytes of GPIO, which begs to be used for all sort of external communication. However, I haven't found someone who has made a wrapper library for this, all of the examples I found are simply examples of how someone use the GPIO for their specific communication requirements.
I tinkered for a while in my free time and thought that I might as well just create my own. The requirements that I had in mind is simply:
- able use the GPIO without race condition between the Host and PICO-8
- able to send a message of arbitrary length, even more than 128 bytes
- is configurable, doesn't take all of the GPIO space
- enable user to create their own protocol on top for their own usage
- reliable
A little bit of details:
6 comments


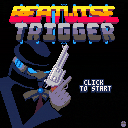
A rhythm-based dungeon crawler inspired by Enter The Gungeon and Crypt of the Necrodancer.
Originally made for RNDGAMEJAM 2, BEATWISE TRIGGER has been reworked since the jam to be more fun to play.
itch.io page: https://pixelshock.itch.io/a-rhythm-based-dungeon-crawler
If you experience laggy audio in this version, try playing it in the PICO-8 desktop app, or download the game from the itch.io link above.
-- HOW TO PLAY --
You can only shoot and reload on the beat.
Defeat enemies and break barrels to gain gold, and find shops to buy better weapons and tools to give Diot new abilities.
Find the exit on each floor to travel deeper into the ruins, and discover new areas.
4 comments

This is a submission for the RND Game Jam and a collaboration between me and Malith.
Malith: Code, Sprites, Music, Sounds, and Levels
Me (Gabe-8-Bit): Music and Sprites
1 comment