


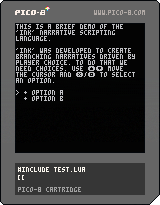
Ink is an open source, narrative scripting language developed by Inkle Studios. This is my attempt to implement a sub-set of Ink. There's already a Lua implementation of Ink but I'm trying to create something more specifically targeted to PICO-8's limitations.
I'm in no way associated with Ink or Inkle Studios, [marge simpson]I just think it's neat![/marge simpson]
This cart doesn't implement all the features I want to support yet—and not all the ones that are implemented are fully implemented—but I think it's at a stage where it's interesting enough to share, so here it is.

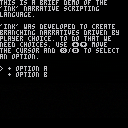
Here's the actual Ink script which is driving the demo cart for anyone interested:
 3 comments


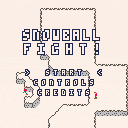
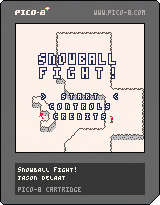
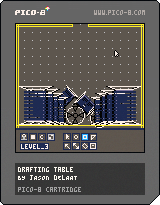
A Fight! With snowballs! Don't forget to grab all the cool stuff the other kids drop!
Growing up in rural Canada, winter always meant huge, endless piles of snow everywhere. And as kids, huge piles of snow meant chaos. Snowball Fight! is an endless, high score chasing, winter arena "shooter." Bury the other kids with snowballs or dig ledges out from underneath them and nab dropped presents for bonus points. Clear each screen to move to the next one.
This game was made as part of the 2024 PICO-8 Advent Calendar.
Thanks to everyone who play-tested early versions of the game. And special thanks especially to:
- bikibird: for managing and organizing the Advent Calendar
2 comments

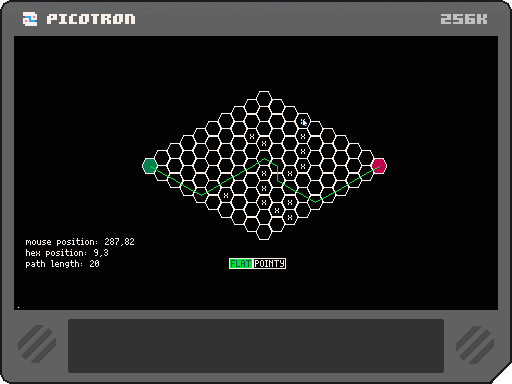
Apparently I like writing vector libraries. This one's specifically for working with hex-grids.
Code and full documentation on github: https://github.com/jasondelaat/hector/tree/release
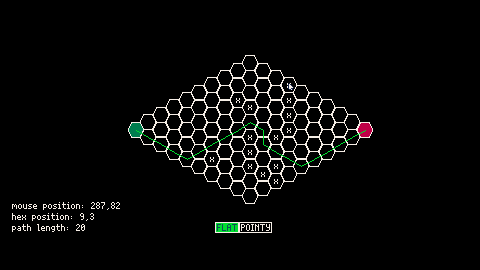
The above cart demonstrates simple path-finding. The grid starts off randomly populated. Click on the hexes to add/remove obstacles and re-calculate the path. You can also switch between a "flat" or "pointy" grid. The draw code is not optimized so it will get laggy if you make the path really long, especially on the web player. But you get the idea.
Example Usage:
include 'hector.lua' -- Initialize the library [ [size=16][color=#ffaabb] [ Continue Reading.. ] [/color][/size] ](/bbs/?pid=127324#p) |
0 comments
In my vector library demo cart (https://www.lexaloffle.com/bbs/?tid=141574) I have a main menu of demos each linked to a key press. From within each demo you should be able to return to the menu. On the web player I can get from the main menu to any of the demos but, once I'm in one of the demos, I can't get back to the menu.
I've uploaded 4 versions of the cart with the key to return to the menu as: tab, space, 0 and now m. All of these work for me within my copy of Picotron (0.1.0e) but none of them seem to work in the web player.
No idea what could be going on here unless all those keys have been reserved for some future web player only functionality and I'm just really good at picking the wrong key to bind my menu to.
1 comment
This is a general purpose geometry/vector library.
It's based on Geometric Algebra (GA) but you don't need to know what that is to use it as most of the standard vector operations you're probably familiar with are here.
I'd be happy to add additional demos (with credit obviously) so if you make something interesting that you want to include let me know.
Updates
2024-04-21
- Added 3D triple pendulum demo (based on the 2D version here: https://matthias-research.github.io/pages/tenMinutePhysics/index.html)
Hat tip to @shanecelis for this post (https://www.lexaloffle.com/bbs/?tid=54905) which made me aware of PBD and Matthias Müller.
4 comments


A tool to help with print debugging based on the Python package IceCream. There's already a Lua version of IceCream but it won't work with Pico-8/Picotron as far as I know. I've called it db for debug rather than ic but it's very similar in concept.
You can download the code here or copy/paste below:
db.lua [hidden]
----------------------------------------------------------------------------
-- print debugging based on IceCream for python
-- pico-8 lua version by jason delaat
do
   local ignore = {}
   local lookup = _ENV
   for k,_ in pairs(_ENV) do
      ignore[k] = true
   end
   local function format_arg(value, env)
      for k,v in pairs(lookup) do
         if v == value and not ignore[k] then
            return 'db: '..k..'='..tostr(v)
         end
      end
      return 'db: '..tostr(value)
   end

   local db_meta = {
      __call=function(self, value, log)
         if db.display and log then
            print(log)
         elseif db.display then
            print(format_arg(value))
         end
         return value
      end
   }
   db = {
      display = true,
      local_env = function(t)
         lookup = setmetatable(t or {}, {__index=_ENV})
         return lookup
      end,
      reset_env = function()
         lookup = _ENV
      end,
      wrap = function(f)
         local fn = sub(split(format_arg(f), '=')[1], 5)
         _ENV[fn] = function(...)
            local log = 'db: '..fn..'('
            local result = f(...)
            for a in all({...}) do
               log ..= tostr(a)..','
            end
            log = sub(log, 1, -2)
            log ..= ') --> '..tostr(result)
            return result, log
         end
      end
   }
   setmetatable(db, db_meta)
end
---------------------------------------------------------------------------- |
\
0 comments
This cart has devkit mode enabled and requires a mouse and keyboard.
It's intended to be run locally; not all feature work correctly in the web player.
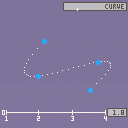
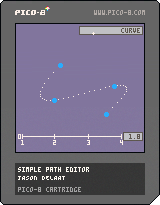
A simple path editor for creating animation paths for game objects. The paths created are simple interpolated paths not bezier or similar curves. The path is guaranteed to pass through all of the control points. You don't have as much control over the exact shape of the path but you can still get some pretty nice results.
Features
- Save and Load path files in a binary format to .p8 files so they can be easily changed later.
0 comments
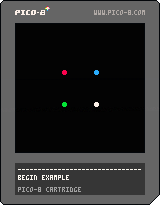
Code for combining simple animations together to create more complex animations using + and * operators.

The example uses four simple animations—each one just a different coloured circle starting in a different corner and moving to the diagonally opposite corner—and combines them in different ways to create the final animation.
For simple animations A and B:
- The + operators first runs A and, once it's finished, runs B.
- The * operator runs both A and B at the same time.
As with normal addition and multiplication you can string together as many animations as you want and use parentheses to indicate a particular ordering.
To create animations use new_animation() and then give the animation object an init method. The init method should return a table containing a draw and an update function; update should return true when the animation has finished.
  a = new_animation()
  a.init = function()
     local offset = 0
     return {
        update=function()
           offset += 5
           if offset > 128 then
              return true
           end
        end,
        draw=function()
           circfill(offset, offset, 2, 7)
        end
     }
end |
The animation object then needs to be instantiated to use it.
  anim = a() -- or a.init(), same thing

  function _update()
     anim.update()
  end

  function _draw()
     cls()
     anim.draw()
end |
Having the init function means you can use the same animation multiple times since any internal values, like offset, will be re-initialized each time. You don't need to initialize the animation each time when combining animations, that's handled internally, you only need to initialize the combined animation as a whole.
-- creates a compound animation which will play the simple animation -- three times in a row. anim = (a + a + a)() -- or (a + a + a).init(). Again, same thing. |
Lua Code (indented 3 spaces)
0 comments
If I view a post on the BBS and scroll down to the bottom to post a comment, there are two buttons: Submit, on the left and Preview, on the right.
If I click Preview I'm taken to a new screen. The first issue is that I've just clicked a Preview button but I'm not shown a preview just a larger text box. To actually see the preview I have to scroll down and click the Preview button again.
Which brings me to the second issue: The Preview button is now on the left and the submit button, now called Publish Changes, is on the right. I would expect the buttons to still be in the same place and the number of times I've almost posted half a comment because I almost clicked Publish when what I wanted was Preview are many.
Minor issues. Not the end of the world if it never gets fixed—at this point fixing it might cause as many or even more mistakes than not fixing it so maybe it's just not worth doing—but thought I'd point it out anyway.
1 comment

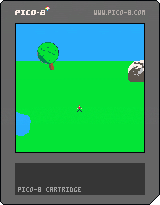
This is just something I've been playing with in between working on other things.
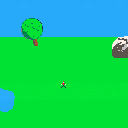
I didn't know about sprite stacking until this old post popped up a couple of months ago. Although that example rotates the sprites themselves it turns out you can get some interesting results even without it. I haven't bothered with collision detection so you can walk right through the trees and the rocks. Waking through the water was intentional though. I wanted it to look like actually walking in water.
The space is procedurally generated but persistent so it's the same every time the cart is run. And it's effectively infinite in all directions. Not actually infinite obviously but pretty darn big for no particularly good reason.
4 comments


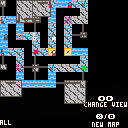
This cart uses devkit mode so you'll need a mouse and keyboard to use it.

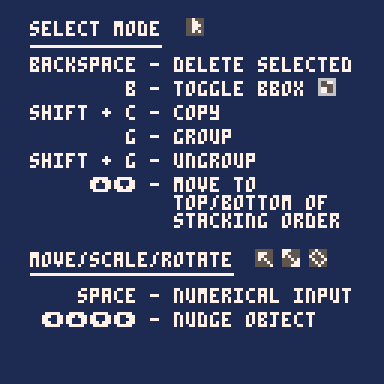
Update:
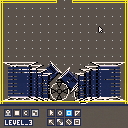
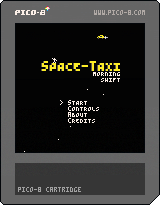
This started off as a level editor for the Space Taxi Remake I'm working on. At some point I realized I was going a bit overboard and instead of doing the sensible thing and saying, "well that's good enough for my purposes I guess I'll stop now," I just kinda leaned into it.
0 comments
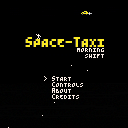
The original Space Taxi divided up its 24 levels into three "shifts" of eight levels each corresponding to the easy, medium and hard levels. And it turns out eight levels is about what I'm able to fit on a single cart so I've decided to release the game by shift and then merge them all together into a single multi-cart game when I'm done. It's actually already multi-cart with one for displaying the menu and loading the level data into upper memory and the other for actually running the game.
The first one, Morning Shift, is not quite finished but it is fully playable. The first level is a copy of the first level from the original game as sort of an homage to it but the rest of the levels are original. And they could use some play testing. If anyone is willing I'd be happy to hear any feedback.
 10 comments
.jpg)


This function creates simple extensible 'types' with a few additional (potentially) handy properties. If you find it useful, help yourself to it. Credit appreciated but not required.
You use it like this:
  -- a 2d point object
  point = new_type('x y') -- argument names separated by spaces

  p = point(1, 2)
  print(p.x) -- prints 1
print(p.y) -- prints 2 |
As for the handy properties, the first is that the object's data is stored both by key and as an array. Which means you can access the properties using the dot notation, numerical indexes, or even unpacking the object, all of which can come in handy in different situations.
1 comment
Not sure if this is actually a bug or expected behaviour. Seems like a bug to me. That said, don't know if it's a problem with PICO-8 or just with Lua in general.
Here's the problem. If I define a metatable using the __metatable property then the __tostring method doesn't get called automatically (by print for example) when expected.
m = {}
x = setmetatable(
   {},
   {
      __index=m,
      __metatable=m,
      __tostring=function(self)
	 return 'blah blah blah'
      end
   }
)

print(x)
print(tostring(x)) |
Output:
[table] blah blah blah |
So, I can call the tostring() function explicitly but it's not called automatically by print as I would expect. If I leave out the __metatable property though it works as expected:
m = {}
x = setmetatable(
   {},
   {
      __index=m,
      __tostring=function(self)
	 return 'blah blah blah'
      end
   }
)

print(x)
print(tostring(x)) |
Output:
blah blah blah blah blah blah |
Putting the __tostring function in m also doesn't work:
m = {
   __tostring=function(self)
      return 'blah blah blah'
   end
}
x = setmetatable(
   {},
   {
      __index=m,
      __metatable=m
   }
)

print(x)
print(tostring(x)) |
Output:
table: 0x30bb9cc table: 0x30bb9cc |
Nor does giving m its own metatable with a __tostring method:
m = setmetatable({}, {
   __tostring=function(self)
      return 'blah blah blah'
   end
})
x = setmetatable(
   {},
   {
      __index=m,
      __metatable=m
   }
)

print(x)
print(tostring(x)) |
Output:
[ [size=16][color=#ffaabb] [ Continue Reading.. ] [/color][/size] ](/bbs/?pid=126465#p) |
4 comments

I don't know if people are still having problems with the inline music player but here's a cart with the song just in case.
I've made no attempt to optimize space and used pretty much all the sfx slots. Though some are duplicated just so if you happen to listen on the editor music/sfx tab it's kind of satisfying to watch. To me at least.
 0 comments
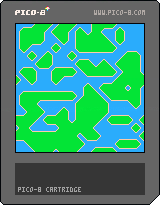
Just a little weekend "I need a break from my projects" project.
Uses the marching squares algorithm to determine tile placement at each step and 3 dimensional value noise to animate it.
0 comments
This isn't really anything special, just a little quality of life improvement I've found handy and keep in a file of utility functions I use frequently.
Overloads sub() so it works on arrays as well as strings. I find it useful to be able to slice and dice arrays in the same way as strings and especially now that we can index strings with square bracket notation the difference between them isn't always important. I've got something with a length and I want a sub-section of it. Makes sense to use the same function for both, in my mind at least.
_sub = sub

function sub(lst, i, j)
   if type(lst) == 'string' then
      return _sub(lst, i, j)
   else
      local r = {}
      for n=i,j or #lst do
         add(r, lst[n])
      end
      return r
   end
end |
Creates a new array without modifying the original. Doesn't handle negative indices because I've not really needed them so far but it would be easy enough to add.
Potentially a feature suggestion @zep? I don't mind writing the function myself but I'd also be happy not to. But maybe I'm the only one who finds it useful.
3 comments

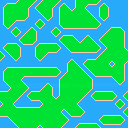
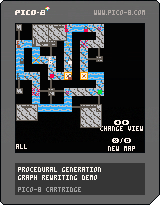
I'm working on a game using procedural generation and although the game is nowhere near done I thought the generation technique itself was interesting enough on its own to post about.
Rather than try to explain it myself I'll just send you to someone who already has, better than I likely could. BorisTheBrave: Graph Rewriting for Procedural Level Generation
Instead, I'll just share some of my initial results. The general idea is to generate the "big picture" details first and then successively refine them to build a fleshed out so the levels generated here are shown at 1/8 scale. Eventually every pixel in these maps will expand to be one tile at full scale with additional generation filling in the fine details along the way.
 0 comments
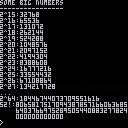
A few days back @dw817 posted a thread about the number of possible combinations in 256 bytes in which they asked:
> Is there a way to calculate 256^256 ?
And knowing there are all sorts of tools and languages which can handle such huge numbers I cheekily posted the answer and caused a bit of a derail.
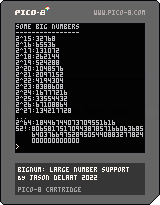
Anyway, I had some time on my hands so I figured I'd implement large number support for Pico-8.
Edit: Fixed a bug in divide()
Is this likely to be of use to anybody? Probably not. Is it major overkill? You betcha! Though in fairness, at 706 tokens it came out smaller than I was expecting.
Features/Functions
-
bignum(n): Create a 'bignum' with valuenwhich is just a regular Pico-8 number. Most operations require both numbers to be bignums. Sobignum(16000)*bignum(1254)but notbignum(16000)*1254.bignum()is equivalent tobignum(0) -
divide(bn): You can use the division and mod operators (/, %) on bignums if you only need one or the other. Thedividefunction returns both the quotient and remainder at once.q, r = divide(bignum(3)^16, bignum(2)^15) show(bn): Converts a bignum into its decimal representation as a string.factorial(n): Calculates the factorial ofnand returns the result as a bignum. Factorials get very big, very fast so the input tofactorialis just a regular number.+ - / % ^: Arithmetic operators behave how you would expect. All require both arguments to be bignums with the exception of^where only the first argument is a bignum and the second is a regular number. Division is integer division only sobignum(3)/bignum(4)==bignum(0).> >= <= < ==: Comparisons similarly require both arguments to be bignums.
Issues
- The arithmetic operators are all fairly efficent but probably not optimally so.
- I wasn't taking negative numbers into account at all so I make no promises about what will happen if you try to use them. Maybe it will work! (It probably won't work.)
showis extremely inefficient. I'm sure there are better ways to convert very long binary strings to decimal but I'm not familiar with them so this is what I've got. Large numbers (like 52!) may take a bit of time and very large numbers will crash the program as it runs out of memory. (bignum(256)^256 does this, sadly. It calculates the number fine but crashes when you try to convert it.)
5 comments
I know a lot of people, myself included, usually write their pico~8 code a little off the cuff tinkering with it until it works. Which tends to be more fun in my experience. But it can also be incredibly frustrating if I'm working on sometime more complex where every time I change something I break something else. And in those cases planning out some formal tests helps me maintain my sanity and get the thing actually working much faster than I probably would otherwise. And since I'm working on something fairly complex at the moment, I took a bit of a detour and put together a little test framework and thought I'd make it available for anybody else who might find it useful.
The code is on github: https://github.com/jasondelaat/pico8-tools/tree/release/testo-8
Or you can just copy it here:
0 comments