


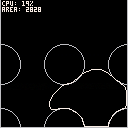
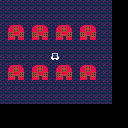
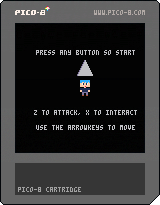
Sketched out some water balloon physics - press any P8 button to restart with a randomized balloon size.
 4 comments


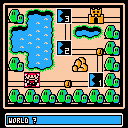
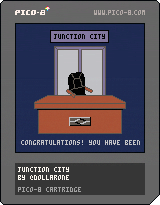
A few weeks ago, I tried to make a Sim City style game in an hour (for the onehourgamejam). I didn’t finish in time, and I spent several extra hours before accepting it would have to become a larger project. Since then I have been tinkering with it on and off, and I think I’m done now?
Note that this was never supposed to be a fully-featured Sim City clone - just a minimal thing with minimal features made in an hour or two.
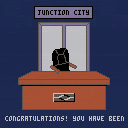
Take control of Junction City and make it into a proper large city before you run out of money!
You can create jobs by building industry. 
Jobs will attract people, but they also need houses to live in. 
2 comments


Description:
This is my entry for the GMYK game jam, The theme for GMTK Game Jam 2019 is "only one".
In Bong, there is only 1 ball, and 1 paddle. See how far you can get!
I'd like to have got some audio, or background music in for the competition but i ran out of time. The whole thing took about 7-8 hours start to finish, i spent a lot of time messing about with circle drawing algorithms... ugh, math.
Controls:
Z key - Start / Begin game.
Arrow keys - Move your paddle
1 comment


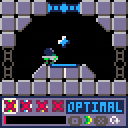
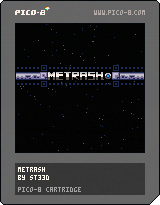
METRASH
A top-down-shooter metroid-like.
Cursors keys to move, Z / X to fire.
1 hour or less playtime, does not save.
This is my first Pico-8 project. Apart from the class definition (which I abstracted) I wrote the whole thing from scratch in 2 weeks of spare time. This meant it turned into more of a shmup odyssey than a metroidvania. I will have to listen to a lot of feedback before I know what weapons, monsters, and topography would have worked better.
Let me know what you'd expect from a sequel.
14 comments


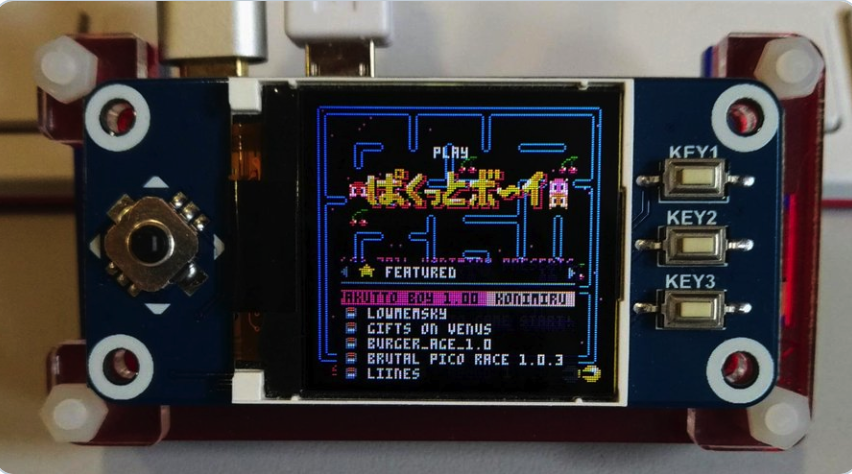
At 128 x 128 pixels, the Waveshare 1.44 inch display with controller is a perfect fit for Pico-8.
The screen Driver being installed, requires a Waveshare 1.44" 128x128 pixel colour LCD display, with joystick & 3 buttons which utilises an ST7735S controller.
Amazon UK link: https://www.amazon.co.uk/gp/product/B077YK8161
Amazon US link: https://www.amazon.com/waveshare-1-44inch-LCD-HAT-Interface/dp/B0781BNC9L/
Built, tested and confirmed working with both Raspbian Stretch lite and Buster lite-based images.
Begin by writing a fresh Raspbian Stretch or Buster Lite image to a 4GB or larger MicroSD card using your favoured image writing tool.
Caution:
Raspbian Buster appears to generate more heat after short periods on a Pi ZeroWH than Stretch does.
Whichever image you begin your build with, please monitor CPU temperature during use. I won't be held responsible for a baked Pi!
A Pi ZeroW can be set-up headless if a properly configured "wpa_supplicant.conf" and a blank file named "ssh" are copied to the root of the MicroSD card, after writing the image but before unplugging and inserting into the Pi.
ON FIRST BOOT
SSH into the Pi or plug-in a keyboard and monitor. Login with username "pi" and password "raspberry"
sudo raspi-config |
Expand the filesystem
Set boot to CLI with auto-login
enable SPI
disable VNC
disable serial
I recommend changing the default password from "raspberry" to something more secure while you're still in raspi-config.
You may also wish to change the hostname while you're in here. I named mine pico8, so I can ssh to pico8.local from other machines for maintenance.
Exit raspi-config and reboot with
sudo reboot |
Once rebooted, login as pi, then update and upgrade the OS and programs:
sudo apt-get update sudo apt-get upgrade |
Reboot once again and re-login if recommended by the upgrade process
Let's begin by getting Pico8 running on the Pi
sudo apt-get install libasound2-dev wiringpi wget https://t.co/jZy96cDeCC?amp=1 -O sndio-1.2.0.tar.gz tar -xf sndio-1.2.0.tar.gz cd sndio-1.2.0 ./configure make sudo make install cd ~ |
Use SFTP (or USB) to transfer your personal Pico download zip file into /home/pi folder
Unzip your Pico8 Raspberry Pi zip file into /home/pi.
This should create a /home/pi/pico-8 folder, which will contain all of the files required to run Pico8.
Now we’ll get the Waveshare 1.44" 128x128 pixel LCD display hat working on the Pi
cd ~ sudo apt-get install git cmake git clone https://github.com/tasanakorn/rpi-fbcp cd rpi-fbcp/ mkdir build cd build/ cmake .. make sudo install fbcp /usr/local/bin/fbcp cd ~ wget http://www.airspayce.com/mikem/bcm2835/bcm2835-1.59.tar.gz tar zxvf bcm2835-1.59.tar.gz cd bcm2835-1.59/ ./configure make sudo make check sudo make install |
Open and edit the modules file to enable the additional modules required to make the LCD function.
sudo nano /etc/modules |
Append the two lines below to the end of the file, save and exit.
spi-bcm2835 fbtft_device |
We need to create a new file for the fbtft configuration
sudo nano /etc/modprobe.d/fbtft.conf |
Add the following lines to the empty file and save it.
# /etc/modprobe.d/fbtft.conf options fbtft_device name=adafruit18_green gpios=reset:27,dc:25,cs:8,led:24 speed=40000000 bgr=1 fps=60 custom=1 height=128 width=128 rotate=180 |
Fortunately for us, Adafruit created a GPIO controller driver, so let's use this to make the Waveshare hat's controller and buttons work in pico-8.
cd ~ curl https://raw.githubusercontent.com/adafruit/Raspberry-Pi-Installer-Scripts/master/retrogame.sh >retrogame.sh sudo bash retrogame.sh |
On the option screen, Select “6 buttons + joystick”. We’ll edit the resulting config file a little later to fit the 3 button and joystick layout of our hat.
Once installed; at the reboot prompt, type “N” so as NOT to reboot your Pi.
Now we’ll edit the configuration file installed and used by Adafruit’s retrogamer driver, to configure the correct number of buttons for the Waveshare hat.
sudo nano /boot/retrogame.cfg |
Use CTRL-K to remove all lines from the file and paste the following lines into the now empty file before saving it and exiting nano.
LEFT 5 # Joypad left RIGHT 26 # Joypad right UP 6 # Joypad up DOWN 19 # Joypad down Z 20 # Button 3 X 16 # Button 2 ESC 21 # Button 1 |
Please ensure each entry is on a separate line as displayed above.
At this stage, we can set the correct display settings for the Waveshare 128x128 LCD within the file config.txt
sudo nano /boot/config.txt |
Add to the end of the file and beginning on a new/empty line, the following lines:
display_rotate=1 hdmi_group=2 hdmi_mode=87 hdmi_cvt=128 128 60 1 0 0 0 hdmi_force_hotplug=1 |
Save the file and exit nano.
Now let's put this all together and have Pico-8 run in "splore" mode at boot.
sudo nano /etc/rc.local |
This file should should be as below. (All we're adding to the file are three lines near the end, each beginning with sudo):
#!/bin/sh -e # # rc.local # # This script is executed at the end of each multiuser runlevel. # Make sure that the script will "exit 0" on success or any other # value on error. # # In order to enable or disable this script just change the execution # bits. # # By default this script does nothing. # Print the IP address _IP=$(hostname -I) || true if [ [size=16][color=#ffaabb] [ Continue Reading.. ] [/color][/size] ](/bbs/?pid=66331#p) |
25 comments


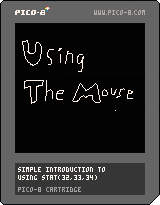
For those learning PICO-8, you may have heard that you can write carts that access the hardware mouse. While the information to do this is not readily apparent, I put together this simple demonstration program with remarks to show how you can do it by reading the position and both buttons of the device.
-- simple introduction to
-- using stat(32,33,34)
-- for reading the mouse
-- by dw817 -- (08-01-19)
--
-- poke(24365,1)
-- enables keyboard + mouse
--
-- stat(32) mouse-x position
-- stat(33) mouse-y position
-- stat(34) =1 if left button
-- stat(34) =2 if right button
-- stat(34) =3 both buttons
--
-- flip() updates the screen

cls()
poke(24365,1) -- enable mouse

c=7
repeat
  color(7)

-- if right-button pressed,
-- change plotting color

  if stat(34)==2 then
    c=c+1
    if (c==16) c=1

-- if both buttons pressed,
-- clear the screen

  elseif stat(34)==3 then
    cls()
  end

-- read x+y position of mouse

  x=stat(32) y=stat(33)

-- if left button pressed,
-- draw on screen

  if stat(34)==1 then
    if ox!=nil then
      line(ox,oy,x,y,c)
    end
    ox=x oy=y
  else
    ox=nil
  end

  p=pget(x,y)
  pset(x,y,c)
  flip()
  pset(x,y,p)

-- loop until press [esc]

until forever
|
2 comments


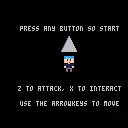
A work in progress game I'm uploading for the sake of feedback. It's quite unfinished, and ends at the first planned boss (not actually implemented yet, sadly.)
Arrow Keys to move/jump
Z to use selected weapon
X to change selected weapon
Please let me know what you think.
8 comments
For you new people at PICO-8 and even some of you veterans, you may or may not be aware that you can create a BATCH file to run PICO-8 with very precise settings. Here is the one I use:
CONTENTS OF P8.BAT
@run-pico8.exe -gif_len 120 -windowed 1 -width 692 -height 650 -draw_rect 10,5,672,640 -sound 64 -music 64 -pixel_perfect 0 -software_blit 1 -desktop c:\david\games\pico-8\pico-8_win32\roms\_snaps -home c:\david\games\pico-8\pico-8_win32 |
You can use this as a SHORTCUT too but it is too long, I think a Windows shortcut only allows 64-characters. So if you can, a BATCH file will work just as well.
Modify to your liking and - Hope This Helps !
0 comments


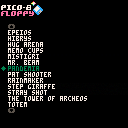
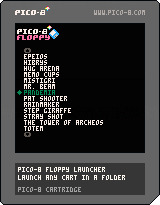
I built a Raspberry Pi PICO-8 console that uses floppy disks, but SPLORE doesn't work great for browsing a floppy: you have to wait for the preview image of a cart to load before you can scroll past it. For a disk with more than one or two cartridges on it, this is a frustrating experience. Additionally, SPLORE is a little finicky about reloading the floppy contents if you swap out the disk.
To get around this, I boot this cartridge instead of booting into SPLORE, which provides a quicker floppy browsing experience and correctly picks up a new disk if you choose "reset cart" from the menu. It's a pretty rough hack, but I'm sharing it here in case anyone finds any pieces of it useful.
8 comments


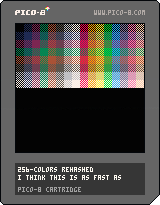
-- 256-colors rehashed
-- i think this is as fast as
-- i can get the code.
-- you will notice that the
-- loop only moves a section
-- of memory per frame now.

mode=0
p=0
cls()

function _update60()
  p=1-p
  if mode==0 or mode==1 then
    sfx(0) -- confirm drawing
    fillp(23130)
    if(p>0)fillp(-23131)
    for i=0,15 do
      for j=0,7 do
       rectfill(i*8,j*8,i*8+7,j*8+7,i+j*16)
      end
    end
    if mode==0 then
      memcpy(0,24576,4096)
      mode=1
    elseif mode==1 then
      memcpy(4096,24576,4096)
      mode=2
    end
  else
    if p==0 then
      memcpy(24576,0,4096)
    else
      memcpy(24576,4096,4096)
    end
  end
end
|
8 comments


cls()

print"mary jane's buster browns"

-- 0=using memcpy()
-- 1=using standard array
kind=1

if kind==0 then

memcpy(0,24576,320)
color(0)
rectfill(0,0,127,5)
color(7)
sspr(0,0,128,5,0,0,128,5,true,true)
reload(0,0,320)
sspr(0,0,8,8,0,0,8,8)
print("",0,24)
stop()

end

rev={}

for i=0,4 do
  rev[i]={}
  for j=0,127 do
    rev[i][j]=pget(j,i)
  end
end
for i=0,4 do
  for j=0,127 do
    pset(127-j,4-i,rev[i][j])
  end
end
rev=nil
spr(0,0)
print("",0,24)
|
What makes programming interesting is the many different ways in which you can approach a problem.
0 comments
I'm trying to understand PICO-8's method of NOT seeding a random number, that is, I want to return back to the original seed after I have seeded a number
cls() z=rnd() srand(1) ?"" ?"forced seed" ?rnd() ?rnd() ?"" ?"reset to random seed" srand(z) ?rnd() ?rnd() |
The only way I know how to do it is this. Get a random number to begin with. Seed the number I want, get the values for this forced seed, then return back by seeding with the initial random number. But isn't there a way to reset the SRAND itself ?
In Blitz for instance, you seed (-1) to return it back to normal non-seeded random numbers, but that does not work here.
0 comments

I'm currently working on a game where you collect items from different areas in a map. I have around 10 spots on the map where I want items to be, but I feel like only 6 or so should actually have items in them when playing as so to create some mediocre replay value. I'm currently detecting the spots using map flags, and sending that data to a function in which I'll create an entity spawner. However I dont know how I can create these exceptions in the code when generating where the items go, does anyone have any hints or ideas for solutions to this problem?
5 comments

Hello, I am back for a bit, maybe longer, depending on circumstances. Mostly I am programming in BlitzMAX though.
However, I have since come across a program that lets you run LUA in the Pocket Sony Playstation device.
Since PICO-8 is LUA, is it possible to run PICO-8 on PSP then, as an ISO or CSO ?
The emulator PPSSPP which runs PSP flawlessly is for Android, Windows, iOS, macOS, Blackberry, Meego/Harmattan, Symbian, Pandora, and Linux.
https://www.ppsspp.org/downloads.html
One major advantage of running PICO-8 on the PSP is with PPSSPP you can state-save and state-load. That will definitely be helpful to gamers.

As the resolution of the PSP is 480x272, the screen of 128x128 could be scaled and dithered to 272x272 or 362x272 for a 4x3 proportion.
And it would look great.
So how about it, can it be done ?
Can you do it ?
0 comments