


I don't post everything I did on Pico-8 here.
You can also check out my gallery too.

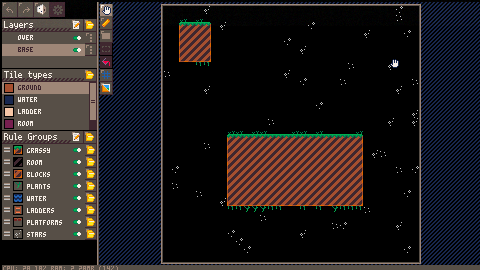
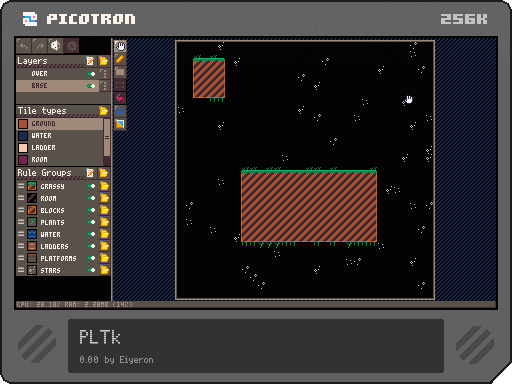
PLTK ("Picotron Level ToolKit", working name) is a in-development tool attempting to provide a similar feature set as LDtk provides.
Its (and LDtk's) design revolves around pattern matching. A set of rules are executed for each tile to compare its value and its neighbors' to determine which tile to apply.
The tool's, while it looks more polished on the first aspect, is still under heavy tinkering in all of its aspects (from the GUI to the data format, etc.), so while it might look close to final, expect things to shift around.
How to use PLTK?
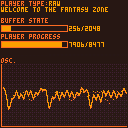
PLTK works with tile layers like map.p64 but instead of storing the tiles to show, they contain the type of the tiles from which the tiles will be deduced. See the "Tile types" section for an example of the tiles I currently have hardcoded in the cart for example.
 1 comment


A slightly outdated animation of a skill unlock in an old relaxed and exploration-based platformer I have never finished. I implemented that as I was learning the existence of bitplane manipulation and redesigned the whole game's palette around it (4 color ramps of four colors: white, red, green and blue).
1 comment

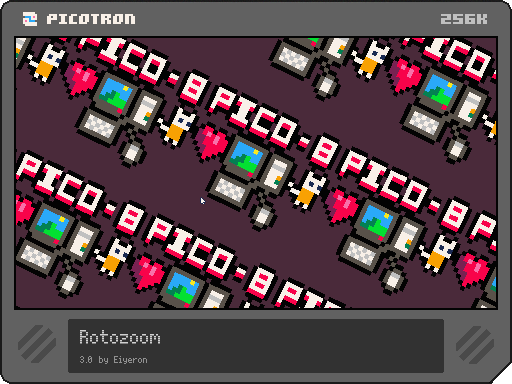
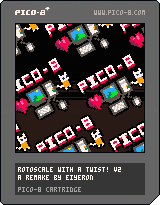
I can't believe it's been almost 9 years I posted that old rotoscale effect here and 4 years that I haphazardly tried to optimize it without tline, emphasis on "tried".
I somehow ended up figuring all at once the involved maths to use tline (or tline3d) and presto, my oldest cart ported to Picotron! I just wanted to upload it, as a token of my progress in both understanding the consoles and also for geometry and maths. Cheers!
Do you believe if I tell you that I just realized it's still displaying "Pico-8" even though it's Picotron? Oops
0 comments
Caution
This runs poorly in the Web version of 0.1.0f (runs too slow for the streaming to work well). This cart is better experienced in desktop versions.
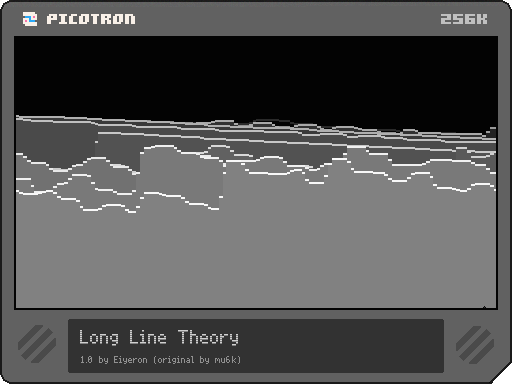
Long Line Theory
This cart is a quick port of [Long Line Theory][llt], a bytebeat track that was and still is impressing me as of today. When I have access to directly audio rendering, this is usually my audio Hello World, especially with the [C version][llt.c] I made to port the JS snippet to desktop.
This bytebeat is actually quite heavy, I had to resort to some tricks like a dirty resampling from 8kHz (its original sampling rate) to Picotron's 44.1kHz. It gave me enough spare cycles so I could whip that ugly visualizer. Can't have both your cake and eat it, I guess!
1 comment

Caution
This posts acts also as a kind of documentation for the tool, its usage and the integration of the data. It's not final and might probably change in the future, to improve the writing style, fix mistakes or add more explanations. Please do report any feedback you desire so I can improve the documentation.
Anim Editor
Hello! From starting a project, I ended up going on a tangent for weeks and had been making a frame-based animation editor for the last few weeks with an intent of making my own internal mini animation library to make sprite animations as easy as drawing -or at least, for me-.

Changelog
0.0
- Initial version
0.1
Additions
4 comments


Hello @zep. I had to dig into the bug where text in text editors would overlap for some reasonand I noticed something: on Windows, the following snippet causes the issue 100% when pasted from notepad:
adasd the game |
Of course, I don't think copy-pasting it from here would work. As a matter of fact, there should be two blank lines and there's only one, so there's something altering the text, be it the BBS, the browser or something else.
So, I hacked in gui_ed.lua:insert_multiline_string a way to read the string and its hexdump in the console log in the following snippet. It's ugly but it's functional.
local res = ""
--str = str:gsub("\r", "") -- I'll get to that
for i=1, str:len() do
	local c = str:sub(i,i)
	local co = ord(c)
	local cs = c
	if co < 32 then
		cs = ("<%02x>"):format(co)
	end
	res ..= ("[%s][%02x]"):format(cs, co)
end
printh(res) |
I spotted the presence `[<0d>][0d]
2 comments

Hello zep. I was wondering about a specific behavior of Picotron and I couldn't figure if it was a regression or a choice.
Prior to 0.1.0c, if a cart folder with its name ending with .p64 was loaded, saving it would preserve the format, the cart would stay a folder. Now, whatever I try to do, as soon as I save a folder cart from Picotron, it gets turned into a .p64 file, which is a bit more inconvenient as I'm currently using an external editor.
Even cp -o <src> <dest> doesn't save a folder anymore if <dest> is suffixed with .p64. Copying to a normally named folder seems to work and I just realized that as I was writing this blog post. Still my question stands.
Are project folders or files ending in .p64 will always taken as files and going to be converted as such? Was the switch intentional? Should I rename all the folders in my project folder so far?
Good luck squashing all those bugs! Have a nice day!
6 comments


Hello, the release thread is a bit busy and I'd like to make it a bit more visible as it's both about a possible bug and a feature the community could use for editor or more, it's a bit more interesting than just a crash, I'd say. I think I found a possible issue with wrangle and filenav.
Basically, wrangle that works with the current opened file pwf() and by when creating the wrangle object you have to pass getter/setter to store/load data from the file. Right?
Inspired by the GUI code here and there, I found out that the argument intention was mostly the thing that makes filenav acts as an open/close dialog, or supposedly. Thus, I ended up with code looking like that
    sidebar:attach_button{
        x=0, y=0,
        label="Open",
        tap = function()
            local segs = split(pwf(),"/",false)
            local path = string.sub(pwf(), 1, -#segs[#segs] - 2) -- same folder as current file

[ [size=16][color=#ffaabb] [ Continue Reading.. ] [/color][/size] ](/bbs/?pid=143779#p) |
2 comments
Some Discord servers have been quite busy lately and we've been discovering (less trivial) things here and there than the officially documented things and I thought it was good to have them available in the BBS instead of losing them in a Discord server's chat log. I'll try to update this post as more discoveries are uncovered.
Don't hesitate to write more discoveries in the thread.
Notice
At the moment I'm writing this post, we're running 0.1.0b, stuff might change in the future, nothing is set in stone for now.
POD is data, data is POD
Most of the file one will find on their systems are just POD files with an extension. The extension allows the OS to determine which app to launch but the internal data seems to work the same for all formats: they're PODs.
podtree (your_file) will pop a tool window containing a tree interface with the guts of your file. So you can determine how those file are formatted.
For instance the default drive.loc file, once opened, will show that it has only one property: location. So creating a table looking like that my_table = {location="/path/to/a/program.p64"} and then saving it with store(my_shortcut.loc, my_table) will efectively crete a new shortcut.
24 comments
.jpg)


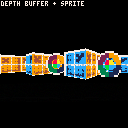
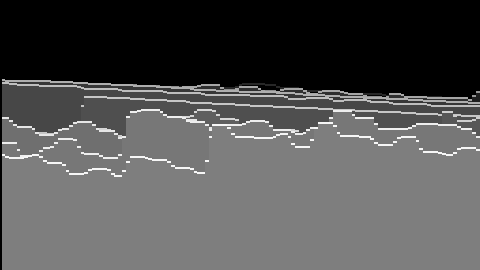
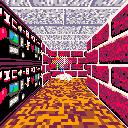
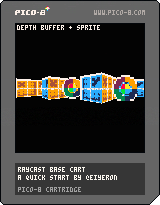
So, I fell into the raycasting hole. I'll keep around a small cart with a few routines so I can quickly do more stuff with that technique.
I'm not making a generic routine to display the walls because there are a lot of features one might want to use in their own caster (wall uvs, animations, etc etc), so instead, I made a few scenes to show how to augment a simple caster to do a few more things (like alternating textures on NS/EW sides or having a depth buffer to properly render world sprites)
In the future I might explore ray collision, there is potential to get fun stuff with that. A lead I'm following is using custom collision shapes per tile so hitting a tile will trigger the shape. An example of a possible shape would be a circular column smaller than a tile would be simple to do with a ray-circle hit detection and atan2 to compute the UV.
0 comments
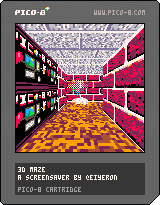
The legendary screensaver from Windows 95, recreated in Pico-8. You can now feel like it's 97 all over again, but in 128x128 pixels.
Something is off, I can't put my finger on it. Maybe if I let it run for a while?..
A content note (spoiler) :
2 comments


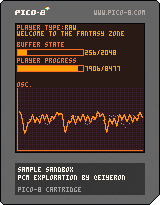
A cart a bit different than the usual coming from me. I recently discovered about the hidden PCM channel and I just had to play with.
So I'm experimenting with both sample playback and PSG (Programmable Sound Generators) to both learn and see if we can make the most of the PCM channel and -why not- in the distant future, have a 5-channel tracker?
So here, we've got one cart that shows smooth playback of various samples and at the end a sawtooth PSG.
To generate the samples, I use two steps:
- A pass through SoX to convert a sample into unsigned 8bit 5512Hz raw file (
-e unsigned-integer -r 5512 -b 8). - A quick use of a Python script to convert the sample into a pastable string (I suggest you to convert it into chars once inside Pico-8). I'm sorry I can't post the snippet here yet, it somehow breaks the BBS' upload process.
5 comments

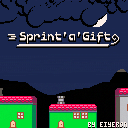
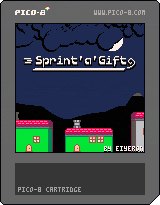
Play it also on Itch : https://eiyeron.itch.io/sprintagift
Sprint'a'Gift is a submission to a certain 2020 holidays calendar you can find here.
Santa's in a hurry and forgot to jump on his magical sleigh! Now he's trying to run as fast as he can on the rooftops for an express delivery. Can you help him?
Controls:
- (X) Jump (hold for higher jumps)
Thanks to:
- Gruber for the music
- Somepx for the title font
- Adam Saltsman for Canabalt, which is the main inspiration for this game.
1 comment

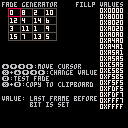
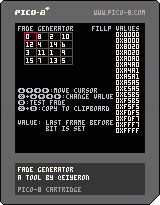
I'm making a small tool to quickly generate fill pattern for making fades. As I'm working on a game using those, I hastily threw together this small program to quickly visualize and tweak a fade based on the base pattern and to export it.
Each case in the grid represents a pixel in the fill pattern. The generator is creating a fill pattern gradient from 0x0000 to 0xFFFF while each pixel can turn off in a different frame. The pixel's value will indicate to the generator how many frames the bit must be kept at 0, with zero meaning that it'll stay down for 1 frame, one for two 2 frames and so on. Up to 17 frames worth of fill pattern can be created this way.
The default setting is the fade with the classic dithering 2x2 Bayer pattern, the one that inspired me to do this tool.
1 comment

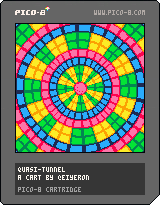
I almost succeeded in making a tline-based tunnel effect in a tweetcart.
Two limitations : poor angle/side management and no perspective scaling.
Close enough.
Post-mortem explanation
Most sites explaining the effect are based on screen-space LUTs. pset-ing 128*128 times being very slow,
I got the idea to use tline to draw on the whole screen by considering that function as the converter between normal and polar coordinates.
To get the "normal coordinates" version, try replacing the for calls to w with w(x,0,x,127,p,o,0,v)
I accidentally made the tunnel circular instead of square, can't help explaining this part, sorry.
0 comments

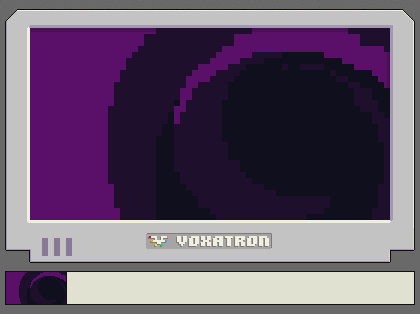
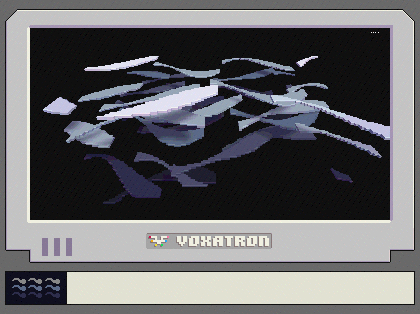
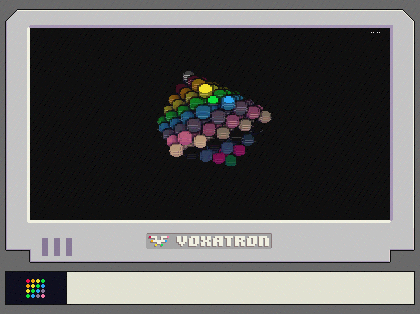
I got the voxel itch again after so long. This is a tweetcart version of an effect I'll very probably use in the future. The code is slightly altered from what I posted on Twitter because when running a cart without a scene, the camera is not properly reset.
I also added the zoom transition that'll be used, you can see it working by pressing up/down.
Here's the code
q=0 function _draw() camera() if(btn(3))q-=.5 if(btn(2))q+=.5 q=mid(20,q) clv() for z=48,63 do a=t()/6-z/12 r=63-z+q s=16*(1-q/20) o,p=s*cos(a),s*sin(a) col=z%2+33 set_draw_slice(z-q) rectfill(0,0,127,127,col) circfill(o+64,p+64,r*6,0) end set_draw_slice(0) [ [size=16][color=#ffaabb] [ Continue Reading.. ] [/color][/size] ](/bbs/?pid=74558#p) |
2 comments

I can't believe it's been almost 5 years I posted that old rotoscale effect here. It's been roughly 5 years that I discovered and loved Pico8, it's a console that stuck on me and that I love to program little bits and bobs on it.
I also can't believe how far the community have gone with that small computer. Just look back and see how much projects evolved on it and how thriving it is after so long. Y'all are so productive and creative you make the BBS and the community awesome!
So yeah, after a few years, I had to touch up that old cart. It was really poorly optimized. Inspired by a few awesome devs, I used a few new tricks based on peek/poke and damn, it goes way faster than I expected. I jumped on the occasion to add translation and a small effect, just because why the hell not.
See ya!
 2 comments

Hello there, after a positng a sketch variation I did on Twitter earlier today, I was asked how one would do such a similar result.
So instead of a badly written Twitter thread, let me post you a badly written BBS post with a badly written (but well commented) breakdown on how I did it.
The spiral is a cylinder sliced in a few circles I offset on X and Y based on a formula. This formula varies with time and on which circle it'll yield the offset to (here, the index).
So, I progressively iterated from nothing to the spiral. Here's how I broke it down:
First I generate circles made by vertices I'd store aside. Drawing circles this way will allow me to the other steps. Each circle is drawn by drawing a segment between two consecutive vertices in the circle and by linking the same vertex between two consecutives circles. Here, it looks like a colored spider web.
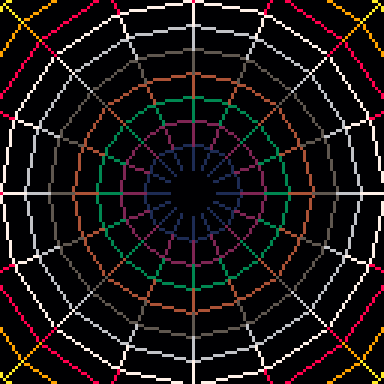
Then, I made the circles' center move based on the time. But it still doesn't look like a spiral. We can do better.
3 comments


r=rnd function _draw() srand(1) clv() for i=0,32 do ot = r(16)-8 tf = flr((t()+ot)*16) op = r() c = 96+r(7) sh = r(4)+12 z = r(63) yb= r(127) for x=0,48 do h = sin(x/48)*5+6 X = (x + tf)%128 y = sin(X/96 + op) * sh + yb line3d(X, y, z, X, y + h, z, c) end end end |
Alternative version
 0 comments
c=cos s=sin l=sphere v=8 M=2 m=-M function _draw() clv() for X=m,M do for Y=m,M do for Z=m,M do T=t() a=T/8 W=c(a) w=s(a) V=v*(1/T+1)+W+w x,y,z=X*W-Y*w,X*w+Y*W,Z x,y,z=z*w+x*W,y,z*W-x*w x,y,z=x*V+64,y*V+64,z*V+32 l(x,y,z,5,224-16*flr(y/16-2)) l(x,y,z,4,13+X+Y+Z) end end end end |
0 comments