


This cartridge is an example of the tline3d rotation algorithm!
I adapted this code from @freds72 's PICO-8 sprite rotation algorithm with tline(). They also helped me with some small edits via the Picotron Discord! You can check out freds' cart here: https://www.lexaloffle.com/bbs/?tid=37561
Here's the uncommented version to add to your project files (I'd recommend making a new file, such as rspr.lua, then including that file in your project to keep your own code clean):
-- rspr.lua
function rspr(sprite,cx,cy,sx,sy,rot)
    sx = sx and sx or 1
    sy = sy and sy or 1
    rot = rot and rot or 0
    local tex = get_spr(sprite)
    local dx,dy = tex:width()*sx,tex:height()*sy
    quad = {
        {x=0, y=0, u=0, v=0},
        {x=dx, y=0, u=tex:width()-0.001, v=0},
        {x=dx, y=dy, u=tex:width()-0.001, v=tex:height()-0.001},
        {x=0, y=dy, u=0, v=tex:height()-0.001},
    }
    local c,s = cos(rot),-sin(rot)
    local w,h = (dx-1)/2, (dy-1)/2
    for _,v in pairs(quad) do
        local x,y = v.x-w,v.y-h
        v.x = c*x-s*y
        v.y = s*x+c*y
    end
    tquad(quad, tex, cx, cy)
end

function tquad(coords,tex,dx,dy)
    local screen_max = get_display():height()-1
    local p0,spans = coords[#coords],{}
    local x0,y0,u0,v0=p0.x+dx,p0.y+dy,p0.u,p0.v
    for i=1,#coords do
        local p1 = coords[i]
        local x1,y1,u1,v1=p1.x+dx,p1.y+dy,p1.u,p1.v
        local _x1,_y1,_u1,_v1=x1,y1,u1,v1
        if(y0>y1) x0,y0,x1,y1,u0,v0,u1,v1=x1,y1,x0,y0,u1,v1,u0,v0
        local dy=y1-y0
        local dx,du,dv=(x1-x0)/dy,(u1-u0)/dy,(v1-v0)/dy
        if(y0<0) x0-=y0*dx u0-=y0*du v0-=y0*dv y0=0
        local cy0=ceil(y0)
        local sy=cy0-y0
        x0+=sy*dx
        u0+=sy*du
        v0+=sy*dv
        for y=cy0,min(ceil(y1)-1,screen_max) do
            local span=spans[y]
            if span then tline3d(tex,span.x,y,x0,y,span.u,span.v,u0,v0)
            else spans[y]={x=x0,u=u0,v=v0} end
            x0+=dx
            u0+=du
            v0+=dv
        end
        x0,y0,u0,v0=_x1,_y1,_u1,_v1
    end
end |
You don't need to call tquad yourself, rspr will do that for you. rpsr takes 6 arguments, the last three of which are optional:
- sprite: the spritesheet index to draw
- cx: the screen x-coordinate to render the sprite (the center of the sprite)
- cy: the screen y-coordinate to render the sprite (the center of the sprite)
- sx: (optional) the scale factor in the x-axis (defaults to 1)
- sy: (optional) the scale factor in the y-axis (defaults to 1)
- rot: (optional) the angle at which to rotate your sprite [0-1)
By no means is this code minified or code-golfed, so feel free to hack away at the token count if you wish!
In the comments below I'll drop a commented version that does a better job of explaining what each line does.
Current limitations:
- tline3d doesn't like bitmaps that don't have dimensions that are a power of 2. Be sure that your sprite has side-lengths that are a power of 2 (i.e. 8, 16, 32, 64, etc). This code can handle rectangles. If your sprite doesn't take up the entire space canvas, just use a transparency color to give it padding.
- draws from the CENTER of the sprite, not the top-left corner. Keep this in mind when rendering your sprites if you also need to handle collisions or other positional updates.
 1 comment

I'm trying to learn myself about bitmap rotation algorithms. I've been documenting my exploration in the attached cart. If you run it in your browser, what you're seeing is the same sprite from the spritesheet being rendered in four different ways:
1) rotating each pixel location via standard sin/cos rotation matrix
2) rotating each pixel location via the 3 shears method
3) rotating each pixel location via 3 shears + a fix for Picotron's rounding during tan() calculations
4) rotation each texture endpoint via standard sin/cos rotation matrix, then drawing with tline3d
Each method is labeled with a title and the approximate CPU usage each one uses when being drawn alone. You'll note that the tline3d implementation is the fastest, but also has the most "holes" along non-orthogonal rotations.
What I need help with is understanding how to get tline3d's performance while also making sure the gaps are filled in properly (the performance of implementation 4 with the pixel accuracy of implementation 3). Any advice / guidance greatly appreciated!
EDIT: I should note that I'm aware I could cache the results of implementation 3 at discrete intervals and then draw from the cache at runtime, but I'm here to learn about tline3d, so any responses in that direction would be great!

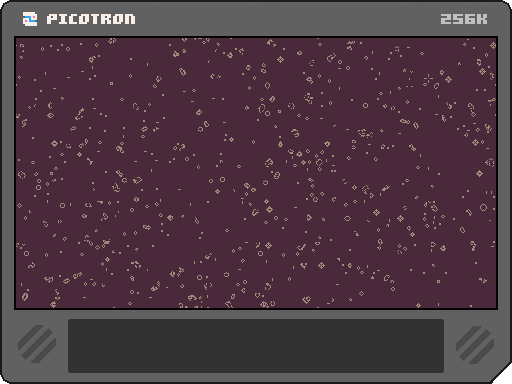
This wallpaper will play Conway's Game of Life on your desktop!
This was a personal experiment to see if I could get Life to run reasonably fast enough to be an interesting wallpaper. The 480x270 resolution makes efficiency a challenge, but with some help from a book of algorithms and some clever thinking, I think the end result is pretty nice.
Installation:
- run "load #conway_wallpaper"
- run "save /appdata/system/wallpapers/conway.p64.png" (you may need to create the wallpaper folder first, if you haven't yet)
- open System Settings and select "conway" from the list.
- enjoy!
This wallpaper takes into consideration your theme, using theme("desktop0") as the "off" color, and theme("desktop1") as the "on" color. After changing colors, you may need to reboot Picotron for the changes to take effect.
Customization:
The program can be configured to run faster or slower, depending on how much CPU you're willing to allocate to the wallpaper process. If you load the cartridge into RAM, you'll be able to look through my code. At the very top of the "main.lua" file, you'll find a SPEED_SCALE variable. This variable can be set to one of four settings:
- 1: 49 frames / update, 20% cpu usage
- 2: 37 frames / update, 28% cpu usage
- 3: 25 frames / update, 45% cpu usage
- 4: 19 frames / update, 65% cpu usage
I don't recommend speed 4 because of the intensity of the CPU usage, but it is nice to look at just for fun.
Changelog:
conway_wallpaper-2:
- reverted change regarding clicking the mouse because the desktop wallpaper process doesn't receive mouse button events.
conway_wallpaper-1:
- fixed a bug where black was painted as transparent instead of true black
- added the ability to click the mouse on the desktop to set a pixel to "alive" to disrupt patterns
conway_wallpaper-0:
- initial release
When windows or process lose visibility, the window manager sends the "lost_visibility" event to the process. This unsets the "running" bit (controls whether a process is running or suspended):
-- /system/lib/events.lua - lines 275-277 if (msg.event == "lost_visibility") then if (pid() > 3) poke(0x547f, peek(0x547f) & ~0x1) -- safety: only userland processes can lose visibility end |
The way we can get around this is having our process define a custom implementation of poke that avoids setting that bit. Copy and paste the following into any process that you'd like to keep running, even when it loses visibility:
-- get a reference to the system-defined poke()
local _sys_poke = poke
local is_visible = true
-- define a custom version of the function
poke = function(loc, val)
    -- if we see incoming parameters that would suspend our process...
    if loc == 0x547f and val == peek(0x547f) & ~0x1 then
        is_visible = false
        return -- don't set the lost_visibility flag
    end
    if loc == 0x547f and val == peek(0x547f) | 0x1 then
        is_visible = true
    end
    -- otherwise, just continue with poke()
    _sys_poke(loc, val)
end |
Be careful with this power, as it will make your process consume CPU resources until a user initiates some sort of way to kill the process. To reduce CPU resource consumption, just wrap all of your draw code in this way:
function _draw()
    if is_visible then
        -- draw code goes here
    end
end |
NOTE: this is just a temporary hack. There are comments zep has left in the system files that state that official background process support is coming in the future.
You can use your spritesheets as-is in Picotron! First, add your spritesheet(s) into sprites in Picotron, like this:
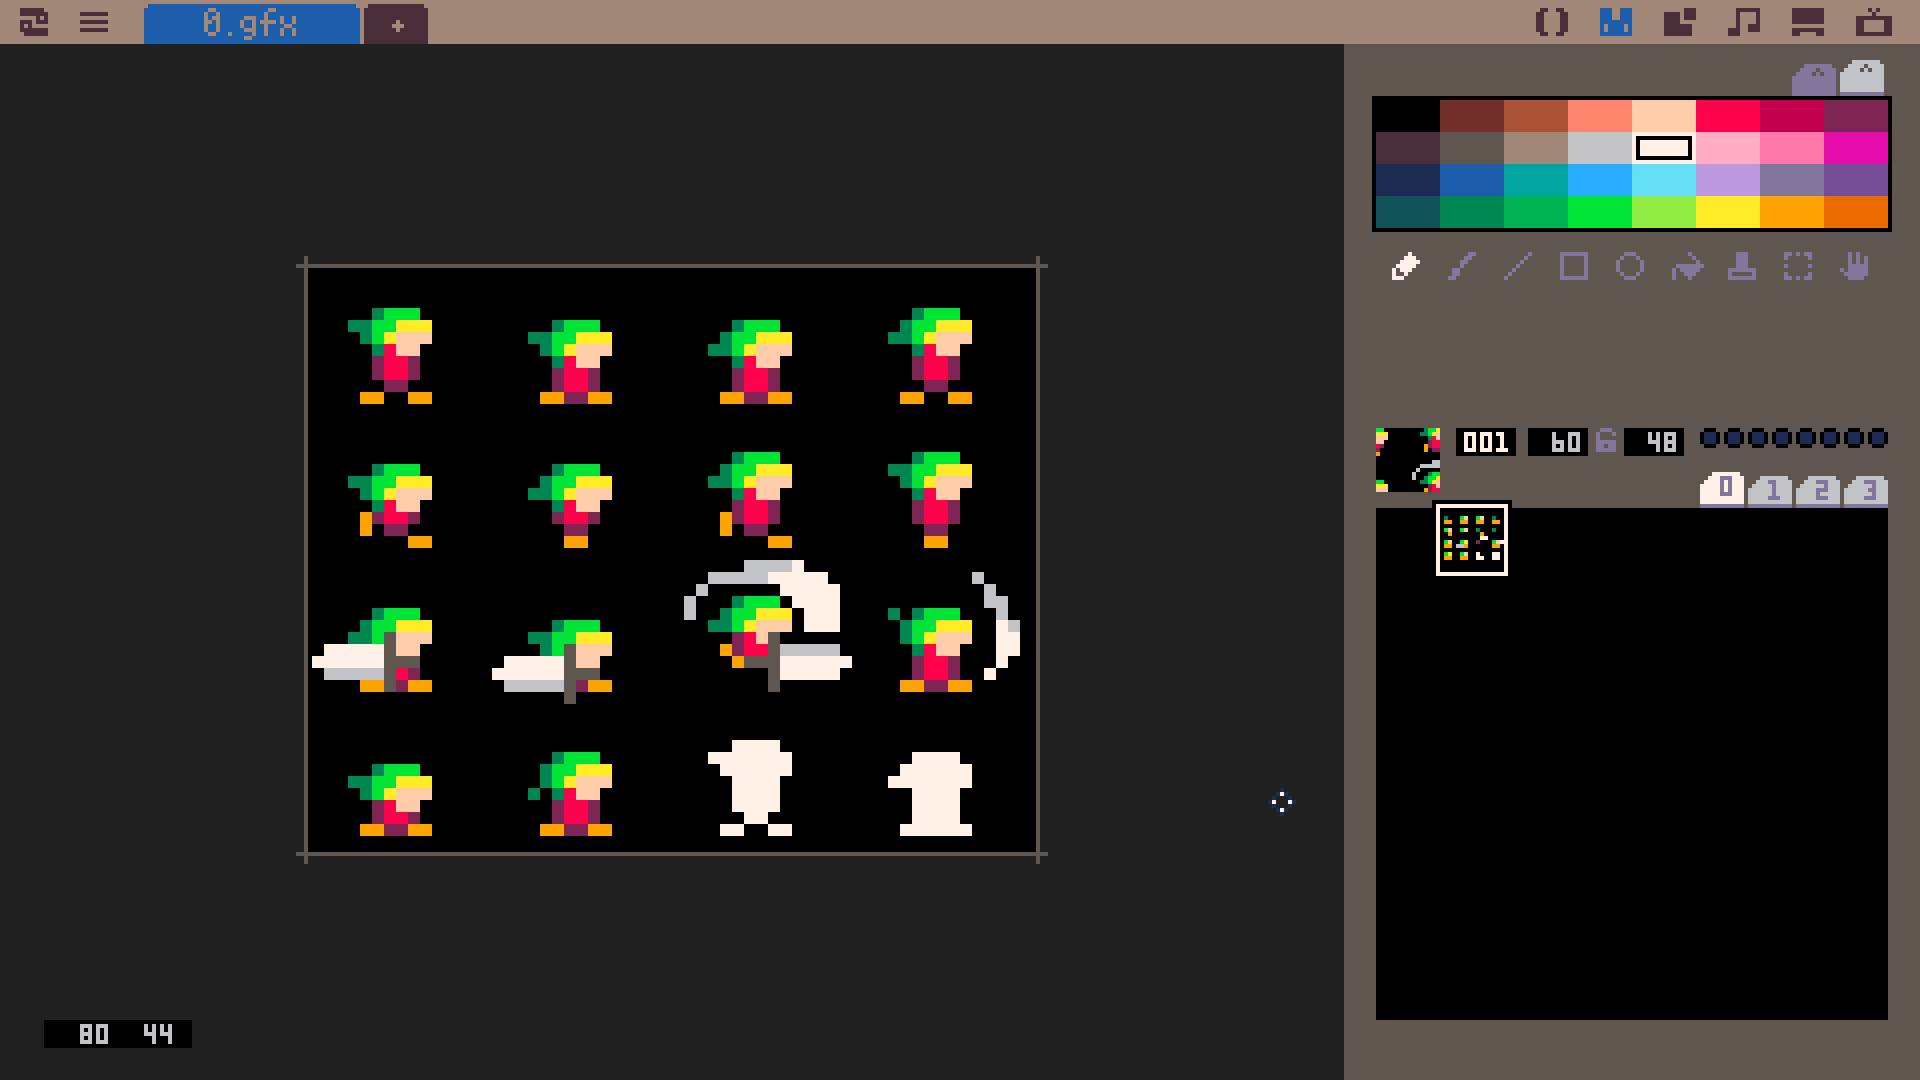
Next, paste this function into your lua code (you can delete the comments for a smaller footprint):
-- spr_from_atlas() - draw to the screen a slice of a sprite atlas
-- param: s - sprite atlas to use (the number in the Picotron spritesheet)
-- param: idx - the 0-based index to render from the atlas
-- param: cols - number of columns in the sprite atlas
-- param: rows - number of rows in the sprite atlas
-- param: x - screen x-coordinate to draw top-left corner of the sprite
-- param: y - screen y-coordinate to draw top-left corner of the sprite
-- param: flip_x (optional) - flip the sprite horiztonally
-- param: flip_y (optional) - flip the sprite vertically
function spr_from_atlas(s, idx, cols, rows, x, y, flip_x, flip_y)

    -- assign default values to optional parameters if nil
    local fx = flip_x ~= nil and flip_x or false
    local fy = flip_y ~= nil and flip_y or false

    -- retrieve userdata about the sprite
    local spr_data = get_spr(s)
    local spr_w = spr_data:width()
    local spr_h = spr_data:height()

    -- calculate width and height of each atlas entry
    local w, h = (spr_w // cols), (spr_h // rows)

    -- determine where in the sprite's coordinate system to start referencing
    local spr_x = (idx % cols) * w
    local spr_y = (idx // rows) * h

    -- sspr( sprite, sx, sy, sw, sh, dx, dy, dw, dh, flip_x, flip_y )
    sspr(s, spr_x, spr_y, w, h, x, y, w, h, fx, fy)
end |
Note that the idx paramter counts from left-to-right, then top-to-bottom. With the example above, the first row of indices would count "0, 1, 2, 3".
Finally, just call the function when needed, and enjoy seeing your atlas come to life! Cheers!
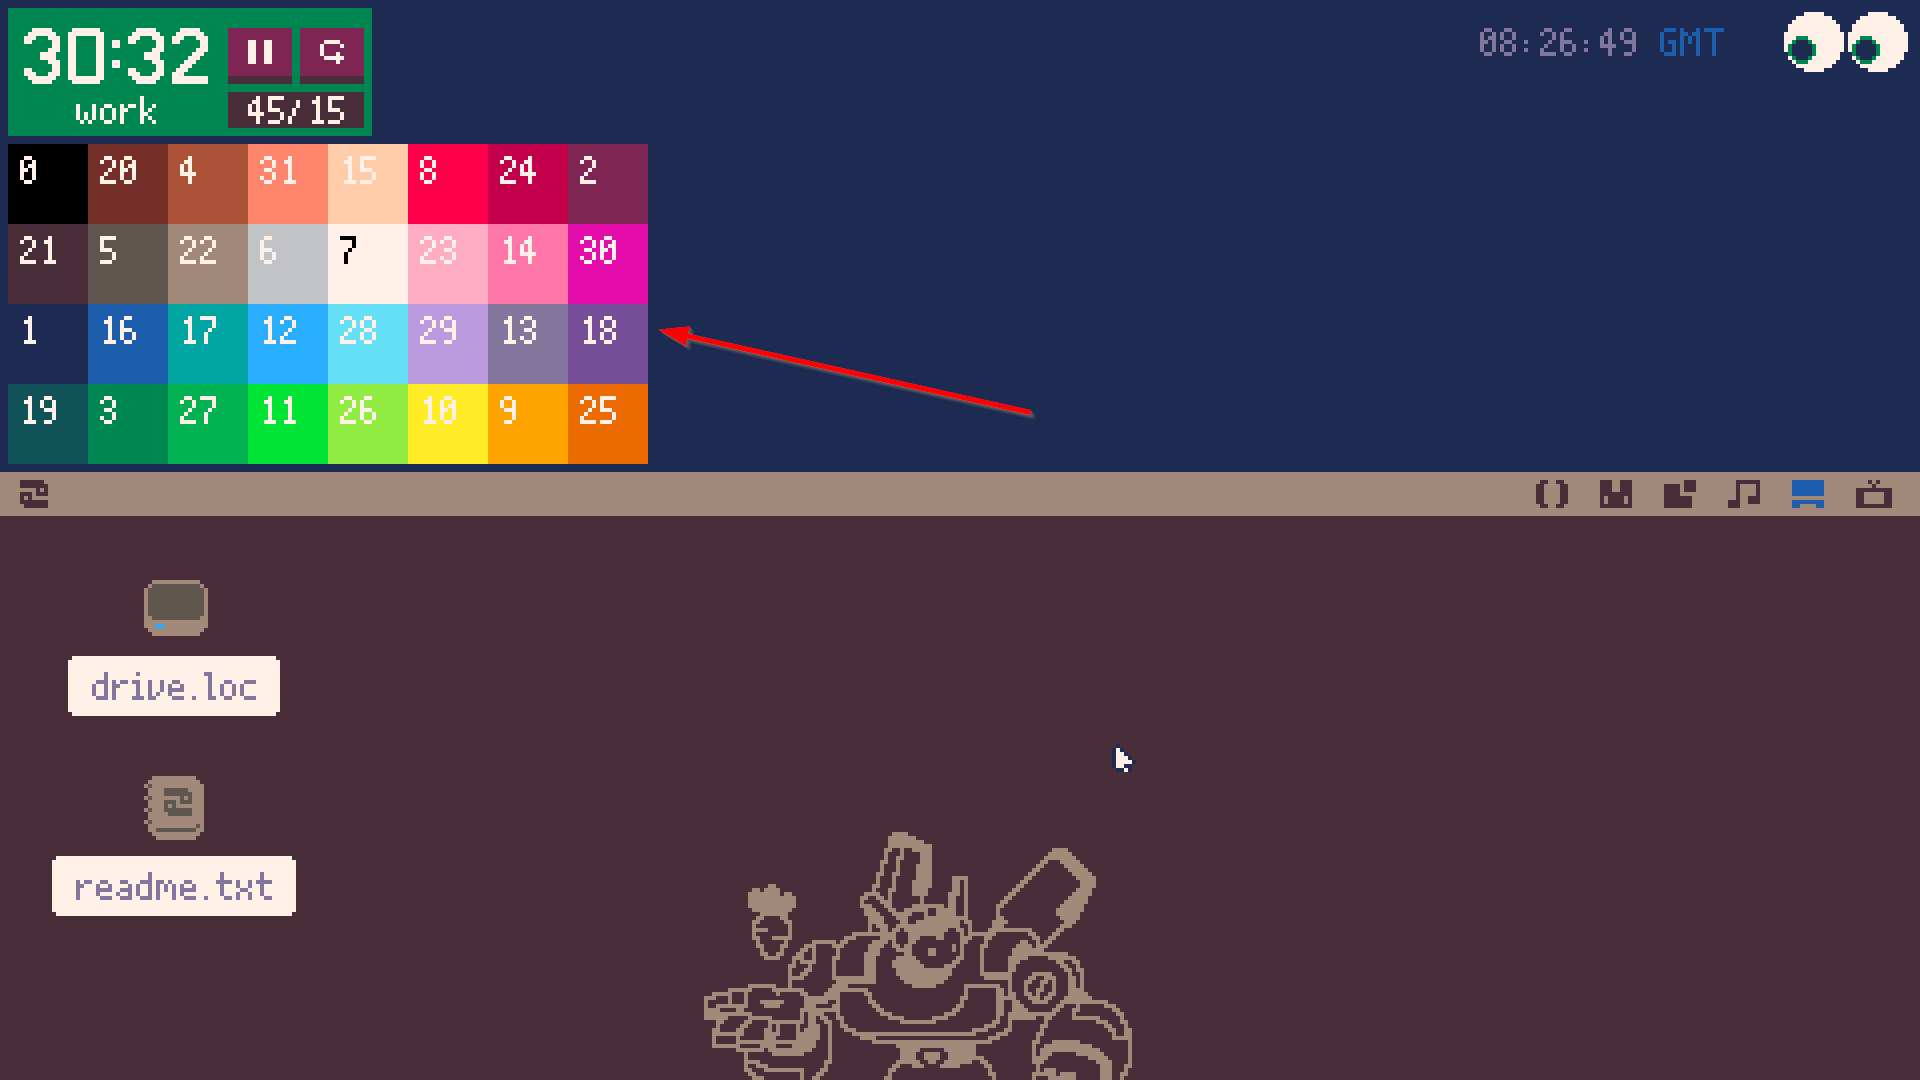
The Picotron palette was quite chaotic and the numbering wasn't very intuitive to me (probably due to being backwards compatible with PICO-8). I thought it might be nice to have an easy reference within reach so I don't need to open a forum post or wiki page whenever I need to work with colors. If you'd like to add this widget yourself, here are the steps:
- create a file named "colors.lua" and place it somewhere that makes sense to you (mine is in /appdata/local/tooltray/colors.lua)
-- colors.lua local GRID_SIZE=20 local palette={0,20,4,31,15,8,24,2,21,5,22,6,7,23,14,30,1,16,17,12,28,29,13,18,19,3,27,11,26,10,9,25} function _draw() cls(0) for i=1,32 do local x = ((i-1)%8)*GRID_SIZE local y = ((i-1)//8)*GRID_SIZE rectfill(x,y,x+GRID_SIZE,y+GRID_SIZE,palette[i]) print(palette[i],x+3,y+3,7) if palette[i] == 7 then print(palette[i],x+3,y+3,0) end end end - create or open "/appdata/system/startup.lua" and add this line: (be sure to edit the path parameter)
-- /appdata/system/startup.lua -- edit the x and y to place the widget wherever you want; width and height should stay the same as below create_process("/path/to/your/colors.lua", {window_attribs = {workspace = "tooltray", x=2, y=36, width=160, height=80}}) - restart Picotron and enjoy your new widget!
Curious about the Pomodoro timer? You can find that here.
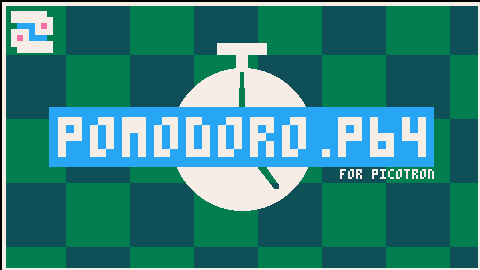
This is pomodoro.p64! A helpful tooltray widget for Picotron that will allow you to follow the Pomodoro system.

Installation
In a terminal:
load #pomodorosave pomodoro.p64(save anywhere you like, I personally have mine at /appdata/local/tooltray/pomodoro.p64)
Then, open up /appdata/system/startup.lua (or create the file if you haven't yet).
Add the following line:
create_process("/path/to/your/pomodoro.p64", {window_attribs = {workspace = "tooltray", x=2, y=2, width=91, height=32}}) |
You can edit the x= and y= coordinates to be whatever you like, but be sure that width and height is 91x32.
Restart Picotron and enjoy your new widget!
Features:
- Preconfigured pomodoro intervals (50/10, 45/15, 15/5, 30/7)
- A chime and notification when an interval changes
- Pause and reset the timer at will
- Easy integration with the tooltray (continues to run even if the tray is shut)
PICO-8 Twitch Plate
A quick and easy way to turn your PICO-8 game into a chat-controlled Twitch community experience!
Learn how to set up this PICO-8 export template here: https://github.com/fletchmakes/pico8-twitch-plate
Pull requests and contributions welcome! I had a lot of fun putting this together and the fact that it can be done via HTML template makes this so powerful. You don't have to modify any of your game's code in order to support Twitch; that's all done via the template for you!
|
12 
|

XTRIS is an arcade-style dexterity game all about catching that elusive green X as many times as you can within 60 seconds. Try the level editor!
Original game concept made in 7 days for TweetTweetJam 8.
Goal
Use the arrow keys to move the white tile toward the green tile! When you collect the green tile, it will move again, so you have to keep chasing it! You have 60 seconds to accumulate as many points as you can!
Controls
Arrow keys // CTRL+R to restart // Z to enter and exit levels // X on title screen to toggle SFX
About
I have developed XTRIS into a full game, but it started out as a game jam submission, which you can try here.
TweetTweetJam is a game jam focused on making a small game with a big constraint: its code must be 500 characters or less! This makes the developer get very creative with how they interact with the PICO-8 engine to try to squeeze as much game as possible into such a small limitation. My code uses 479 characters:
poke(0x5f2c,3)a={18,28,38,28}b={22,22,22,32}p=0g=4i=1l=0c=color q=btnp
::_::c(0)for j=0,4096do
if(rnd()>.7)pset(j\64,j%64)end
c(7)l=t()?p,0,0
line(0,63,l,63)for j=1,4do c(5)
if(j==g)c(3)?"x",a[j]+3,b[j]+2
if(j==i)c(7)
if(l>63)c(8)
rect(a[j],b[j],a[j]+8,b[j]+8)end if(l<63)then
if(q(0) and i%4>1)i-=1
if(q(1) and i<3)i+=1
if(q(2) and i>3)i=2
if(q(3) and i==2)i=4
if(g==i)p+=1 g=rnd(4)\1+1 rectfill(a[i],b[i],a[i]+8,b[i]+8,3)
if(g==i)g+=1 g%=4 g+=1
end flip()goto _ |

SPEEDCAT v1.1 Patch Notes:
- added 130ms coyote time
- added a new block: platforms
- reworked room layouts for better flow and feel
SPEEDCAT
A game all about collecting coins and being faster than your friends!
How to Play
Can you be the speediest cat? There are 32 different "rooms" that you can explore. Within each room, there is exactly one (1) SPEEDCOIN that you can collect! Collecting the 32nd coin will immediately end the game and display your completion time and the number of deaths you had!
The coins can be collected in any order, so use your creativity to think of creative routes to get those coins even faster the next time! Or, you could attempt a no-deaths run! Share your high scores in the comments below to compete with the SPEEDCAT community!
Modes of Play:
In SPEEDCAT, there are two modes: "Normal Mode" and "Hard Mode". The only difference between the two modes is that some blocks will blink on and off in "Hard Mode", making some jumps more difficult than in "Normal Mode". Other than that, the modes are identical.
Controls
In-game:
- Left & right arrow keys - move SPEEDCAT
- "Z" or up arrow key - jump
In menus:
- Arrow keys - navigate menu
- "Z" - select option
PICO-8 menus:
- "P" - open menu
- "ENTER" - select option
- Arrow keys - navigate menu
About the Game
SPEEDCAT has been my "pet" project for the past 2.5 years. It started as an experiment for myself to learn more about how to detect and resolve 2d collisions. When I started, I didn't realize I'd be finishing the entire game!
I've taken my time on this game. Whenever I felt like my heart was in it, I'd put some work into the game, and whenever I was feeling burnt out, I took a break! So while it's taken longer to develop than the average development time for a game this size, I feel like this game is the culmination of all I've learned thus far in game development!
Credits
- Developed by: Fletch
- Written in: PICO-8
- Background music composed by: Andrew Carlson
- Playtested by:
- Clark O Tron
- Benny
- Cowboy
- Salayna (Sachi)
- SpicyCheeseBite
- Spak
- PixelDud
- DJF#1107
- Claire Kascher - v1.1
- TurdBoomerang - v1.1
- Thanks to jacobpierce for their reproduction of the PICO-8 font for use in the trailer and other promotional graphics
- Huge shoutout to my wife for all of her support and encouragement throughout the entire development process. Her words of excitment and encouragement helped me through many speedbumps!