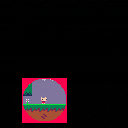
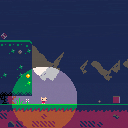
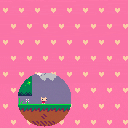
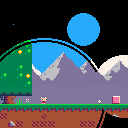
Circular Clipping Masks
I wanted to create a comprehensive post on how to create Circular Clipping Masks. This post goes together with a video tutorial I made which you can watch here:
But if the video doesn't work or you don't want to watch a long video, I want this post to make sense without it.
What is it and why do I need it?
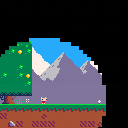
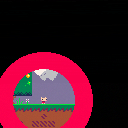
Pico-8 has this function called CLIP(). It restricts all drawing to a rectangular area on the screen. A Circular Clipping Mask is that but instead of a square area it's a circular area. The simplest version of this function is drawing the game inside a screen and making everything around it black.
There are many names for this effect. I call this a "Circular Clipping Mask" in this thread. But possible names could be also "Iris Out", "Circular Stencil", "Circular Matte", "Inverted Circle Fill", etc...
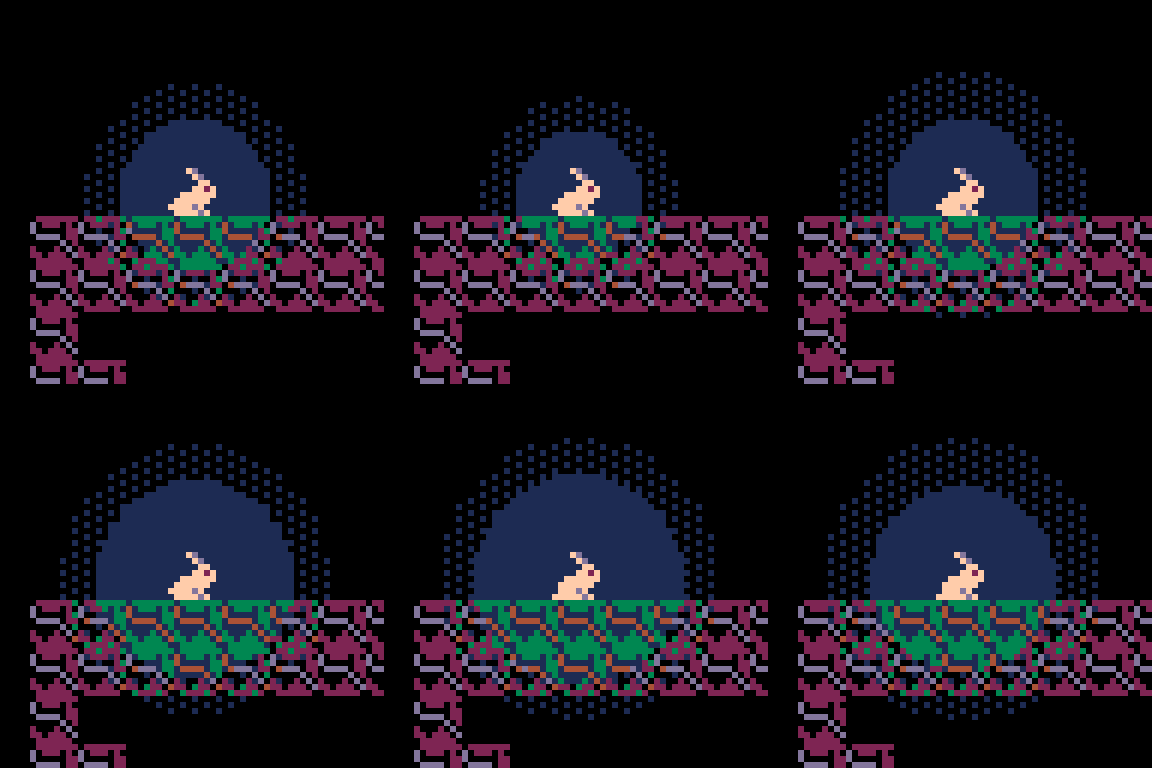
One typical application of such function is a cartoony screen transition at the end of a level like in Super Mario World. Another application is making a "dark level". You only render the environment around the player's character in order to simulate an environment with low visibility.
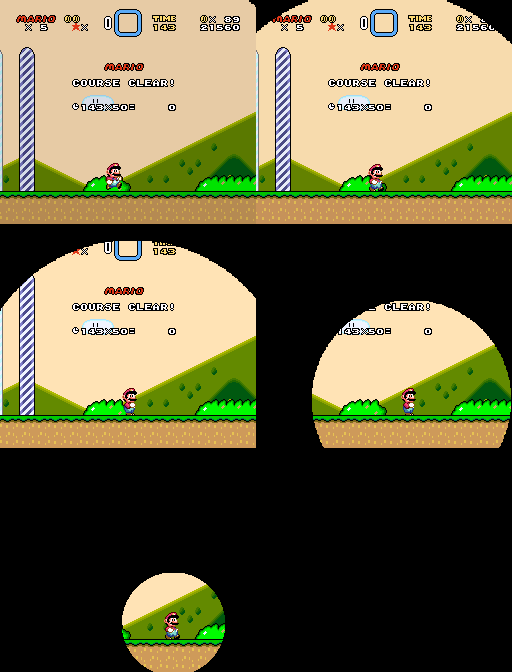
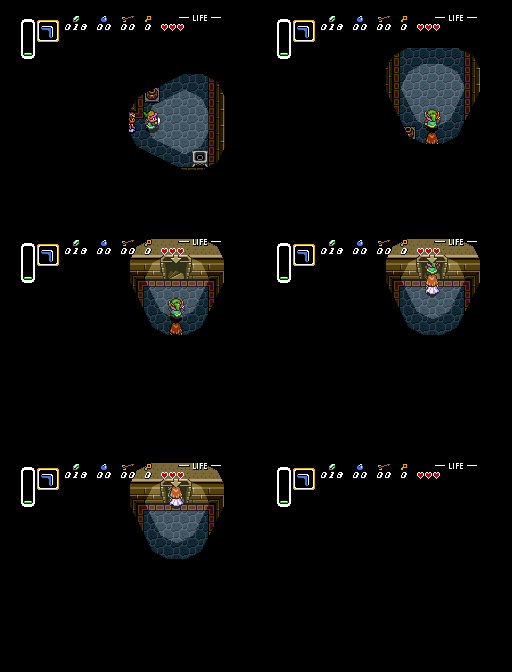
But this sort of functionality can go a long way. Some games hinge their entire game mechanic around it, like in case of independent titles like Closure or Schein.
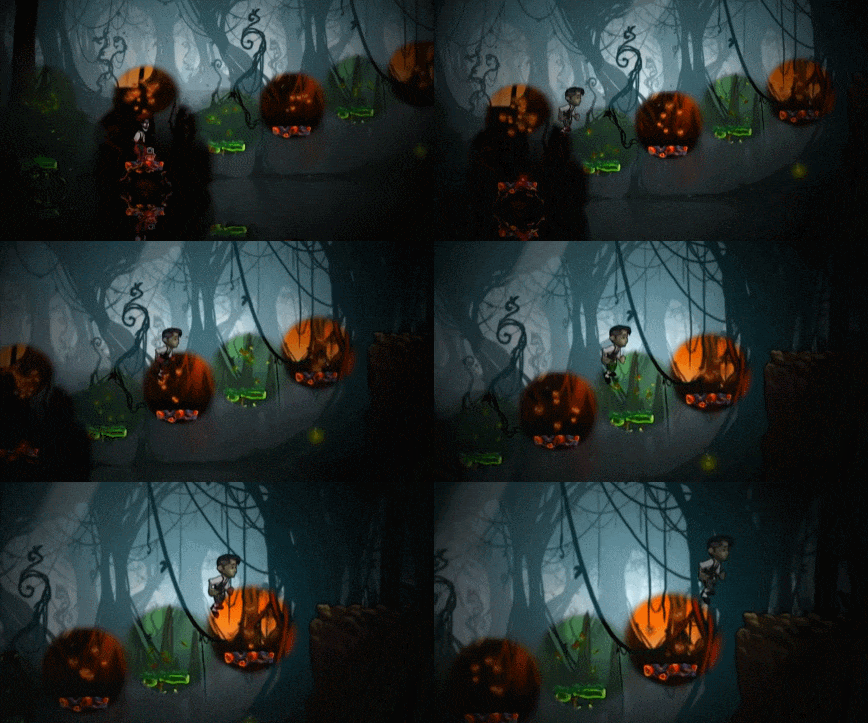
Many devs find themselves in situations where they want a Circular Clipping Mask but Pico-8 doesn't provide straight-forward tools to make one. So in this post I want to discuss 4 different techniques to pull of this effect. I also want to invite you to post your own solution so we can build a repository of tools to tackle this recurring problem.
Workbench
I want to show off code in a practical application scenario. So I decided to mod Jelpi's code to allow us to try out different approaches and to compare the results. Here is the workbench cart I will be using for this post. You can just download this or create your own:
NOTE In the cart above all the Circular Mask code is in tab 1 for your convenience. This is a small change from the video. I hope this won't lead to any confusion.
Changes I've made
- Created a BEFOREDRAW() function and inserted it in the _DRAW() function just before the comment "-- decide which side to draw"
- Created a AFTERDRAW() function and inserted it in the _DRAW() function at the very end
- Commented out the CLIP() statement from the DRAW_WORLD() function so it doesn't interfere with my own clipping mask
- Inside the _DRAW() function, just before the BEFOREDRAW() call, I fill the screen with pink hearts. This effect is triggered by setting the global variable DRAWMYBG to TRUE. This is something I want to use later to optionally test our ability to combine two unrelated scenes. The hearts themselves don't matter, could be any visually distinct effect.
- Inside the BEFOREDRAW() function I calculate Jelpi's position on screen and save it in global variables
myx=pl[1].x*8-cam_x myy=pl[1].y*8-cam_y-4 |
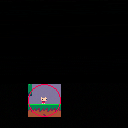
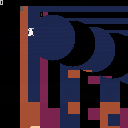
To test if this works I draw a 32 x 32 clipping rectangle around Jelpi using CLIP() in BEFOREDRAW(). I also draw a red circle in AFTERDRAW() that perfectly matches the clipping rectangle. Our goal is to find out ways how we can fill in the gaps between the circle and the square. Let's go!
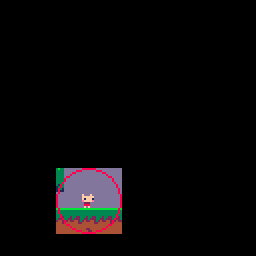
Method 1: Big Dumb Sprite
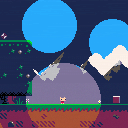
This is the simplest solution for this problem. Just draw a big circle in the spritesheet and render it on top of the clipping rectangle to fill in the gaps. You need to set the black color to opaque using PALT(). You also need to pick some other color to become the transparent color so the center of the circle becomes see-trough. The result is something like this:
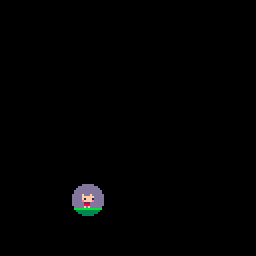
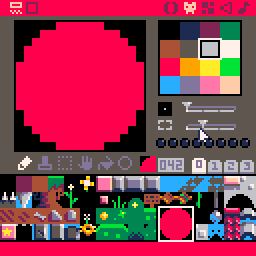
This is a small circle. You can make a bigger one but that will start eating into your spritesheet. So it pays off to make sure you're using the sprite efficiently. Instead of drawing the entire circle in one big sprite you can only create a quarter-circle sprite and draw it 4 times flipped vertically and horizontally.
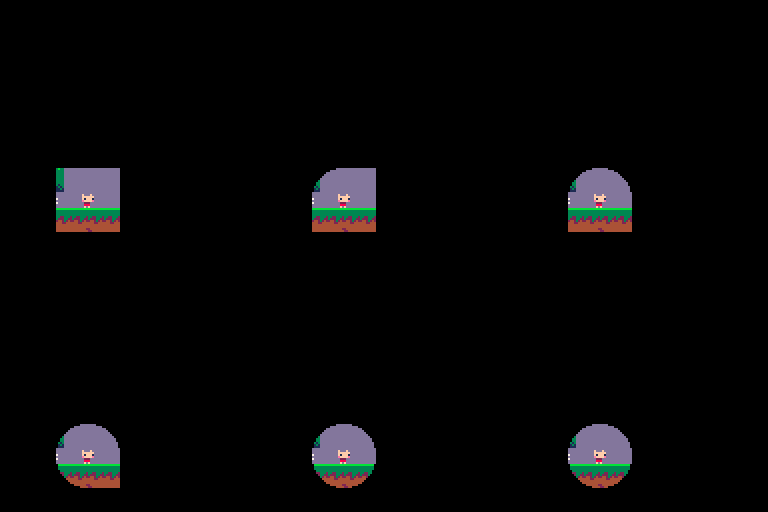
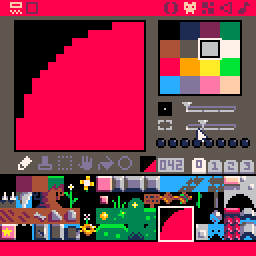
This will give you more bang for your buck and you'll get a nice big circle.
But that circle is still relatively static. We can scale the size of the clipping rectangle and use SSPR() to make sure our sprites scale accordingly. This works fine but does result in some pixelation.
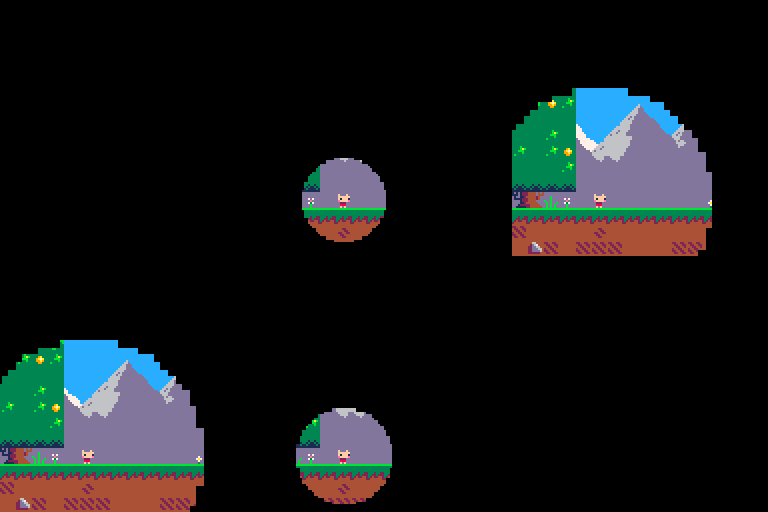
Your AFTERDRAW() function ends up looking like this. MYX and MYY are the coordinates of the center of the circle. MYR is the radius.
function afterdraw() palt(8,true) palt(0,false) sspr(80,16,16,16,myx-myr,myy-myr,myr,myr) sspr(80,16,16,16,myx,myy-myr,myr,myr,true) sspr(80,16,16,16,myx-myr,myy,myr,myr,false,true) sspr(80,16,16,16,myx,myy,myr,myr,true,true) palt() end |
And here is the cart for you to download
Pros
- Super simple. No crazy math or memory manipulation. If you know how to draw sprites in Pico-8 you can probably make this work.
- Not limited to circles. You can easily make any clipping mask shape you want!
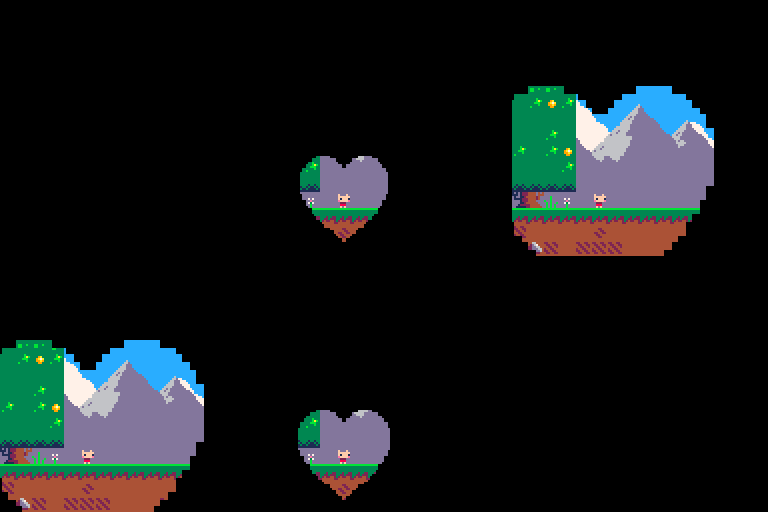
Cons
- The scaling looks pixelated
- You end up using precious sprite sheet space
- It's not a REAL clipping mask. You can only turn the background into a solid color. You cannot seamlessly draw one image on top of another
Method 2: Bunch of Circles
In order to save precious sprite sheet space and make things look nice and smooth, how about we draw the circles procedurally? We can't use the CIRCFILL() function to fill the outside of the circle. But how about we draw a bunch of circles with CIRC() and increase the radius as we go? Well, this will get you something like this:
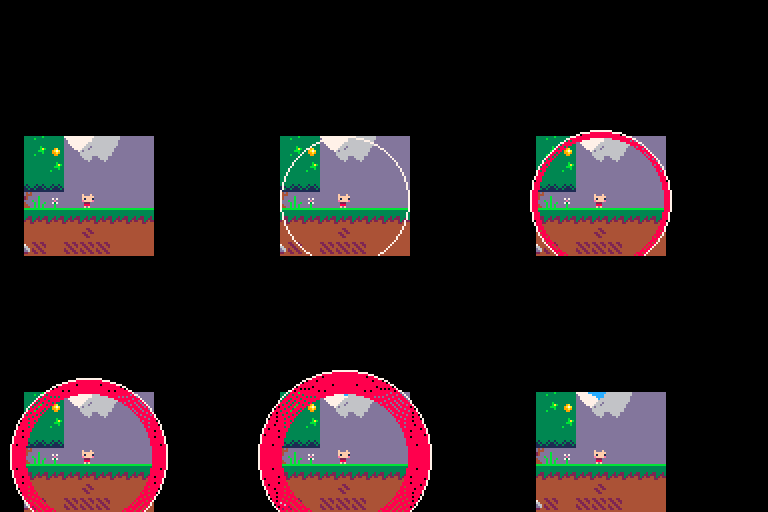
As you can see, this doesn't quite work. You get some ugly gaps between the circles. The algorithm that draws the circles doesn't create circles that neatly fit into each other. And you can't draw more circles in-between to fill in the gaps since the radius needs to be an integer number.
But you can fill the gaps by drawing more circles. Every time you draw a circle you just draw a second, identical circle shifted by one pixel in any direction. This results in a complete coverage.
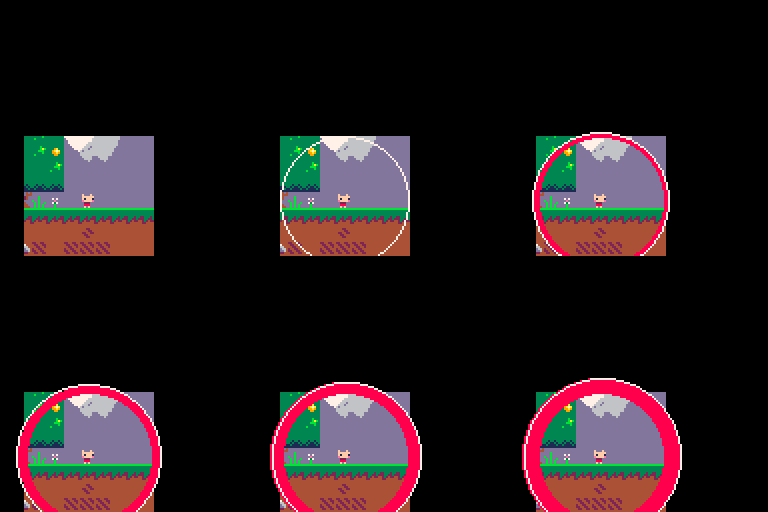
Something you need to pay attention to is how many circles you draw. As the clipping rectangle gets bigger there are more pixels to cover.

So you need to increase the number of circles to do the job. Drawing around RADIUS/2 number of circles seems to be about right. The result is going to look like this:
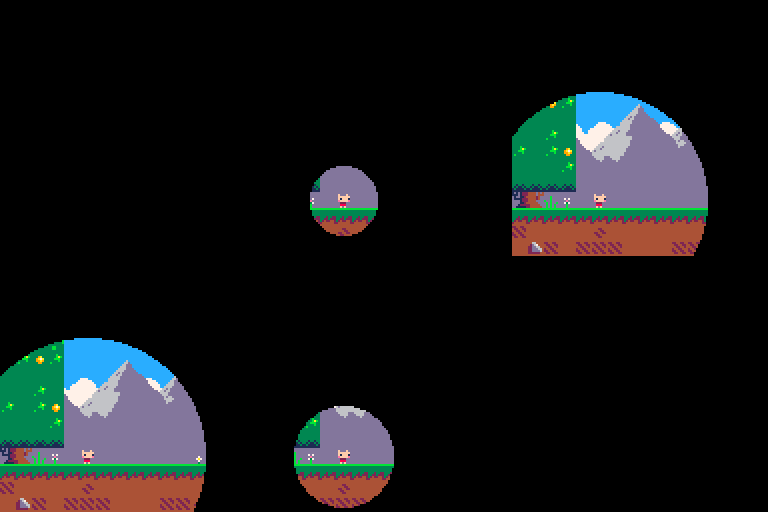
Your AFTERDRAW() function ends up looking like this.
function afterdraw() palt(0,false) for i=0,flr(myr/2) do circ(myx,myy,myr+i,0) circ(myx-1,myy,myr+i,0) end palt() end |
And here is the cart for you to download
Pros
- Scales cleanly
- Uses no sprites
- Fairly simple
Cons
- Feels a bit janky. Drawing whole bunch of overlapping circles just to cover the gaps.
- Mask not perfectly circular. Ends up a bit egg-shaped.
Method 3: Math!
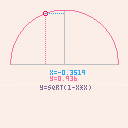
Ok, time to put our big boy pants on. It's time for Math! This method is something that some devs would maybe consider "the proper way" of doing things. We are going to fill in the corners of the square by drawing the circle manually using a bunch of LINE() functions. We fill only in the areas we need line by line. However, in order to do that we need a mathematical function that tells us how to slice up a circle into individual lines. This sounds like it would use trigonometry but it's actually fairly simple. The following GIF / Cart examplifies:
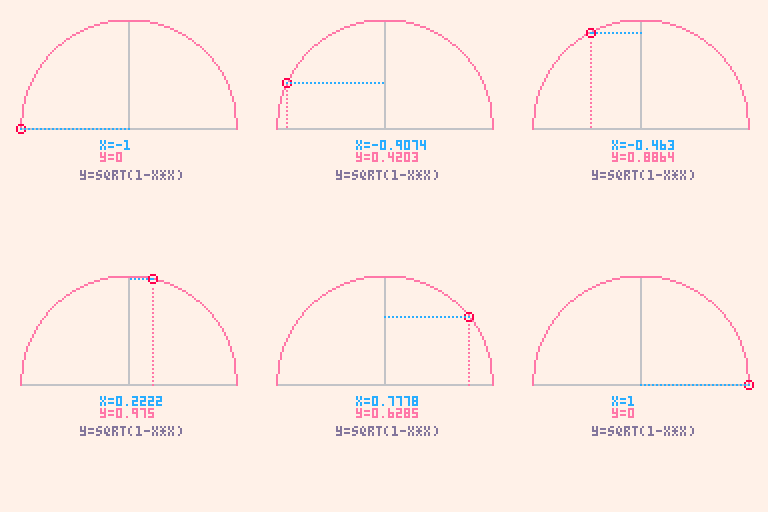
I explain the Math more in detail in the video. But in short, we draw a circle with the center at coordinate 0,0 with the radius of 1. By applying the Pythagoras Theorem we can plug in 1 as the length of the hypotenuse (c). We can then solve by a or b to derive a function that descirbes that kind of circle on a 2D grid. For any given X we can calulate the Y using this formula:
y = sqrt(1 - x*x) |
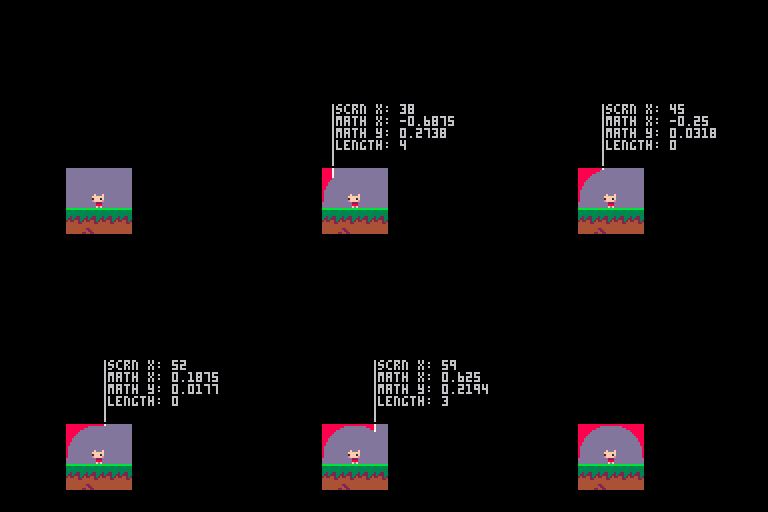
This equasion is going to be our "reference circle". All we need to do now is do a for loop that will iterate along one of the edges of the clipping rectangle and keep drawing lines into the rectangle. We need to translate the screen coordinates into a value between -1 and 1 to look up where on the reference circle any given line is. We will get a number between 0 and 1 as a return. This number needs to get multiplied with the radius to calculate how long each line has to be to form a nice circle. Here is what this looks like in "slow-mo".
Of course you then need to also draw a second line on the other side of the rectangle but that's just using the same result, no need to go through the calculations twice. This method requires quite a bit of fiddling with the math to get it to work. But when you get it to work you'll arrive at something like this:
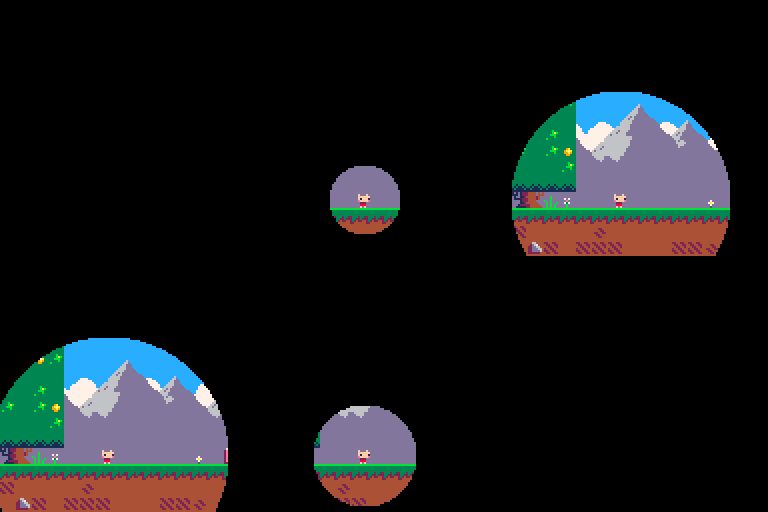
Your AFTERDRAW() function ends up looking like this.
function afterdraw() palt(0,false) local py=myy-myr for px=myx-myr,myx+myr do local cval=px-(myx-myr) cval=cval/(myr*2) cval=cval*2-1 cval=1-sqrt(1-cval*cval) local ph=cval*myr+0.01 line(px,py,px,py+ph,0) line(px,py+myr*2-ph,px,py+myr*2,0) end palt() end |
And here is the cart for you to download
Fake Alpha with Method 3
The true power of Method 3 becomes apparent if we explore it's versatility. Since we are drawing everything manually we have access to some stunning effects. For instance, we can create an effect where the outside of the circle isn't just a solid black color but a dimmer version of the image - fake alpha transparency so to speak. To pull this off we are going to take advantages of the Video Remapping functionality in Pico 0.2.4.
Here is how the effect works. Instead of filling in just the corners of the clipping rectangle, we will fill the ENTIRE SCREEN with our black lines. And instead of black lines we are going to use SSPR to draw thin, line-shaped sprites. We will use Video Remapping to use the screen as the spritesheet. So we will redraw the entire screen line-by-line back onto itself, apply a palette change and leave a circular opening out. This is what the effect looks like (first in "slow-mo" and then in real-time):
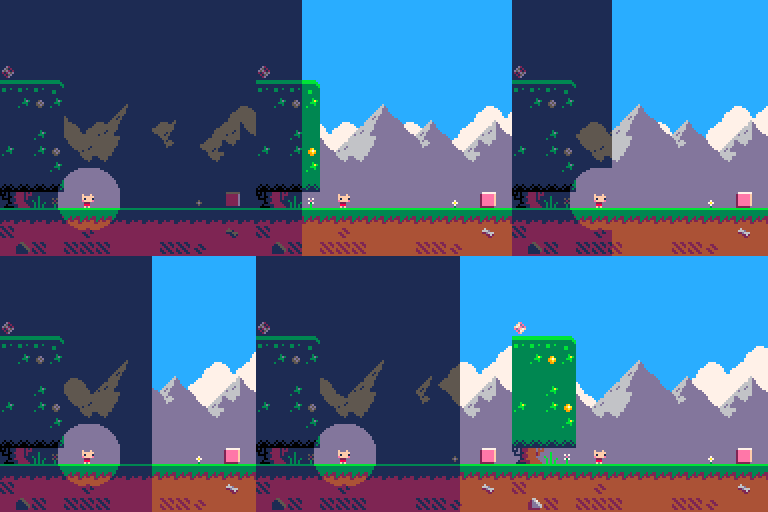
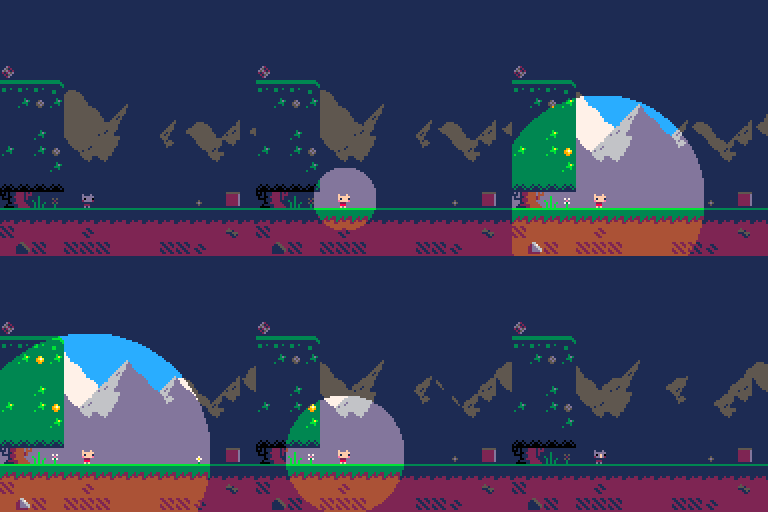
This is a lot to take in but here is a commentated AFTERDRAW() function that hopefully steps you through the process
function afterdraw()
 --remap the spritesheet to the screen
 --spr+sspr statements will draw from the screen back onto the screen now
 poke(0x5f54,0x60)

 --palette shift everything a shade darker
 pal({0,1,1,2,0,5,5,2,
      5,13,3,1,1,2,13})

 --this calulates the top edge of the clipping rectangle
 local py=myy-myr

 --loop through the entire screen!
 for px=0,127 do

  --math that converts screen coordinates to a range compatible with our reference circle function
  local cval=px-(myx-myr)
  cval=cval/(myr*2)
  cval=cval*2-1

  --if we're outside the circle just draw the entire line
  if abs(cval)>1 and myr==0 then
   ssprline(px,0,px,128)
  else
   --the actual circle function
   cval=1-sqrt(1-cval*cval)

   --calculate length of the line
   local ph=cval*myr

   --draw both lines
   ssprline(px,0,px,py+ph)
   ssprline(px,py+myr*2-ph,px,129)
  end
 end

 --reset things to normal
 poke(0x5f54,0)
 pal()

end

--helper wrapper for sspr that allows us to conveniently change a line function into an sspr function
function ssprline(x1,y1,x2,y2)
 sspr(x1,y1,1,y2-y1,x1,y1)
end |
And here is the cart for you to download
True Clipping Mask with Method 3
So far, our clipping masks haven't been "real" clipping masks. We just filled the outside with a solid black. A true clipping mask like the one you'll get with the CLIP() function should also allow you to combine two unrelated images. The previous step already paved the way to make this happen.
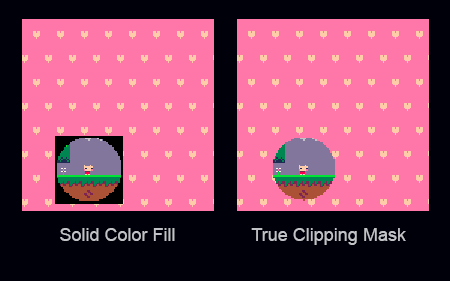
Finally it's time to set our DRAWMYBG variable from the Workbench to TRUE so the program will draw a cute heart background before drawing the Jelpi game. Our goal is now to combine the two images using a circular mask.
Here is how that will work.
- Draw the cute heart background
- Take the contents of the screen (the heart background) and save them into RAM. We will use the new extended RAM functionality of 0.2.4 for that. Essentially, we will take a screenshot.
- Draw the Jelpi game as normal
- Copy the screenshot we made earlier into the spritesheet
- Use the line-drawing function as before to draw the entire screen line by line leaving out a circular spot. But now we will actually use the spritesheet as the source, which now contains the heart background.
- Reset the spritesheet to what it was before
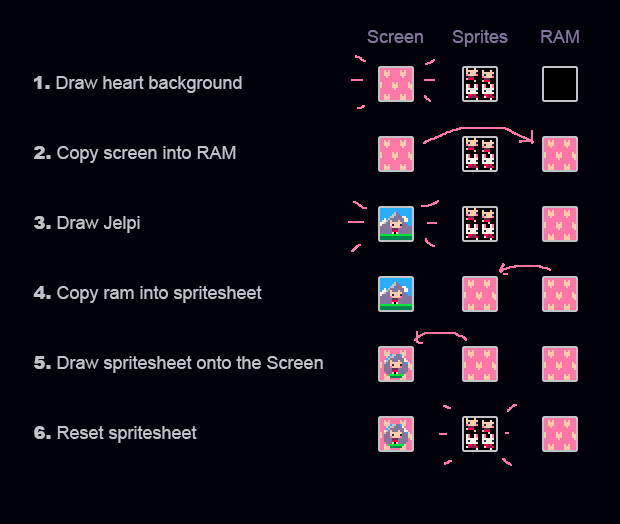
This is what the effect looks like (first step 5 in "slow-mo" and then everything in real-time):
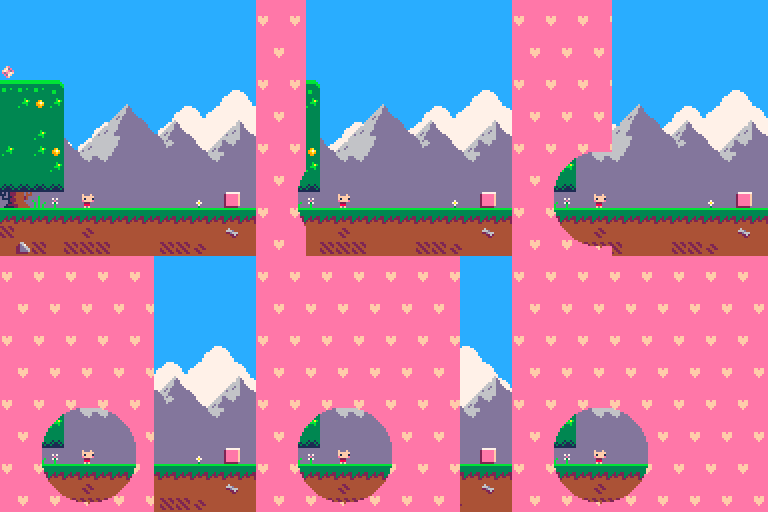
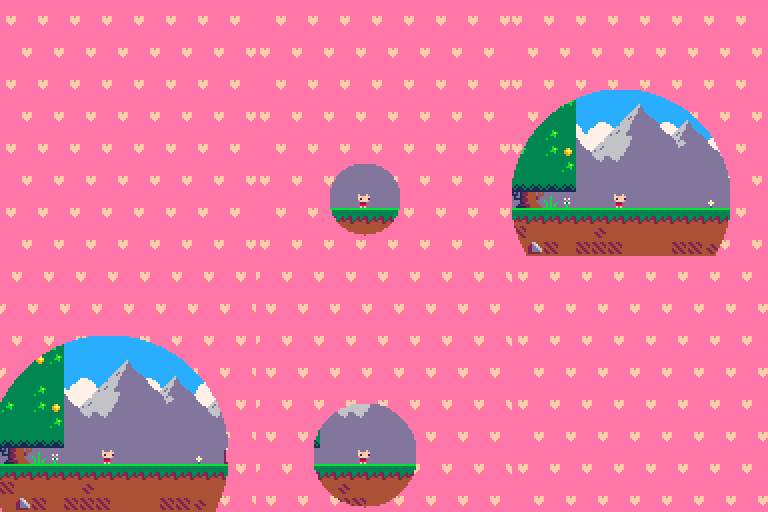
The code for this is actually deceptively similar than the previous one so instead of posting the entire AFTERDRAW() function again, I will just focus on important lines. You can look at the final code in the cart posted below.
--this will copy the screen contents to a spot in the new expanded RAM section --essentially, this makes a screenshot memcpy(0x8000,0x6000,0x2000) --this will copy the screenshot into the spritesheet memcpy(0,0x8000,0x2000) --this resets the spritesheet to it's original state reload(0,0,0x2000) |
And here is the cart for you to download
Pros
- Can be the quickest method
- Uses no sprites
- Super versatile
Cons
- Math overload can cause nosebleed
- Circle with a small radius looks square-ish
Method 4: Video Remapping Stencil
Method 3 was complicated. Method 4 sure SOUNDS complicated but as you will see the code is fairly simple and compact. Method 4 is all about exploiting 0.2.4 functionality to Video Remap and copy around screen contents to make Pico-8 do the heavy lifting for us. Ultimately what we're aiming to achieve is to use the regular CIRCFILL() function to draw a solid circle and "punch out" that circle by setting the circle's color to transparent while drawing it to the screen.
Let's begin with the simple black background version of it. Here is the plan:
- Draw the Jelpi game screen
- Remap the spritesheet to become the screen. Paint the spritesheet all black.
- Draw a white circle on the spritesheet
- Reset video remapping to normal. Set white to transparent. Draw the entire spritesheet onto the screen.
- Reset the spritesheet to how it was before
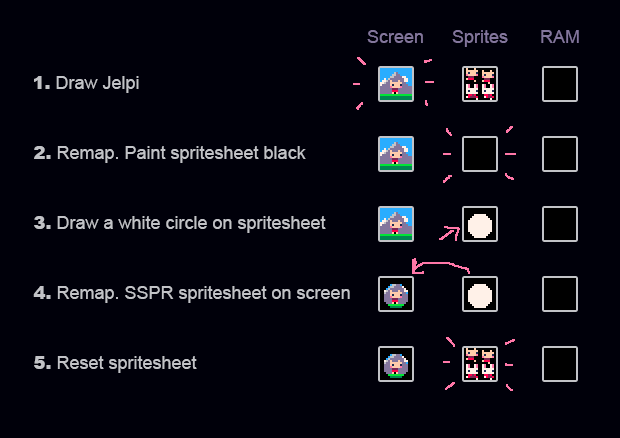
This sounds complicated but this is what the entire AFTERDRAW() function looks like:
function afterdraw() --remap spritesheet to become the screen poke(0x5f55,0) --fill the spritesheet with black palt(0,false) cls(0) --draw a white circle on the spritesheet circfill(myx,myy,myr,7) --video remapping back to normal poke(0x5f55,0x60) --set white to transparent palt(7,true) --draw the entire spritesheet to the screen sspr(0,0,128,128,0,0) --reset everything reload(0,0,0x2000) palt() end |
And it looks like this. Just a nice and clean Circular Clipping Mask.
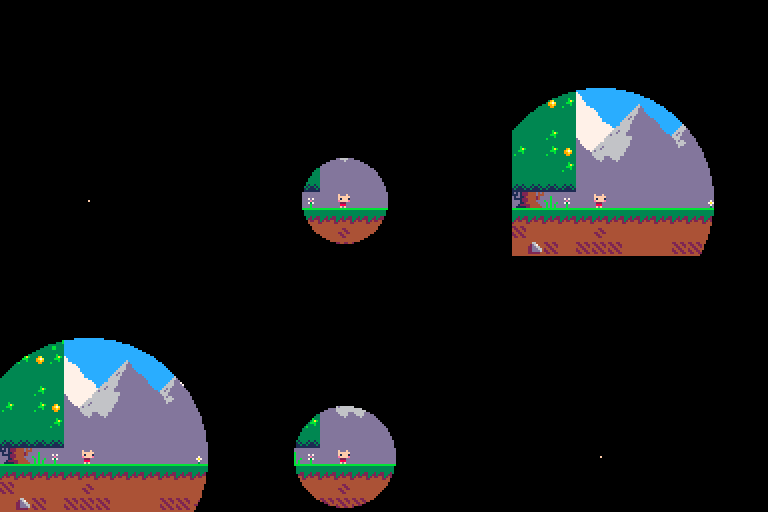
Now this method has one disadvantage in that it takes a lot of processing power. We are copying and drawing large amounts of data for Pico-8 standards. So this may look like a mediocre trade. However, one huge advantage of this method is that we can have as many overlapping circular masks as we want at no additional cost. We achieve this my simply drawing a few more circles onto the spritesheet. Things can get pretty wild.
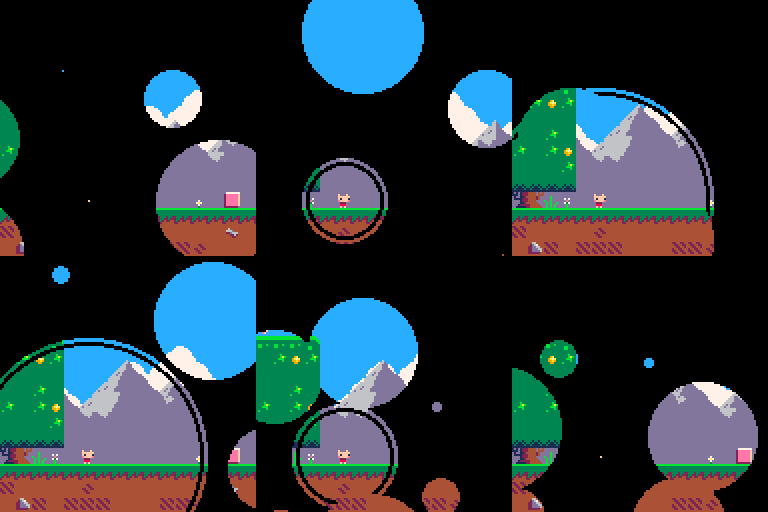
The advantages here should be obvious. This can be a useful technique if we have a game where we need more than just one circular mask at any given time. For example: a dark level illuminated by multiple light sources.
Here is the cart for you to download:
Fake Alpha with Method 4
We can use similar techniques to the ones discussed in Method 3 to achieve the Fake Alpha effect with Method 4. Here is the plan:
- Draw the Jelpi game to the screen
- Copy Screen contents to the spritesheet
- Remap the spritesheet to become the screen. Draw a white circle on the spritesheet
- Reset video remapping to normal. Set white to transparent. Shift the palette for the colors to become darker. Draw the entire spritesheet onto the screen
- Reset the spritesheet to how it was before
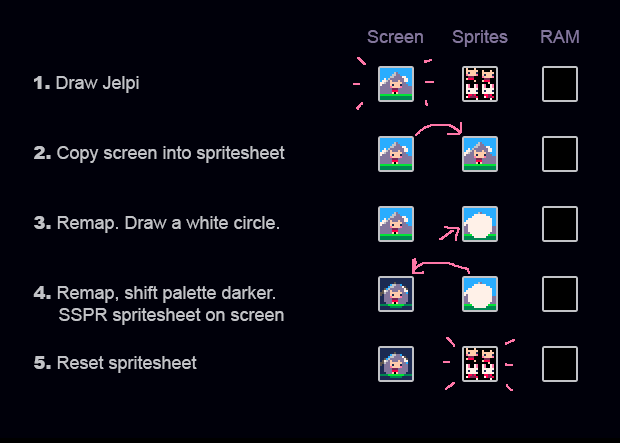
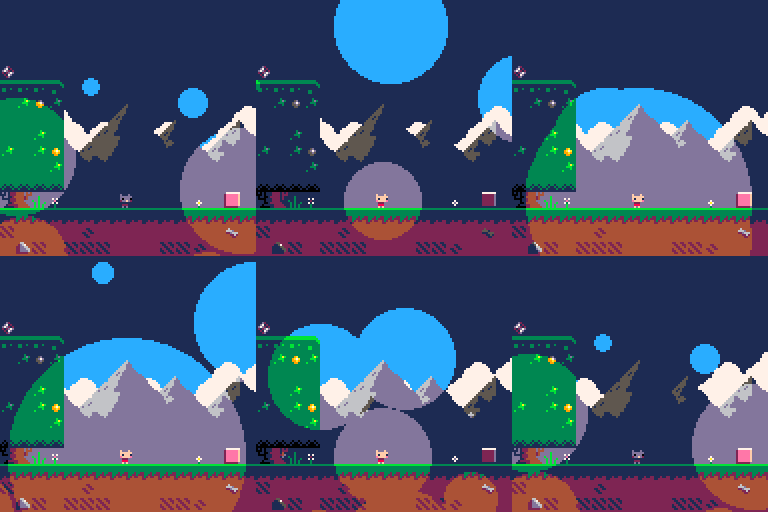
This is essentially the same procedure as the basic Method 4 except instead of filling the spritesheet with black we fill it with the contents of the screen. We also shift the palette darker when we draw the spritesheet back onto the screen. The advantages of Method 4 persist. We can still use multiple intersecting circular masks.
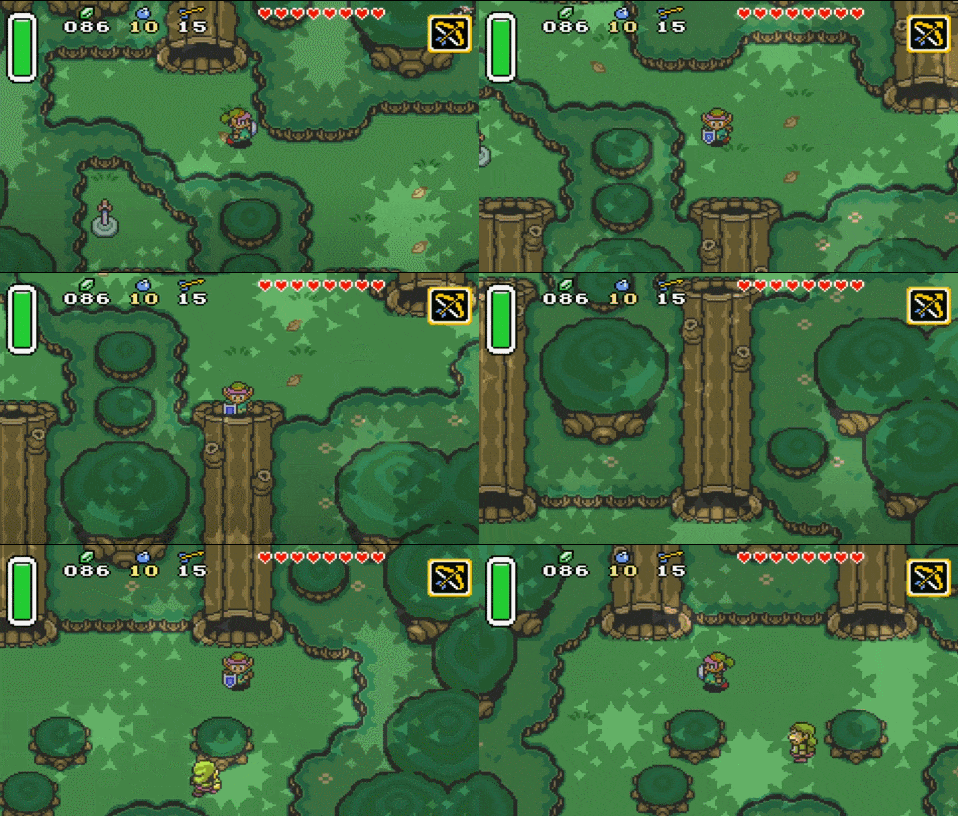
Besides the already mentioned cases this could be potentially used for all sorts of decorative effects such as this canopy shadow effect in A Link to the Past.
Here is the cart for you to download:
True Clipping Mask with Method 4
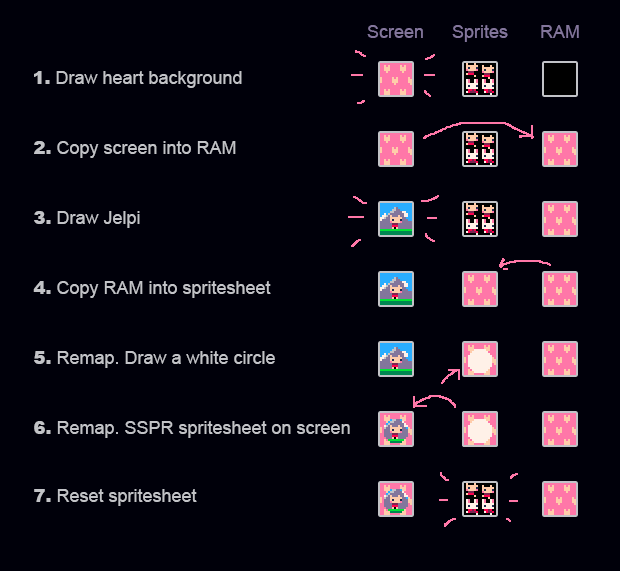
And finally here is how to achieve a true Clipping Mask with Method 4. Which means we once again set DRAWMYBG to TRUE so the program renders the heart background before it renders the game. Our goal is to combine the two using the circular mask. Here is the plan:
- Draw the hart background to the screen
- Save a screenshot of the hart background to RAM
- Draw the Jelpi game to the screen
- Copy heart background screenshot from RAM to the spritesheet
- Remap the spritesheet to become the screen. Draw a white circle on the spritesheet
- Reset video remapping to normal. Set white to transparent. Draw the entire spritesheet onto the screen
- Reset the spritesheet to how it was before
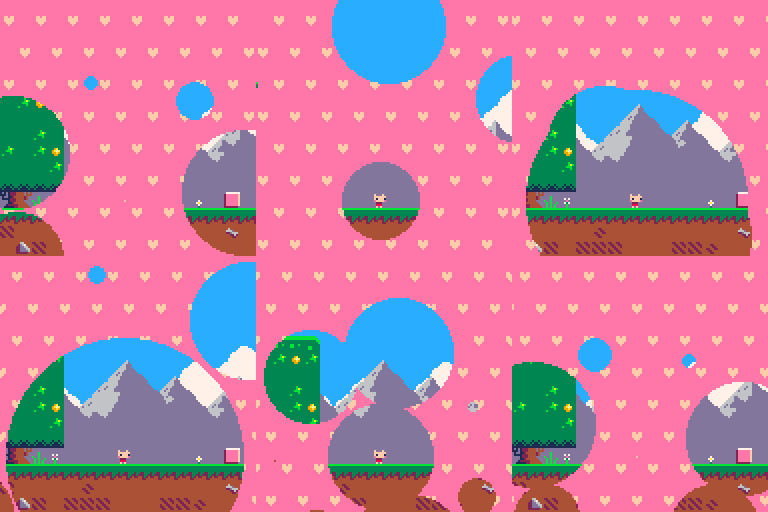
If you've been following this post none of the methods should be new to you at this point. This is what the result looks like.
And here is the cart for you to download and look at the code
Pros
- Fairly short
- Uses no sprites
- Circles look clean at any size
- Allows multiple intersecting masks
- Versatile
Cons
- CPU intensive
- Tapping into weird tech
Performance
Here is the 30FPS CPU load I got on the above carts.
Just Jelpi : 18% Method 1 : 7% - 25% Method 2 : 7% - 29% Method 3 : 7% - 20% Method 3 Alpha : 34% - 28% Method 3 True : 62% - 67% Method 4 : 53% Method 4 Alpha : 56% Method 4 True : 64% |
Method 3 appears to be the most efficient one. Method 4 is flexible and simple but the high CPU load means it's prohibitive to use in 60FPS unless it can be effectively optimized for it's use case. Generally, using the Fake Alpha and True Clipping Mask trick is heavy on the CPU and needs to be used with caution.
Sources
None of the methods I've described here are my own ideas. So at this point I wanted to give big thanks to all the people that I've learned those techniques from. The people I'm listing here aren't necessarily the original creators. They are just the people I've learned them from myself.
A good example for this is Method 1. I'm sure others had a similar idea before. But I've first seen it in use by one of my own students! @xCoraNil used this effectively in their game Night of the Worm Slayer.
Method 2 is something I've recently seen in a Twitter post by @sticky.
Method 3 I've first seen in in this excellent post on this subject. It was @freds72 who suggested doing it like this and I was pretty surprised about how simple the core math formula was.
Method 4 is something @NMcCoy suggested in a Twitter conversation not long ago.
It's Your Turn!
This was a long post. Now it's your turn!
- Try the different methods out. Post Results!
- None of the code is optimized for speed or for tokens yet. I'd love some help with that!
- Do you have ideas for your own methods? Post them here as well!
Let's build a repository of tools to tackle this recurring problem!

Thanks for this in-depth look! The one time I used anything like this was in Apparitional Abode (remake of Atari 2600 Haunted House) for the area lit by the match, and for that I used the Circle Map code written by @cubee from this post: https://www.lexaloffle.com/bbs/?tid=38881. It uses tline to draw a specific map radius out from x,y coordinates.

Neat! Yeah it looks like a variant of the Method 3 I used here. The math just more compact. Love the idea of using tline!

Awesome post, super informative and shows off a lot of cool things I didn't know existed. Definitely gonna look at trying out method 3/4 in my project. Thanks for the shoutout!

This is a feature greatly desired in RPGs, especially for torchlit rooms. Very good research you did here, @Krystman. Gold star effort.
Unfortunately for me, what you have done is system independent for Pico-8. As you started your article I was hoping to see some code I could carry to Blitz regarding filled circles with new data in them to give the effect of torchlit rooms.
Nonetheless for Pico-8 users, what you did here is invaluable and I likely will use it for my future carts with your thanks and credit.

Sometime ago I wrote a coroutine for an iris effect using the mid-point circle algorithm. Wondering if it should be updated to take advantage of tline()?
In my last game, I included an iris effect to transition between two scenes. I used the midpoint circle algorithm to calculate the edges of the iris. This algo avoids trig and square root functions and so is super fast. Even at 60 frames a second, there's no lag. I decided to make a more generalized version, implemented as a coroutine. I hope you find it useful for your projects.
To use:
-
Copy the iris function from the cartridge above into your own cartridge.
-
When it's time for a transition, assign the coroutine to a variable in your update function:
effect = cocreate(iris) - In the draw function, call the coroutine:
coresume(effect, 1, 128, 1, 15)
The parameters for the coroutine are starting radius, ending radius, step, and color. A positive step indicates by how much to open the iris on each frame. A negative step indicates a shrinking iris. See the code for examples.

@bikibird, thought I would toss my hat in. I did something like this years ago ...
https://www.lexaloffle.com/bbs/?tid=36250
I know I did one where the picture changes, but that's not very difficult. Once the iris has completely closed you can easily change whatever picture is appearing beneath and then re-open the iris to show the change.

Absolutely amazing, @Krystman! Great tutorial as always.
I was trying to develop something like method 3 on my own, and you cleared up a lot of the haze that was clouding the issues for me. I am so grateful to you!
I have an additional performance tweak to make: instead of calculating a half-circle, calculate just a quadrant, then perform line() twice with appropriate positive/negative values. (Similar to the sprite method.) Flipping the sign on a number is computationally cheaper that getting a new sqrt().
I'd be interested to see the performance increase. Marginal or not? Hmm. Could open up space for more computationally complex symmetrical shapes.

you can credit Krajeck for the square root method, see: https://hackernoon.com/lighting-by-hand-2-stitching-lines-together-24edc9f819bf#.nfio7en93
(or just credit Pythagorus!)

I used the information here to try my hand at sprite-based shadows but the performance is terrible; nearly 100% CPU. It's understandable though since I'm copying memory back and forth quite a bit between screen, sprites, and general use. Is there a more performant way to pull this off?
Preview
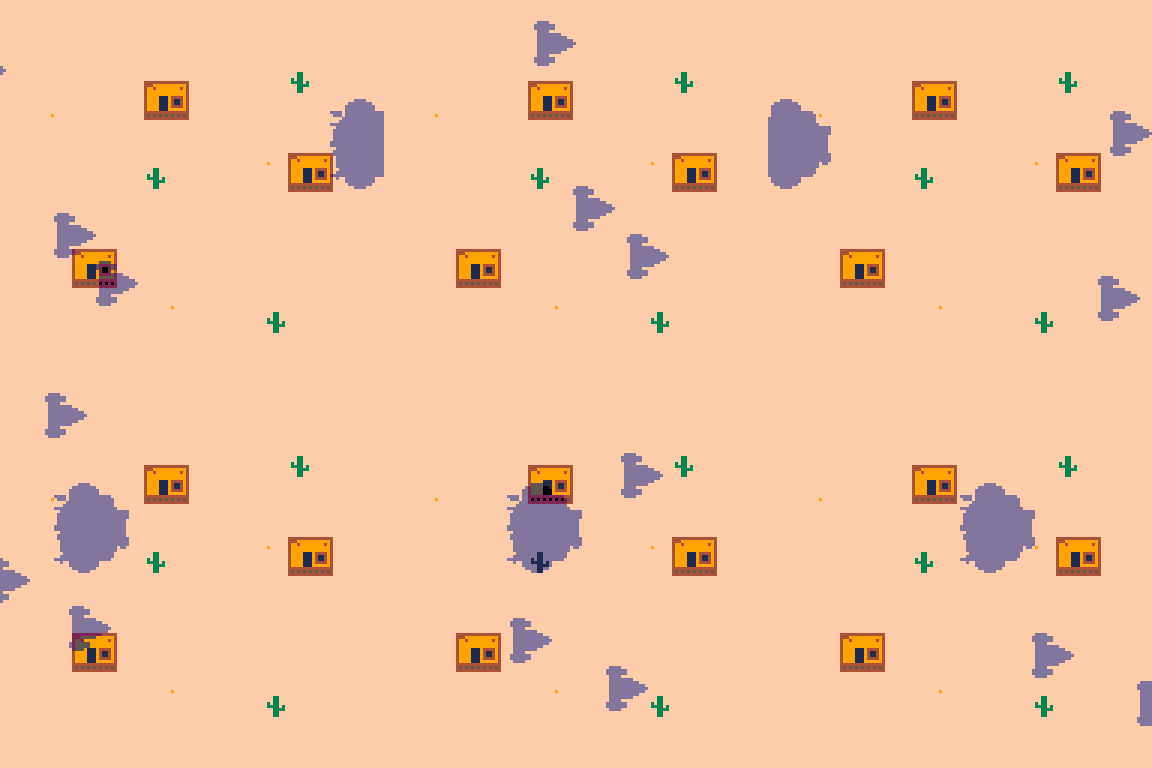
Algorithm
- draw scene
- copy screen to spritesheet
- copy screen to general use
- change to dark palette
- draw dark scene to screen
- reset palette
- copy original scene in general use to spritesheet
- copy dark scene in screen to general use
- load original spritesheet into screen
- swap spritesheet and screen (0x5f54..0x5f55)
- draw shadow sprites as white
- remap screen and spritesheet back to normal (0x5f54..0x5f55)
- copy dark scene from general use to screen
- set white to transparent
- draw the entire spritesheet to the screen
- reset everything
Cart

For "Method 4 Alpha", I recommend that the circles drawn to the spritesheet are made black. Making them white results in the clouds in Jelpi not being darkened.
Other than that little issue, this whole post is great!

@kevinthompson. For your game here is how I would do it in zero memory stages, this may be similar to yours but I think it leaves out a lot of busy steps.
- Draw your screen minus any sprites that create a shadow. This is a total overwrite of the entire screen.
- Prepare to draw main sprites.
- First stage, determine where sprites will appear and their shadow. Now use a function to plot darkened pixels where the shadow would be for all shadowed sprites.
- Draw remaining colored sprites using SPR() and SSPR().
- Draw information, ships remaining, score, etc.
- Show screen. Done.
You can find my version HERE:

@kevinthompson cpu at 20% (may vary with number of ships), using plain old masking.
gist:
- draw shadows (using 0xf color)
- copy to 0x8000
- draw game map
- mask screen & shadow mask, to spritesheet (using a poke4-aligned bounding box)
- change to dark palette
- draw shadows (from spritesheet)
- reset everything (using @carlc27843 trick)

Thanks Krystman for including a full text version of the tutorial!

This is using Method 3 but I inverted the palette numbers. Enjoy.
In case you don't know what I mean by inverting palette numbers, here's an example: if the color is a 5(brownish green), I changed it to 11(lime green.)

@bikibird Ah the "mid-point circle algorithm"! Looks like Method 3 is sorta a re-creation of that. It's just minimizing the SQRT statements and working from the mid-point out rather than from the edges in.

@StinkerB06 Yeah I talk about it briefly in the video. You're right, black is a better choice in this case. It kinda depends on the game and the effect you want to achieve.

@freds72 OOooh! Bitwise operators! That's a cool trick. Also, SSPRing each shadow indivdially back onto the screen helps a lot!

can be further optimized by only masking shadow regions, I’ll post an update

@kevinthompson The reload is expensive (~25% cpu). If you have RAM to spare you can copy the art spritesheet once at _init, e.g. memcpy(0xa000,0,0x2000). Then instead of the reload() do memcpy(0,0xa000,0x2000). Building on @freds72 first version it then runs at 27%.
(Great tutorial btw @Krystman!)

Ha! I finally find a way!
I used method-3 but do it 5 times.

There is something I can add to this that should be helpful with the calculations you guys are doing above.
Back on the Apple ][ game calculations like SIN(), COS(), and SQRT() were terribly slow, so many programmers including myself used ARRAYS to make up for them.
That is an array was made to cover the values needed for items where the values would stay the same and not need to be calculated each and every time.
For instance, while it could be calculated how to plot pixels in a vertical line through 6502 assembly, the code itself was slow and cumbersome. The easy solution ? Create a 2-byte table that contained the exact memory position of all 192-vertical lines on the Apple ][+ HIRES display.
While the final code was obviously bigger than just the one to calculate the memory location of the vertical line, it was considerably faster.
With this knowledge let me give you an example making use of the function SQRT().

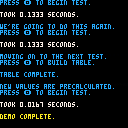
You can see there is a savings in time here.
So in fact I encourage] @zep to create an internal buffer for all calculations..
That is anytime a program is run a calculated value is saved into a table.
So let's say the first time you run your code you need the following: a=sqrt(sin(cos(z+8*m\o))) Then next time the same exact question arrives. Then instead of calculating it each time, as the first value was already calculated and stored into a table, the NEXT time the exact same set of circumstances come up, where z is a certain value and m is a certain value and o are a certain value.
Then Pico-8 would merely retrieve its value from an internal table WITHOUT having to calculate the complexity of this number again.
Doubtless there are literally megabytes of RAM space Pico-8 is not yet taking advantage of. With each numeric value only taking 4-bytes maximum, why not use that space to store values for calculations that are reiterated ? Obviously this would take zero memory of the Pico-8 memory system itself. It's extra memory ZEP would allocate for the Pico-8 OS itself.
This method would ultimately accelerate any and all Pico-8 programs, especially those that use complex calculations, and further it should be a revolutionary method of data recall that would exceed the expectations of any and all programming languages yet made to date.

@dw817 LOL you are assuming that the current speed of the SQR() statements is limited by the system. It is not. Pico-8‘s speed is one of the fantasy console contraints and has been deliberatly chosen.

@Krystman, you are mistaken. I KNOW Pico-8 has artificial constraints. I've been a Piconian for nearly 6-years now.
What I wrote was a suggestion to help other coders speed up their code by bypassing calculations. That is done through CODE and has absolutely nothing to do with changing Pico-8. Nothing. It further has nothing to do with the artificial limitations Pico-8 has.
We all adore the fact SQRT is slow, hell I bet there are hundreds of Piconians out there who wish it was even slower to really get the feel of authentic limitations - I feel for you buddy. It could be slower and no-one would complain.
We all love Pico-8's speed and it will be before a firing line before any of us want it to run any faster than it is. Its speed is perfect and that will never change so you need not every worry about improvements or upgrades - they are not coming - thank goodness for that.

Sorry, I just realized that sounded rude. Obviously, pre-buffering is a good technique.
It's just suggesting Zep use a pre-buffer to speed up functions he himself made slower intentionally was funny.
I wanted to add that buffering on the fly is probably not a good idea. It makes the execution times of function inconsistent. This is not something you want in in a videogame. If a FPS-critical function in your game sometimes takes 2ms and other times 10ms you need arrange the rest of your game that it still runs fine if it's 10ms just in case. And then if you do that you don't need the buffering.
What you want to do is to pre-buffer ALL possible values at the start of the program. A good candidate for pre-buffering was always SIN() because the range was limited. It was a good technique for software 3D rendering. SQRT() is not that great because the range is potentially unlimited. But in this case we use SQRT() in a very limited range. So yes, we can pre-buffer the entire "sqrt(1-cval*cval)" statement.
Result is like 0.18 vs 0.19. May be worth it if you are drawing a lot of huge circles.

I agree, @Krystman. Prebuffering all calculations would be done. And while my brain can wrap around some things - I'm not sure how to do that there.
For all I know I just described a computer that would be designed 10-25 years in the future that uses my method of data recall for maximum speed and efficiency at the cost of solid-state terabyte information retrieval on almost all possible calculations that we deem useful.
In any other language besides Pico-8, assuming you had a huge buffer to work with not just for calculations but for graphics, audio, and really anything else - the program would run at the exact same speed with or without the buffered data.
The only difference would be the CPU which would be less and less usage the longer the code ran since you would still be gearing everything for 30fps. The program itself would never run any other speed except 30fps.
Blitz for instance does this with the FLIP command. Write a program in there without FLIP() and everything will run top speed which is like thousands of frames per second, and peg your CPU usage at 100%.
However in Blitz if do use the FLIP command correctly, your program will run liquid smooth at exactly 30FPS and not even get higher than 1% CPU usage unless you start moving hundreds of graphic elements at which point it starts to go up but still maintain liquid 30FPS.
The 30FPS would only be broken if your CPU attempted to go higher than 75% usage, not configurable, so the highest CPU Blitz would ever run is 75% at the cost of skipping frames. Intelligently done I might add.

Hi, I realize this is a very old thread, but I was wondering if achieving the fake alpha effect is any easier in light of the new release and the inverted fill feature. I've been working with Pico for a few months now and I am still struggling to pull off the effect in my cart. I end up with a bunch of maps drawn over each other without perfect overlap.

Hi @8bit_gnosis your intuition is right on, this feature should be able to make circular clipping masks much easier under the right circumstances, especially now that we can directly map draw and sprite calls directly to areas of high memory. We'll be treating an area of high memory as a temporary spritesheet.
If you are not using high memory at 0x8000, we can draw to this area instead of the screen by calling poke(0x5f55,0x80) --draw to 0x8000. Then, you can go ahead and draw here what you would normally draw to your screen. After drawing everything you want to be inside your circle, draw the inverted circle over that area using a color that is treated as transparent by your sprite calls (obv 0 default).
Now you can call poke(0x5f55,0x60) --draw normal to reset that poke and go back to drawing to screen memory, and switch to using this area of memory as the spritesheet by calling poke(0x5f54,0x80) --treat 0x8000 as spritesheet and draw your scene (or part) from upper memory to the screen, probably with an sspr(0,0,128,128) or similar so that transparent color is masked out. Be sure to return your spritesheet mapping to normal after with poke(0x5f54,0x0) --normal spritesheet
I think that ought to work out for you, but I haven't tested it explicitly.
Edit: You can learn more about both techniques from the 0.2.6 release notes: https://www.lexaloffle.com/bbs/?tid=140421
Looking up old release notes posts can reveal some really interesting less-documented features of PICO-8!

Kozm0naut to the rescue again. @kozm0naut, I'm still having some trouble but I'll get it eventually. The poke commands make memcopy and memset unnecessary, right? Or should I still be using them in conjunction with everything else you suggested? Thanks again.

Edit:
Bizarrely, this cart doesn't seem to work on the BBS. I don't have enough time to debug that now but it seems to work in PICO-8. If anyone can spot an issue with how I'm using upper memory that might result in this, please let me know!
Original Post:
Here's a simple (if horrendous-looking) demo:
px=64 py=64 pw=24 ph=24 function _update() if (btn(⬅️)) px-=1 if (btn(➡️)) px+=1 if (btn(⬆️)) py-=1 if (btn(⬇️)) py+=1 end function _draw() --background cls(4) fillp(░) rectfill(0,0,128,128,3) fillp() --draw character to upper memory poke(0x5f55,0x80) --draw to 0x8000 cls() rectfill(0,ph/2,pw,ph,9) circ(pw/2,ph/2,pw/4,4) rectfill(0,0,pw,ph/2,10) pset(pw/4,ph/4,4) pset(3*pw/4,ph/4,4) --draw our inverted circle mask poke(0x5f34,0x2) --allow inverted fill circfill(pw/2,ph/2,pw/2,0 | 0x1800) poke(0x5f55,0x60) --back to drawing normal --draw from upper memory as spritesheet poke(0x5f54,0x80) --treat 0x8000 as spritesheet sspr(0,0,pw,ph,px-pw/2,py-ph/2) poke(0x5f54,0x0) --normal spritesheet end |
Not a very impressive implementation of the concept, but note that homeboy is composed mainly of rectangles.
Have a nice day!
[Please log in to post a comment]


