updated 9/3/22: Improved encoders with automatic escape-sequence insertion and updated tutorial.
Since getting into Pico-8, I've enjoyed finding ways to optimize my code and fit a lot in a small space, and this has included making Tweetcarts. Recently, I've found ways to cram detailed sprite graphics into a tweet and have made various animated demos like these:
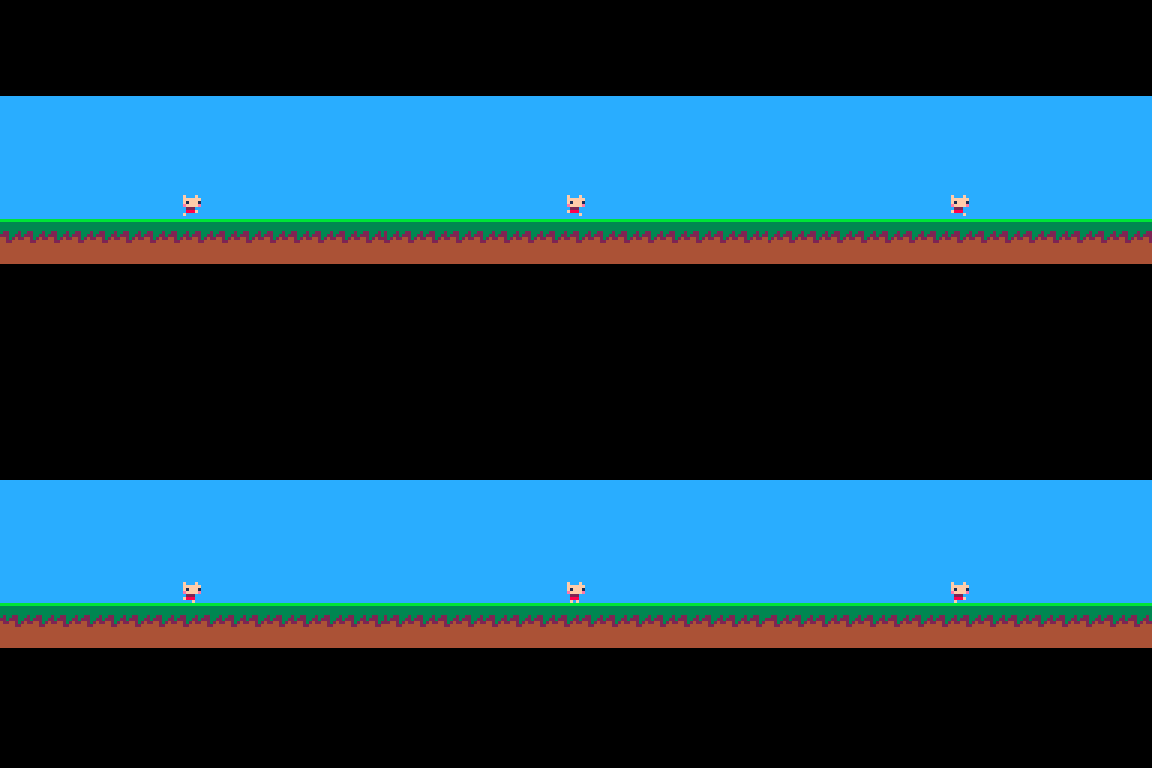
::_::cls()k=ˇ\2%5memset(26624,204,5^5)n=0for i=1,86do
v=ord("cS2C2Cr232$R$31b1CES2Kc32cKc2#2cK2S2c3K2C2c32KcC23nNfffff6%6565&E&%'575g'%ggggggggggg'",i)-35for j=0,v\16do
sset(n%8,n\8,v)n+=1end z=i%2sspr(0,z*(k*2+6),8,6-z*4,60,65-k\3+z*6)spr(32,i*8-ˇ%8-8,73,1,2)end
ˇ+=1flip()goto _ |
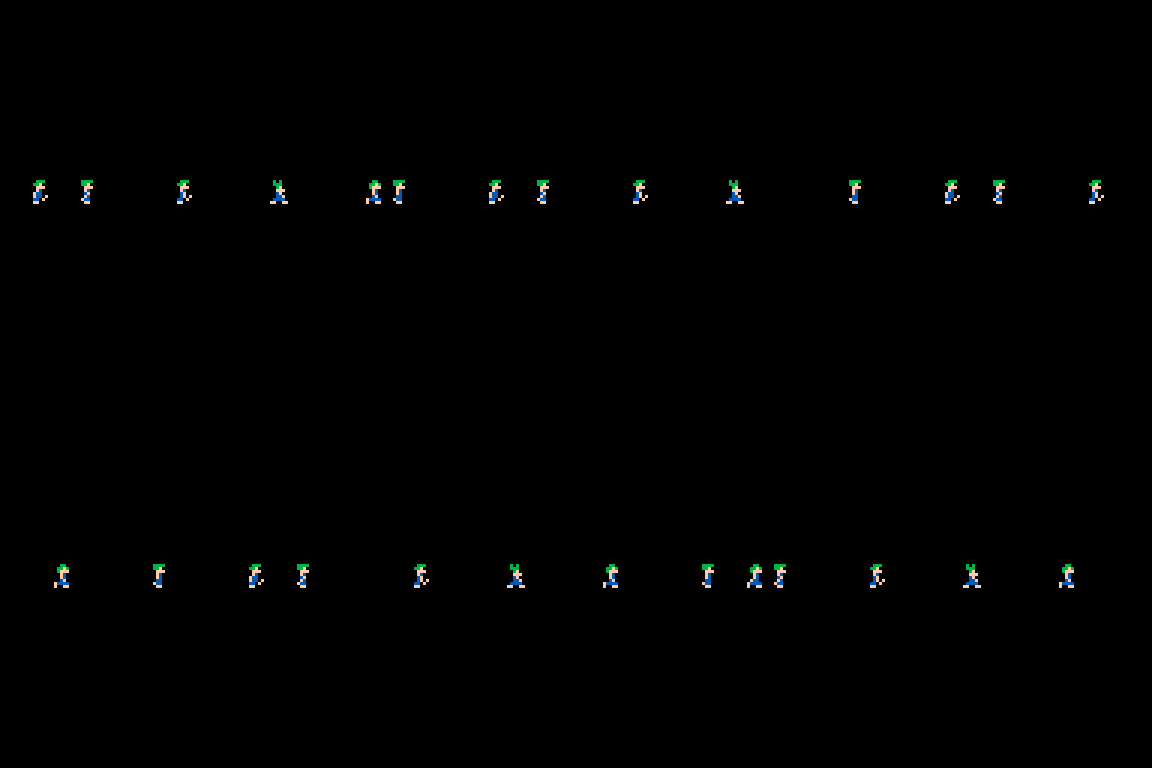
pal({-4,-5,15},1)::_::cls()for n=1,380do
sset(n%6,n\6,(ord("+%K%C&S2_$?$7(2_C%K.[2S$S$?$:(&2K-K&S2S$3&S$?$S&C-K&S2S$3&3V7/_#+%K%C&S23&307(2_C%K.[2S$S$3&:(&2K-K&S2S$S$3$?$S&C-K&S2S$?$?T7/_",n\3+1)-35)\4^(n%3)%4)
if(n<7)spr((ˇ+n)\1%8*16,(ˇ+n*32)%176-8,60)end
ˇ+=.5flip()goto _ |

k=139pal(5,k,1)o=ord::_::cls()for i=0,509do v=o(";C$);C$);C$);C#%+C#%;D$);C$2?D$)?L$2;C$2=S$1[S$A;C$);O(1;C&A/^%//T'#ES&,*&#;737####/+",i\6+1)-35sset(i%40,i\40,o("4?;;333",v\2^(i%6)%2*(i+120)\80))rectfill(0,i*8,k,i*8+7,o('55555::9',i-3))end
spr(ˇ\3%5,ˇ%k-8,64,1,2)ˇ+=1flip()goto _ |
People have shown interest in learning my techniques, so I decided to make this tutorial. The ideas here could come in handy for tweetcarts, entries for TweetTweetJam or Pico1K Jam, or just fitting more into a regular cart.
Fitting sprite data into strings
In order to fit as much information as we can into a few characters, we'll need to use data strings with the largest possible range of of values, and therefore the largest range of symbols from Pico-8's character set.
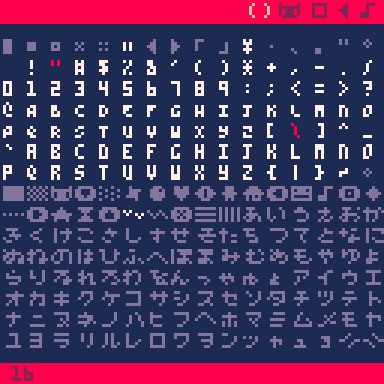
Here's a picture from my CHR Printer tool to illustrate. Characters 0-15 aren't pictured, as P8SCII control codes make printing them problematic, but all of them except characters 1,2,3, and 9 will count as two chars on Twitter. Of the remaining characters, 34, and 92 (shown in red) require an extra backslash character placed in front of them in a string, those which count as two chars on Twitter are shown in blue, and those that count as one are in white. This means the optimum range is the span of 92 characters from 35 (#) to 126 (~).
Alternately, if you're not going to post your code to Twitter, such as in the case of the Pico1K Jam, you can use characters 0-255, and you don't need to worry about any counting as 2 chars, though symbols 0,10,13,34, and 92 will still require an extra backslash character, which the encoders below will add automatically.
Important: Since the range of characters we'll be using includes those for Pico-8's Puny Font, Pico-8 must be put into "puny font mode" by pressing ctrl+p before pasting your data strings into it, and you must be in puny font mode when copying from Pico-8 to paste into a tweet. I've had errors pop up many times because I forgot to do this. o_O
Anyway, to turn our string into values, we'll use Pico-8's ord() function, and since the optimal range of characters we can use for tweets start at #35, we'll need to correct for this by adding 35 when encoding. When decoding, we'll subtract 35, like this: value = ord(string,character)-35. If you're not posting to Twitter, you can pick your minimum starting value, for example, setting it to 16 to avoid the escape sequence characters needed for symbols 0,10, and 13, or just setting it to 0 for the full range of characters.
Now we can find the maximum number of pixels that each string character can hold. So far I've used two different methods for encoding pixels into characters: directly encoding values for a number of pixels, or a simple version of Run Length Encoding (RLE). RLE is more efficient for sprites with lots of single-color spans, while direct encoding is better for more detailed graphics. For both types, there's a tradeoff between range of possible colors and how many pixels can be encoded within our character range. Here are some examples of different combinations:
Direct pixel encoding (92 possible characters)
6 2-color pixels (2^6=64)
3 4-color pixels (4^3=64)
2 9-color pixels (9^2=81)
1 16-color pixel (16^1=16)
Run-Length Encoding (92 possible characters)
1-46 2-color pixels (2x46=92)
1-23 4-color pixels (4x23=92)
1-10 9-color pixels (9x10=90)
1-5 16-color pixels (16x5=80)
Decoding strings
Once we've encoded our strings, we need to decode them back into images. The most straightforward method would use a few nested loops-- two outer loops for horizontal and vertical position, and an inner loop to iterate through the pixel values described by each character. It would take up a large chunk of a tweet just for these loops, though, so we've got to condense things. Fortunately, we can do this using math, specifically the floor divide () and modulo (%) operators. The modulo operator lets us loop through a specific range of values, while floor divison lets us switch to a new value at a specific point. Used together, these can have all kinds of non-linear effects and replace various conditional logic. Here, index_variable%width gives horizontal position and index_variable\width gives vertical position, and the operators are also used along with ^ to iterate through the color values in a single character for per-pixel decoding, or without to separate the color and run length values for an RLE decoder. In both cases, v equals the value derived from each character of the data string (represented by empty double quotes).
Here's the basic setup for a direct pixel decoder, where:
w = image width in pixels
h = image height in pixels
p = pixels stored per character
c = possible colors per pixel
for i=0,(w*h-1)do v=ord("",i\p+1)-35sset(i%w,i\w,v\c^(i%p)%c)end |
The expression v\c^(i%p)%c, which I guess I'll call the pixel value, is where v, the value of each character, is separated out into its component values for each pixel. For instance, if there are 4 possible colors, the value for each pixel will be found by separating out the multiples of 4^0, 4^1, and 4^2,-- AKA 1,4, and 16.
And here's the basic setup for an RLE decoder, where:
t = total characters in string
w = image width in pixels
c = possible colors per pixel
k=0for i=1,t do v=ord("",i)-35for j=0,v\c do sset(k%w,k\w,v%c)k+=1end end |
Here, the run length is stored as a multiple of the total number of possible colors, and the desired color is added to that value. At decoding, we get the pixel value v%c by using modulo, and the run length by using floor division. An inner 'for' loop then sets the specified number of pixels to the correct color.
Encoding sprites
Now we need some encoders to build strings for our decoders. The following two encoders work by scanning the top left portion of the spritesheet left to right and top to bottom, and storing either direct pixel values or color and length values in each character. They also automatically determine the largest color value present, and use that to determine how many pixels can be contained in each character. Since color 0 (transparent) is used, the total number of colors will be 1 greater than the highest color value, so if color 9 is used, there are 10 potential colors. If you aren't posting to Twitter and want to use the most possible characters, you can set 'min_val' to 0 and 'max_val' to 255 to use all 256 of them.
Direct pixel encoder
width=8
height=8
min_val=35
max_val=126
-----------
cls()
top_color=0
for i=0,width*height-1 do
 col=sget(i%width,i\width)
 top_color=max(col,top_color)
end
colors=top_color+1
p=0
while colors^(p+1)<=(min(256,max_val-min_val+1)) do
 p+=1
end
pixels=p

tbl={}
i=0
while i<width*height do
 val=0
 for j=0,pixels-1 do
  val+=sget((i+j)%width,(i+j)\width)*colors^j
 end
  add(tbl,val+min_val)
 i+=pixels
end

str=""
ch=0
for i=1,#tbl do
 val=tbl[i]
 nxtval=tbl[i+1]
 if i<#tbl and nxtval>47 and nxtval<58 and val==0 then
  str..="\\000"
 elseif val==0 then str..="\\0"
 elseif val==10 then str..="\\n"
 elseif val==13 then str..="\\r"
 elseif val==34 then str..="\\\""
 elseif val==92 then str..="\\\\"
 else str..=chr(val)
 end
end

function cprint(s,y,c)
 ?s,64-#s*2,y,c
end

printh(str,'@clip')
cprint('string pasted to clipboard',52,11)
cprint(1+max_val-min_val..' possible values',60,13)
cprint(colors..' colors/pixel',68,13)
cprint(pixels..' pixels/character',76,13)
cprint(#str..' characters total',84,12)
cprint(width*height..' values total',92,6) |
RLE encoder
width=8
height=8
min_val=35
max_val=126
--------
cls()
top_color=0
for i=0,width*height-1 do
 col=sget(i%width,i\width)
 top_color=max(col,top_color)
end
colors=top_color+1
max_span=min(256,max_val-min_val+1)\colors

tbl={}
local n,len=0,0
while n<width*height do
 local val,nxtval=sget(n%width,n\width),sget((n+1)%width,(n+1)\width)
 if nxtval==val and len<(max_span-1) then
  len+=1
 else
  v=val+len*colors
  add(tbl,v+min_val)
  len=0
 end
 n+=1
end

str=""
ch=0
for i=1,#tbl do
 val=tbl[i]
 nxtval=tbl[i+1]
 if i<#tbl and nxtval>47 and nxtval<58 and val==0 then
  str..="\\000" ch+=3
 elseif val==0 then str..="\\0" ch+=1
 elseif val==10 then str..="\\n" ch+=1
 elseif val==13 then str..="\\r" ch+=1
 elseif val==34 then str..="\\\"" ch+=1
 elseif val==92 then str..="\\\\" ch+=1
 else str..=chr(val)
 end
end

function cprint(s,y,c)
 ?s,64-#s*2,y,c
end

printh(str,'@clip')
cprint('string posted to clipboard',52,11)
cprint(1+max_val-min_val..' possible values',60,13)
cprint(colors..' colors/pixel',68,13)
cprint(max_span..' pixel max span length',76,13)
cprint(#str..' characters total',84,12)
cprint(#str-ch..' values total',92,6) |
Optimizing for encoding
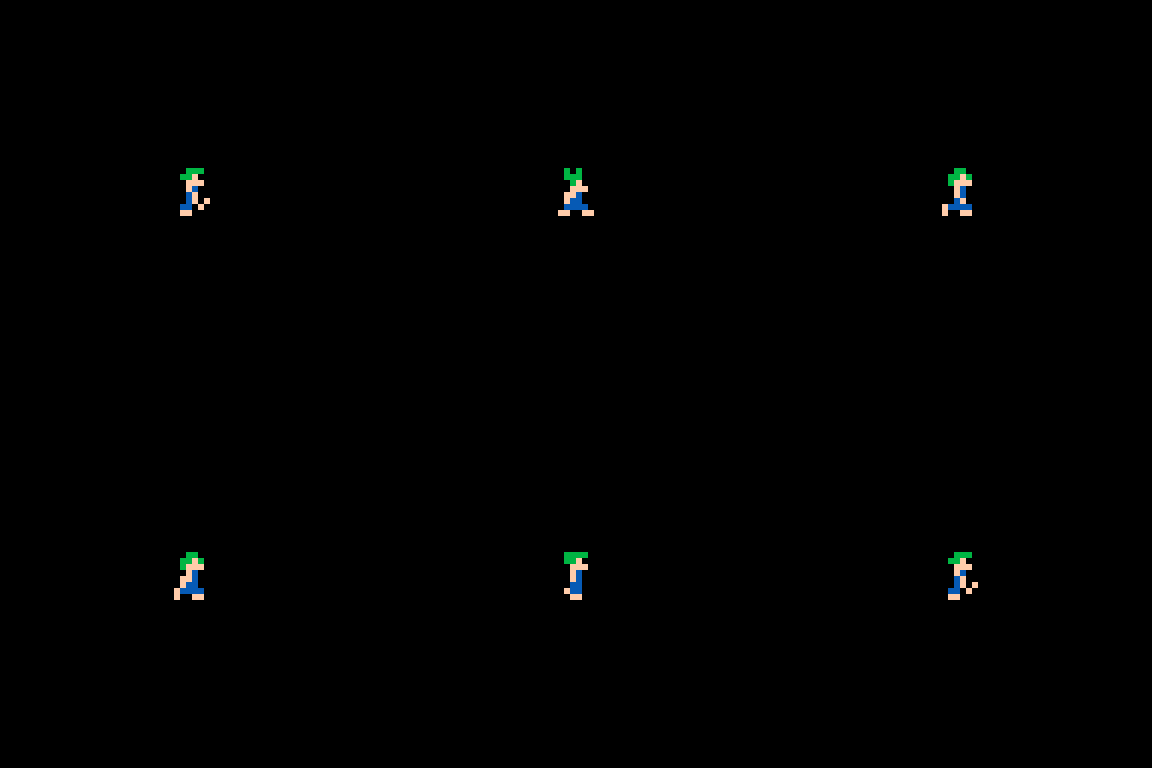
To make the most of your data strings, you'll need to optimize your spritesheet. For example, here are the raw spritesheets for the demos I showed earlier (well, half of the frames for the Lemmings one).
-
-
While Jelpi uses colors from Pico-8's full palette and works better with RLE, the Lemmings and Pitfall Harry sprites only use 4 and 2 colors respectively, and both are stored more efficiently using direct pixel encoding. Because of the math involved, if you want to restrict your palette to save space, you'll need to draw the sprites using the lowest-numbered colors. With 4 colors we have to use colors 0-3, and with 2 colors, we use 0 and 1. It looks weird, but we'll fix it later.
In addition to this, the Lemmings sprites aren't laid out horizontally as you might expect, but vertically. That's because they're only six pixels wide, so placing them side-by-side would take 1/3 more space than necessary. You'll also notice there aren't full frames of animation for Jelpi's run because there wasn't enough space. Because Jelpi's head is the same in each frame and only the position of the legs change, I just drew the head once and stored stacked animation frames of the 2-pixel high leg area, which will be displayed using the sspr(). Jelpi does move up and down a pixel during the run cycle, but that can be added at runtime by altering the vertical sprite position based on the current frame in the animation cycle using '%' and '\'. As you can see, even with efficient compression, it takes some thought and ingenuity to squeeze sprite graphics and animation down to a few hundred characters.
Sprite recoloring
If you restricted your sprites' color range to save space, you'll need to set the pixels back to the right colors. There are a few different ways to do this, but each one takes around a dozen characters or more, so experiment and compare how many chars it takes to recolor vs. just encoding the right colors in the first place.
Using the Lemmings sprites above as an example of recoloring indexed color sprites, I've come up with two main solutions for this. The first lets you recolor using Pico-8's standard palette, as you can see in the second lemming , and the second lets you use any mixture of colors from the standard and dark palettes, which can be a better fit, as seen in the third lemming.
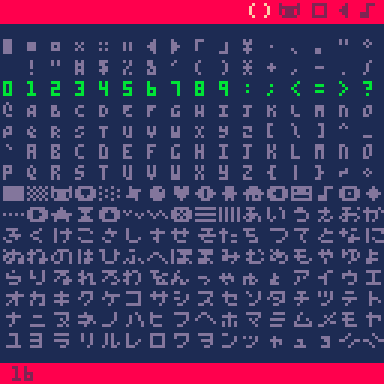
The standard color method uses a small extra string placed inside an ord() function to act as a lookup table. Place this into the sset() command in the decoder as the third input, with the pixel value v\4^(i%3)%4 used as the string position input. It will intercept the pixel values of 0-3 which the output of the string produces, and instead of using it to color the pixels directly, it will use the small string as a lookup table for the corrected colors. Note that you only need 1 less than the number of colors in your palette, (e.g. 3 string characters for a palette of 4 colors). This is because there's no entry 0 in the string, so color 0 will remain unchanged and transparent, which we'll want. As for which characters to use, you can use any which are in the correct column of the character set, though I like to use chars 48-63 as shown in green below, because it makes things more intuitive for 10 out of the 16 colors. Using these characters, our lookup string will have characters from columns 13,11, and 15, or "=;?".
-
for i=0,380do v=ord("",i\3+1)-35
sset(i%6,i\6,ord("=;?",v\4^(i%3)%4))end |
For recoloring using mixed standard and dark palette colors, the most compact way I've found is to declare a small table at the beginning of your code instead of using a lookup string. Like the standard color method, this won't effect color 0, just keep in mind that colors 1-whatever will have those new values wherever they are used. The dark palette colors are usually called by their color palette index number+128, so for medium blue we'd add 12 (light blue) and 128 for 140. I've found that the same effect can be had by just subtracting 16, though, instead of adding 128, which can save a character. So, to get medium blue, we can use 12-16= -4. Likewise, for medium green, we can use 11-16= -5.
pal({-4,-5,15},1) |
-
Now, the Pitfall sprites are more of a special case. They're one bit, or just 0 and 1. This saves space and allows 6 on or off pixels per character for a 92-character range, or 7 if you're using a range of 221 characters, but by default everything will just be dark blue. I've come up with two main methods for dealing with this as well. The first is just setting every 'on' pixel to a certain consistent value, and the second recreates the look of Atari graphics by recoloring the 1-bit sprite on every scanline.
For a starting point, this is what the code looks like to paint Harry in basic dark blue.
for i=0,509do v=ord("",i\6+1)-35
sset(i%40,i\40,v\2^(i%6)%2)end |
Changing the sprite color from dark blue to a single other color is very simple. Since every non-transparent pixel equals 1, just multiply the pixel value v\2^(i%6)%2 by the color you want. In the case above, I used 11.
for i=0,509do v=ord("",i\6+1)-35
sset(i%40,i\40,v\2^(i%6)%2*11)end |
For colors that vary per scanline, we'll need another small lookup string, but this time we need more math. Specifically, we'll take the pixel value and multiply it another expression, (i+120)\80.
for i=0,509do v=ord("",i\6+1)-35
sset(i%40,i\40,ord("4?;;333",v\2^(i%6)%2*(i+120)\80)) |
The 80 here represents twice the width of pixels of all our sprites, which are 40 pixels wide, and the floor divide means this value will count up by 1 every time i increases by 80, or every two rows, so each character in our lookup string will color two rows of pixels. If we replaced 80 with 40, we'd be able to color each individual row with a string entry. An offset (120) is added to i here because if not, no color would be assigned until two rows had been completed, cutting of Pitfall Harry's head (yikes...). The offset here is 120 specifically because that means the pixels will be set to the color of the first symbol only for the first row, (80 to get to 1, plus 40 so the value will change to 2 after 40 pixels, or 1 row), which is helpful because his brown hair is only one pixel tall.
Note, these recoloring methods should also with an RLE decoder, just make sure you have the right number of entries in any lookup strings and plug the pixel value of the decoder into them or multiply it by a constant in a similar way. The one possible exception is the per-scanline color trick, haven't tried that with RLE yet.
Animating Sprites
Finally, here are a few tips for animating your sprites in very few characters. First of all, since your animations will probably be just looping a set pattern of sprites, we can do that easily with the modulo operator (%). You just need a variable that increases or decreases every frame, what multiple of this you want the animation to update at, and a modulo value to make it loop through a certain number of animation frames. Here are a couple different ways of doing this for the Lemmings sprites, using this expression as the sprite number input in the spr() function.
t()\.1%8*16 |
The variable t() is an abbreviation for time(), and will give the time elapsed since startup. By itself this counts up tiny fractions of an integer every frame, and by 1 each second. Neither of these are useful, but floor dividing it by .1 means that the the animation frame will increase by the integer 1 every 10th of a second, or every 3 frames, which is a good speed. This expression is then run through %8, resulting in a sprite number that cycles from 0-7, but then we also need to multiply that by 16 to match up with the right sprite numbers (0,16,32,...), because the sprites are laid out vertically.
Since it might be a good illustration and starting point, here's a complete, simplified version of the Lemmings tweet.
pal({-4,-5,15},1)for n=0,380do v=ord("+%K%C&S2_$?$7(2_C%K.[2S$_$?$:(&2K-K&S2S$S$3&?$S&C-K&S2S$3&3V7/_#+%K%C&S23&307(2_C%K.[2S$S$3&:(&2K-K&S2S$S$3$?$S&C-K&S2S$?$?T7/_",n\3+1)-35sset(n%6,n\6,v\4^(n%3)%4)end
poke(24364,3)::_::cls()spr(t()\.1%8*16,29,28)flip()goto _ |
-
Next up, here's how the animation code works for Pitfall Harry.
spr(ˇ\3%5,ˇ%k-8,64,1,2)ˇ+=1 |
Here, we use a similar structure, an iterating variable run through a floor divide to determine animation speed, then a modulo to control the number of animation frames. Here, we have a new sprite used every 3 frames, and the there are 5 sprites in the run cycle. The same iterating variable is also used in the x-position, along with a modulo. 'k' here is an alias for the constant value of 139, and combined with a modulo, this is what makes Harry's horizontal position loop. The expression ˇ%k, which means position%139-8 makes his horizontal position cycle from -8 to 130, so he keeps running by.
As a side note, the symbol I'm using there, ˇ, is character 149 from Pico-8's character set, which you get by pressing shift+v, and looks like two little birds. I'm using it because it has some unique properties. It only counts as one byte in a tweet, but like the other glyphs, it has a default value before being assigned one (in this case it's -2624.5). Because we're running it through a modulo, it's exact value doesn't matter, so we don't need to intialize it, which saves 3 characters =).
Finally, Here's the code for displaying the Jelpi demo sprites, showing some more advanced tricks.
k=ˇ\2%5... z=i%2sspr(0,z*(k*2+6),8,6-z*4,60,65-k\3+z*6)spr(32,i*8-ˇ%8-8,73,1,2) |
To start, k gives the animation speed (new sprite every 2 frames) and cycle length (5 sprites). With the variable z here I create a value that cycles between 0 (for the head), and 1 (for the body). This is for two reasons. First, it lets me co-opt the same loop that I'm using to set the sprite pixels, to also display all the sprites. The single sspr() function here draws, by turn, both the head and body. The horizontal spritesheet position starting is always the same, but vertical is adjusted by the z variable to be either 0, or cycle through the values 6,8,10,12,and 14. z is also used to cycle sprite height between 6 pixels for the head and 2 pixels for the legs. For vertical position, this is increased by 6 for the legs to put them just below the head, but both head and legs are also modified by -k\3. This is what creates the up and down motion for the animation. Because k cycles between 0 and 4, the value will be -1 when k is >=3, so Jelpi will go up one pixel for the 4th and 5th animation frames. (It's so simple o_O).
The spr() function draws the ground layer by setting several sprites side by side at 8-pixel increments, and it creates the looping effect by performing a, you guessed it, modulo operation on the position variable, represented by our bird glyph, while 8 is also subtracted to make sure there's never a blank space on the left edge of the screen.
Wow, we got pretty far in the weeds there, didn't we? Hopefully you were able to get through that and it made sense. Anyway, that's all for now. I hope that gave you some good tools and ideas, and that you have fun squeezing sprite graphics down to an absurdly small size. I look forward to seeing what you come up with. =)

Thank you so much @JadeLombax for taking the time to post this detailed and well-explained tutorial.
As you say, this could indeed be very handy for #Pico1K Jam and Tweetcarts in general.
Looking forward to trying this out some time soon!
Thanks again 🤓

You're welcome,🙂
It took a while to finish, but I enjoy helping people understand complex ideas, and I'd like to see what others can do with this kind of thing. Please let me know if anything could use a better explanation.

Updated the sprite encoder code snippets to fully support all 256 characters with escape sequences and make them a bit easier to use, and also updated and simplified some of the explanations.

Trying to fit one of my older games into 1024 compressed bytes, of course based on PICO-1K.
I'm having issues getting this to work as I want it to. Here's the source sheet and encoder settings:
width=128 height=32 min_val=35 max_val=126 |

|
[128x32] |
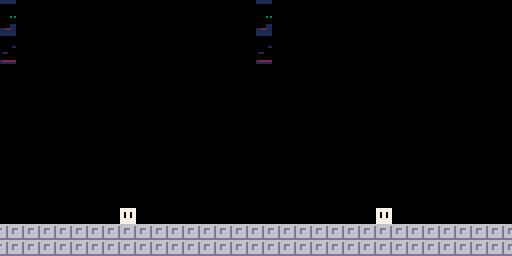
Here, it works perfectly if I only encode the first 8-pixel segment,
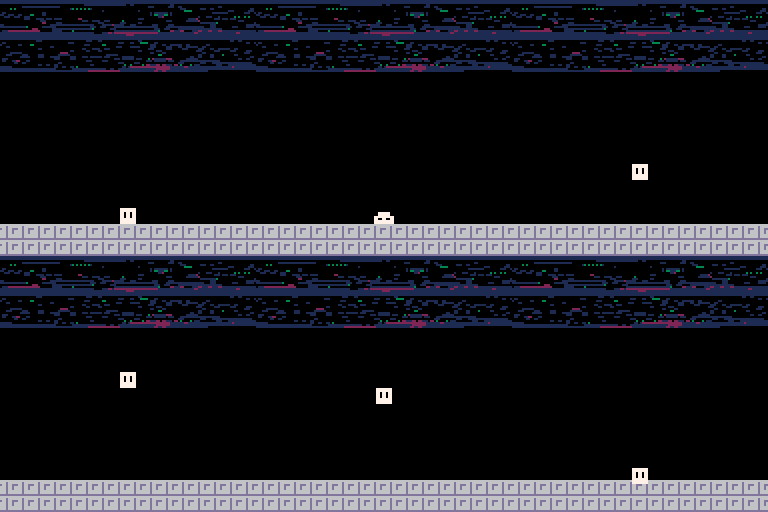
But when I do any more than that width, it gets messed up similarly to this image (full 128x32px sheet used here):
Also, if there's a better way to store 16x16 level chunks in this context, I'd like to know.

I tried compressing the picture myself and it worked alright. My guess is that you forgot to press ctrl+p to enter Puny Font Mode before pasting the string, I've done that many times myself. Anyway, here's a link:
I don't know how much it helps the compressed size, but you can try using different min and max values for the symbols, 35 and 126 are just for Tweetcarts, but you can use up to all 255 chars if you want to pack more in each symbol. On a personal note, I hadn't actually thought of storing levels quite like this, as it seemed a bit inefficient in terms of character count, but if we're dealing with compressed bytes, it could make more sense, so I'll have to experiment.
You asked about 16x16 chunks, I'm assuming you meant would there be a way to encode the level data such that one pixel would store a 2x2 chunk of tiles? if so, that would be possible if you used a series of memset or poke2 commands, but then you'd be limited to a course resolution if you used simple rle encoding like this. If you want to store more detailed chunks by referencing a simple value, then you're getting into metatile territory. That's the kind of thing I've been working on for my first Pico1K entry, but it's pretty complicated and would take a lot of explaining.

Oh right, I feel quite silly now; I completely forgot about puny font mode. It works :) (thanks)
And by 16x16 chunks, that image contains 16 level sections that get placed one after another to create an endless level.

Guess I'm not quite sure what you mean exactly. If you mean more efficient image compression, I think any combination of image width and height that totals 16 screens is going to take the same amount of bytes because of the way the compressor works. If you mean a better way of making the screens loop, here's some pretty efficient code to do that (91 compressed bytes including left and right movement control).
x=0::_::cls() x+=(btn()\2%2-btn()%2)*4 map(0,0,-(x%2048)) map(0,0,-(x%2048)+1024,-128) map(0,0,-(x%2048)+2048) flip()goto _ |

fantastic resource! I reference this often.
small PSA: I thought I was avoiding any ctrl-p issues by pasting my output into my text editor instead of into pico8 (I #include the code instead of editing directly inside pico8)... but today I ran into issues. I spent a while debugging and finally tracked it down: pasting was converting hexcode 0x09 into hexcode 0x20 for some reason?? very bizarre. I know 0x20 is space, what's 0x09? ah, looks like it's tab...
my editor was converting tabs into spaces, like it does for indentation. of course haha
so, I'm adding an elseif val==9 then str..="\\t" ch+=1 clause to the string-escape code. hope this helps others avoid the same problem!
[Please log in to post a comment]


