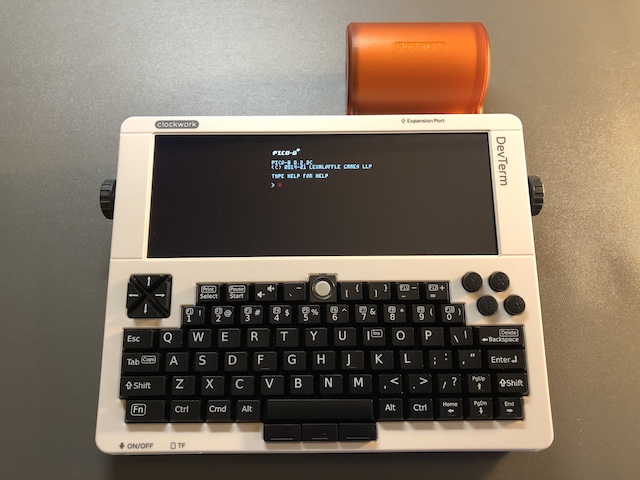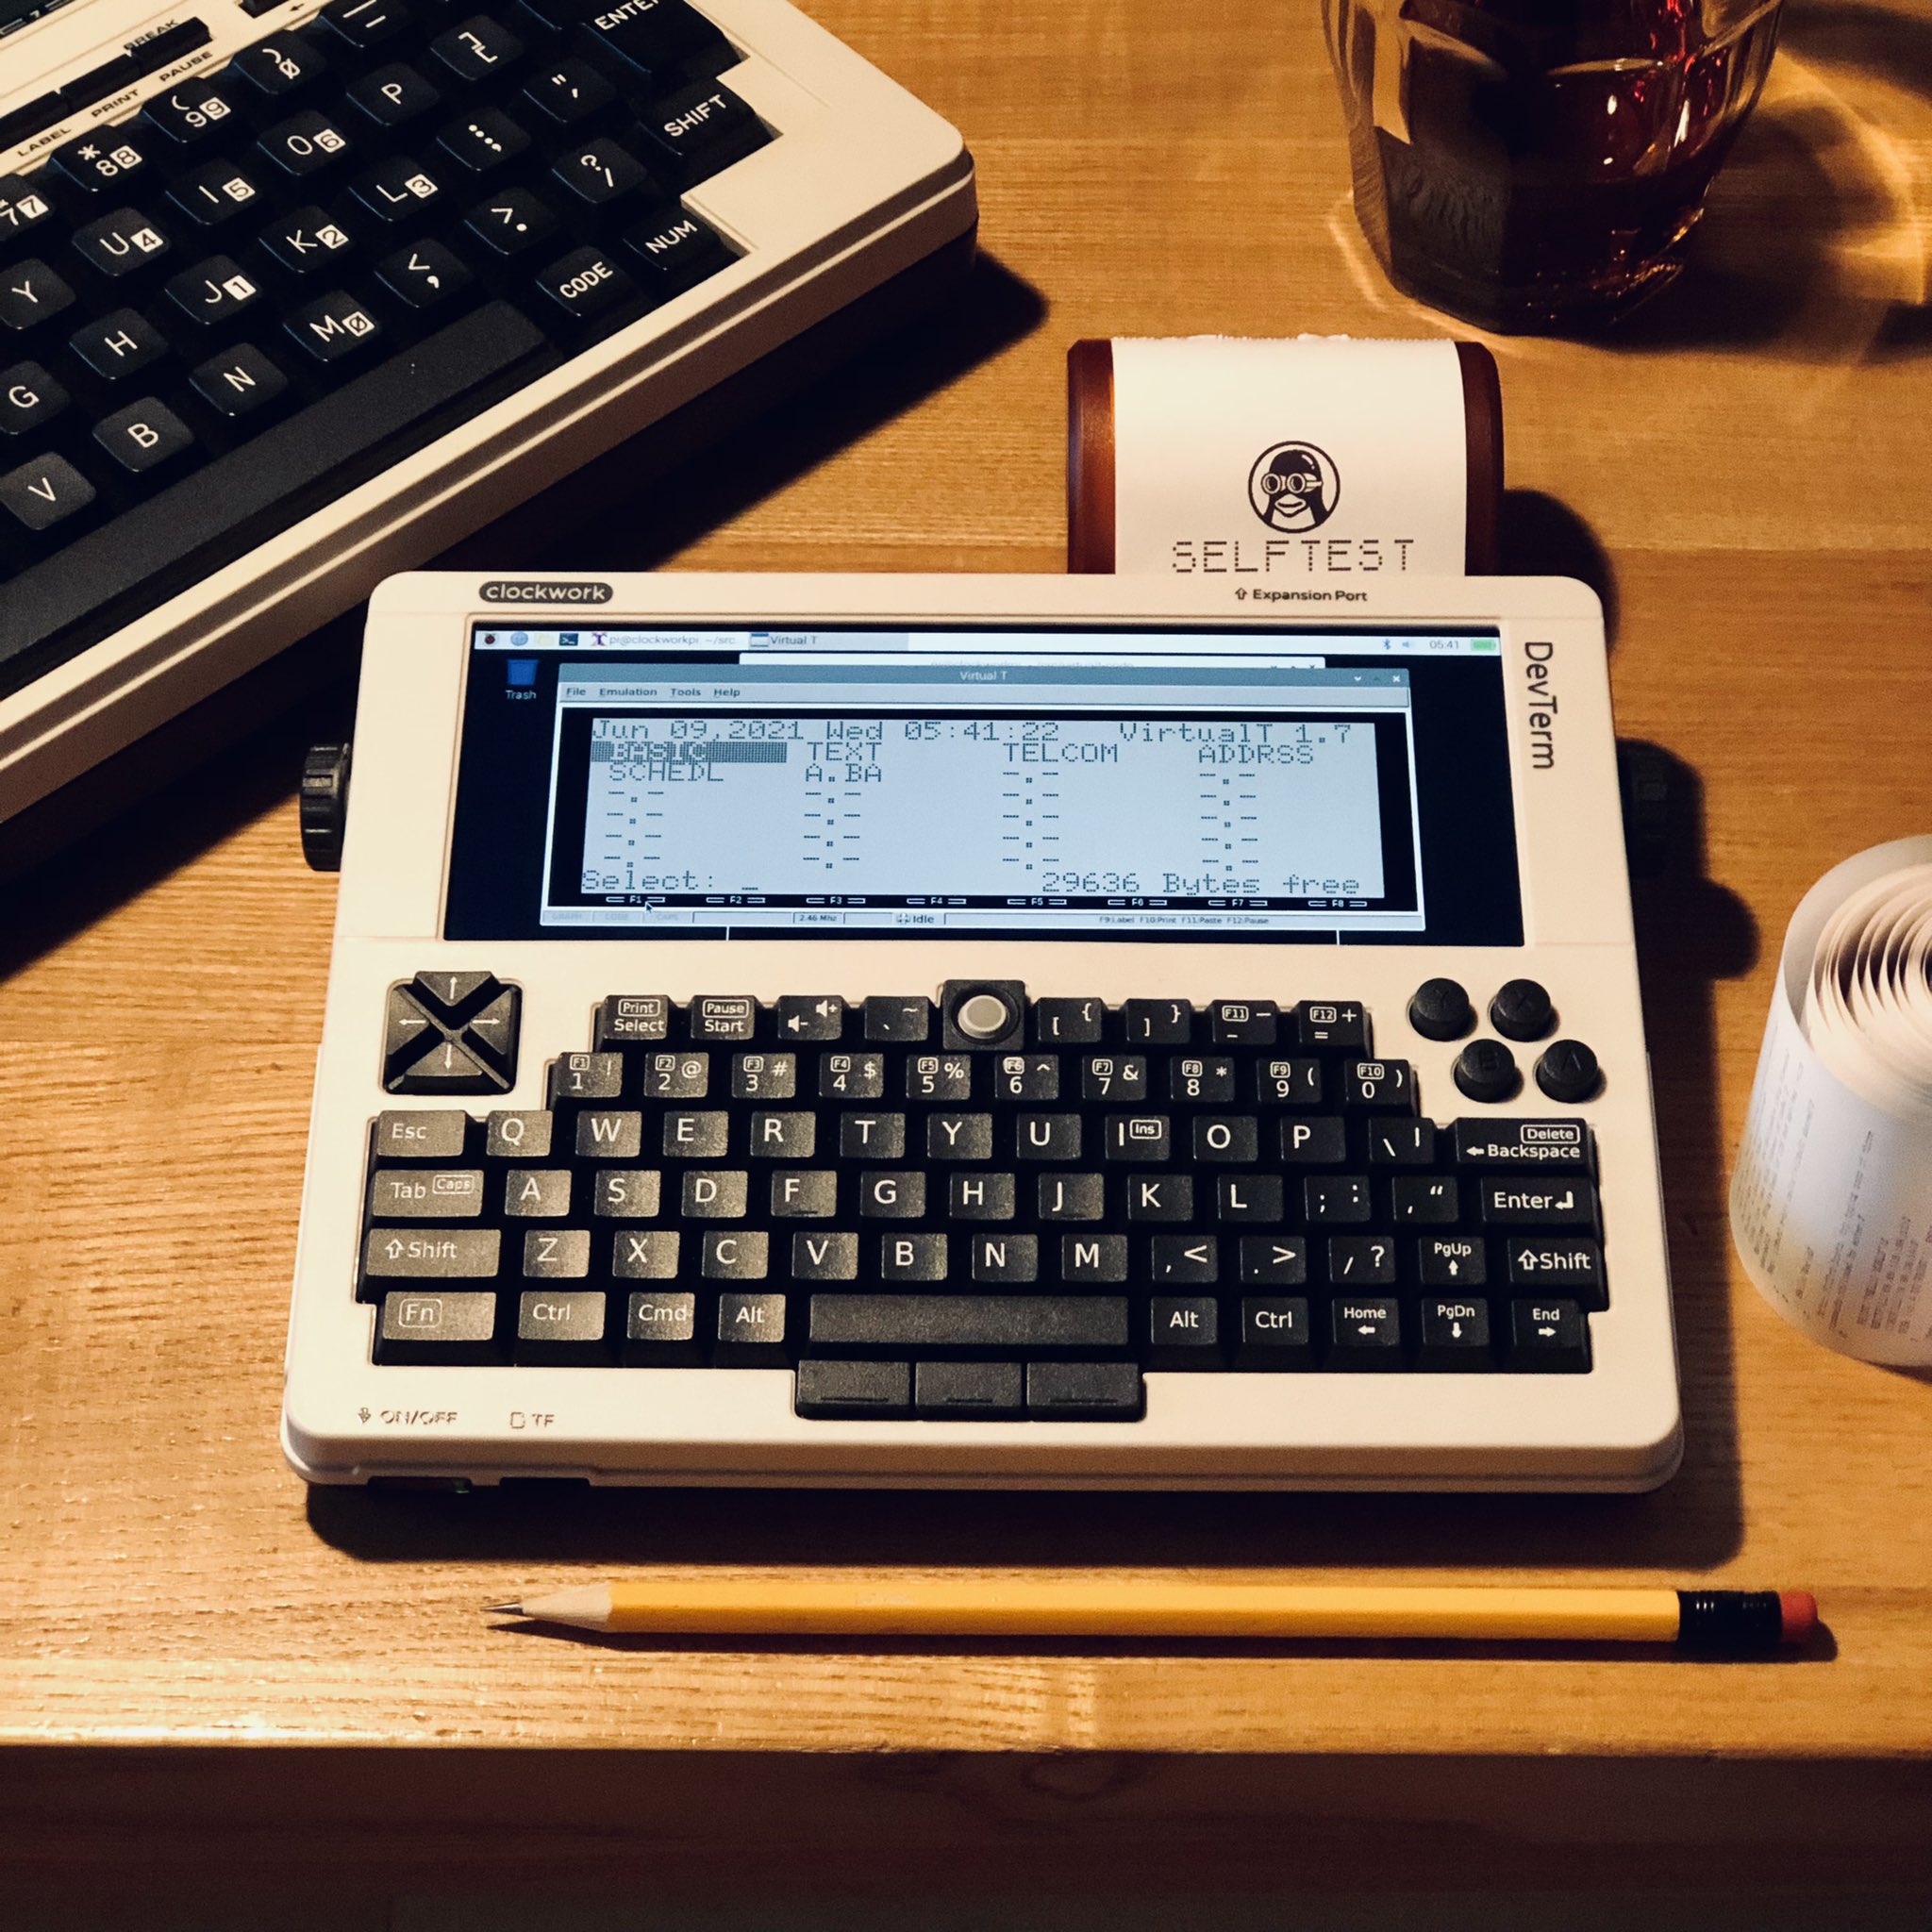
The Clockwork DevTerm is a small portable computer with ultra-wide screen, miniature keyboard, built-in gamepad keys, and a thermal printer. You can buy one configured with a Raspberry Pi core that can run PICO-8 (among other things). I recently live-tweeted my unboxing and set-up. This post is a summary of my review of the device, and PICO-8 set-up instructions.
Clockwork also makes the GameShell, a portable Game Boy-like gaming device. Both DevTerm and GameShell are designed as modular kits that you assemble. As with GameShell, the hardware designs and software for DevTerm are open source. The parts are high quality, the modules are well designed for reuse and expansion, and assembly instructions are easy and clear. The modular design, the breezy assembly process, and the iconic side knobs set the tone: this is your machine, and you can open it at any time.
Stock warning: As of this writing, you can buy the RaspPi version of DevTerm for $219 USD, but this does not include the RaspPi CM3+ Lite core. These seem to be difficult to find at the moment, probably due to the infamous pandemic chip shortage. DevTerm does nothing without this core, so know what you're buying.
You will also need two (2) 18650 rechargeable batteries, a USB charger capable of outputting 2 watts, and a cable with a USB-C connector. The batteries charge while inside the unit.
Both DevTerm and GameShell can run PICO-8. A while back I wrote a PICO-8 on GameShell tutorial that Clockwork subsequently semi-automated and built into their launcher app (thanks Clockwork!). DevTerm doesn't have PICO-8 specific software, but it runs PICO-8 cleanly due to being based directly on a Raspberry Pi core. I have included some details below.
DevTerm is a fully capable Raspberry Pi machine. The reams of RaspPi support material on the Internet make it easy to learn how to do things with your DevTerm. Whether the hardware is up to your favorite RaspPi tasks is another question.
The DevTerm hardware

(Photo credit: Clockwork)
The most important thing to know about DevTerm is that it is small: 7-3/4" wide, 6" deep, and 1-1/2" tall at its highest point. The wide screen and two-tone design of the case recall the vintage Tandy TRS-80 M100 portable (1983), which was famous for its comfortable keyboard. In terms of size, DevTerm is not that. Most official photos do not include other objects that indicate scale, though credit to Clockwork for posting this photo set back in June 2021. To get a sense of the size of the keys from the photos, look at the gamepad buttons in the upper right of the keyboard, and notice that the letter keys are about the same size.
As miniature keyboards go, DevTerm's keyboard is great. The keys are responsive for typing purposes and satisfying to press. I manage to use both hands to type, though at a fraction of my usual speed due to the cramped size. I have minor quibbles with the layout: the tab and enter keys are under-sized and dominated by the escape and backspace keys, and the meta keys are small and inset. In this form factor, you want to use meta keys for text editing and keyboard navigation of apps, so putting Ctrl fully left would have been useful.
For mousing, DevTerm has a trackball and several mouse-button keys. Performance is reasonable for selecting windows and icons. I found it unreliable for drawing art, but it'll do in a pinch. I'd pack a portable external mouse for extended sessions. With default settings, mouse travel is pretty slow and it takes some tedious effort to get the pointer from one side of the screen to the other.
Just above the typing keys are gamepad buttons: four directional buttons on the left, and four action buttons (ABXY) on the right. Here again the layout just misses expectations. I would prefer a traditional D-pad rocker to the bifurcated square thing, and the action buttons are not in a cross orientation. The gamepad buttons are more comfortable for playing games than the letter keys, so I'm glad they're there.
I made brief demo videos of typing, mousing, and gaming on the DevTerm keyboard so you can get a sense of it (Twitter will make you scroll down to see these, sorry):
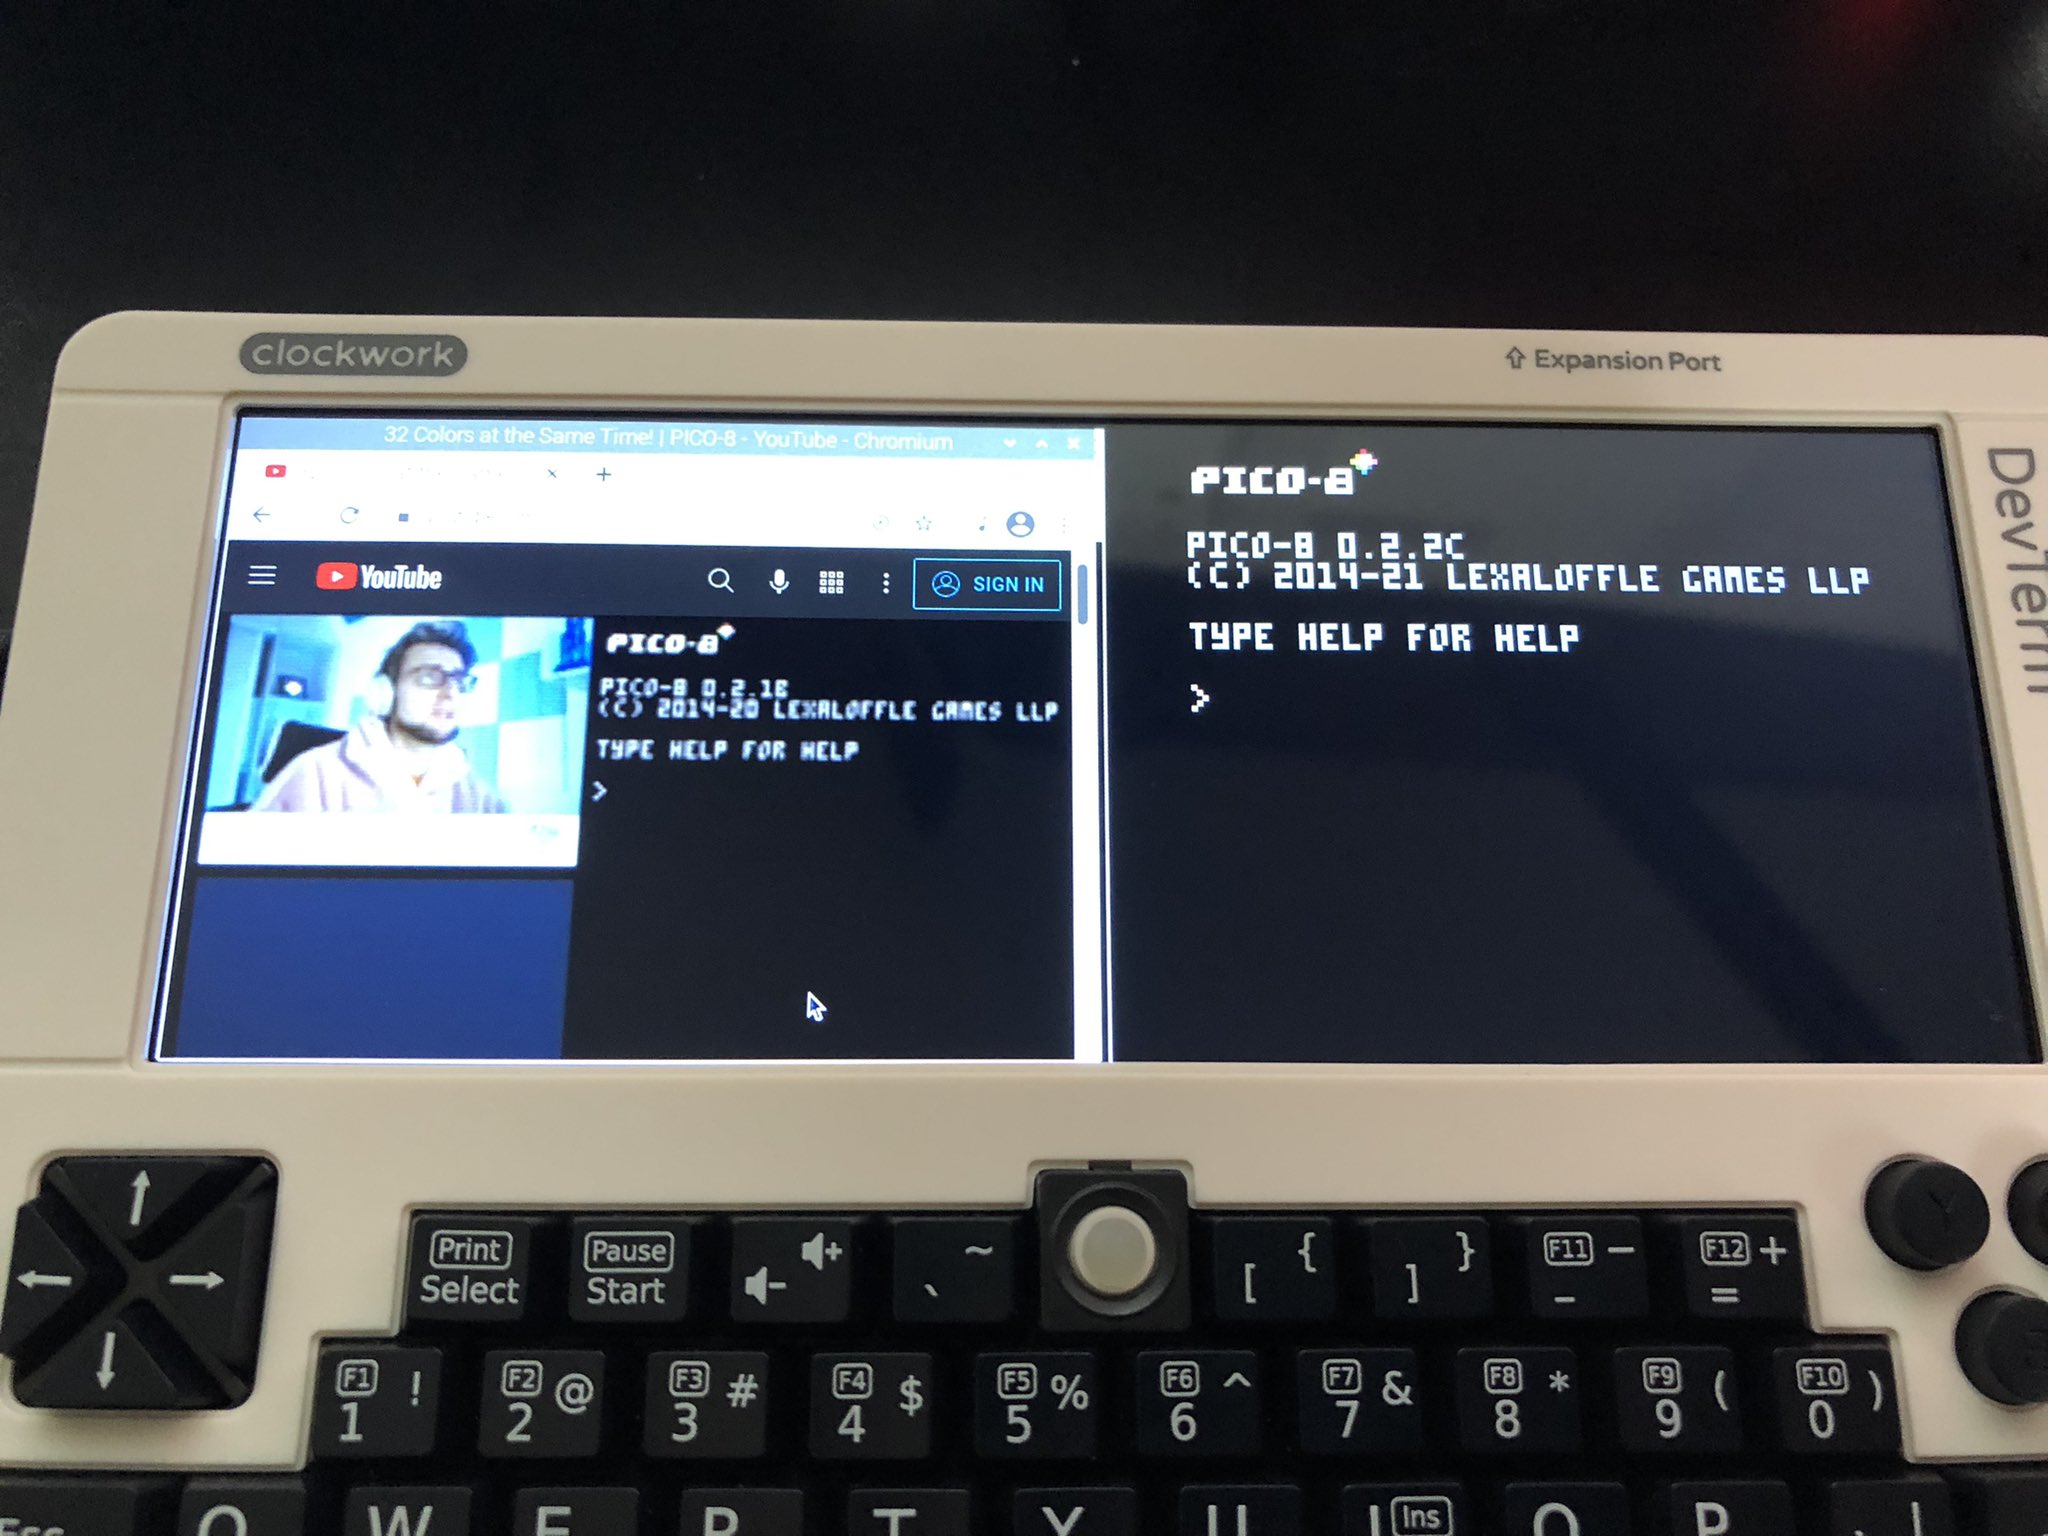
The screen is amusingly wide at 1280x480 pixels, enough for PICO-8 on one side and VS Code, a YouTube tutorial, or the Wiki on the other side. Viewing angles are good, including the most important angle of keeping the device flat on a table surface while seated. The unavoidable geometric distortion does make me wish it had about 10 more degrees of tilt. Maybe I'm getting old, but small type and low contrast color combinations are difficult to read. In a sense, PICO-8 is great for this because its letters are big and chunky compared to some apps at default font sizes.

I have two minor concerns with the display: glare and fingerprints. You'll want to control what light sources are in front of you that might reflect into your eyes. And you might want to carry a microfiber cloth to wipe away smudges. I wonder if a screen protector cut to size might help, though I'd worry about the impact on viewing angle.
You get three USB-A ports, a charging-only USB-C port, a micro HDMI port for an external display, and a standard 1/8" stereo headphone jack. I haven't tested the HDMI port. The headphone jack sounds great. It also has little built-in speakers, with the performance you'd expect for their size. There's no hardware volume control, but X Windows has a volume slider in the menu bar.
The power button is on the front, with subtle lights indicating whether it is turned on or charging. The power button is smart enough to shut down the machine without confusing the OS into thinking it crashed, like some RaspPi power switches do. The default start-up sequence is unceremonious with no Clockwork logo or splash screen, and you might think it didn't work for a few seconds, but after that it boots impressively quickly into X Windows.
All software lives on a 16 GB microSD card that's included with the kit and pre-formatted with Raspian Linux. I was very pleased that I didn't need to mess with writing an OS image to the card as with most Raspberry Pi set-ups. You can turn DevTerm on with USB power the moment you finish assembly.
For one last charming flourish, DevTerm includes a built-in 2-1/4" thermal printer. It takes standard calculator thermal paper. Clockwork has a CUPS driver for the printer that you can install so that it works with all standard Linux software. The distinctive orange paper holder is removable and has its own storage cap, and a door covers its access port. Once the novelty of the printer has worn off, you can disconnect it and pretend it isn't there.
DevTerm and PICO-8
Does DevTerm run PICO-8? Of course it does!
You install PICO-8 like you would with any other Raspberry Pi system.
- Open a web browser. (It's the "globe" icon in the Raspian menu bar.)
- If you purchased PICO-8 directly from Lexaloffle, visit https://www.lexaloffle.com/ and sign in with your account. Click your username to open the menu, select Downloads. Locate the PICO-8 Raspberry Pi version, then click "zip" to download. (If you purchased PICO-8 from Humble Bundle, Itch.io, or another vendor, follow their instructions to download the latest Raspberry Pi version.)
- Open the file explorer (the "folder" icon in the Raspian menu bar), then navigate to Downloads to find the file you downloaded. Double-click to open the .zip file, then click the Extract files button and follow the prompts to select a location for the pico-8 folder. I keep mine in the pi home folder.
To launch PICO-8, navigate to the pico-8 folder, double-click the pico8 icon, then click Execute. (The process for adding PICO-8 to the Application menu or the Application Launch Bar is a bit involved, so I won't go into that here.)
Alternatively, you can start PICO-8 from the command line by executing the pico8 command:
~/pico-8/pico8 |
Note: The rest of these instructions assume some familiarity with the Linux command line. To get to a command prompt, click the "terminal window" icon in the Raspian menu bar.
PICO-8 full screen and windowed modes
By default, PICO-8 opens to take up the full screen. You can press Alt+Tab to switch between applications while PICO-8 is running. You can close PICO-8 by giving it the SHUTDOWN command, or by pressing Alt+Space to open the window menu then selecting Close.
It is important to remember that PICO-8 hides the mouse cursor when it is full screen and in console mode or game playing mode. In other modes, it'll show the cursor, but only if the cursor is positioned in PICO-8's square display area. This is a special problem for DevTerm because the mouse could be anywhere on its wide screen, and the trackball moves it so slowly that it can be frustrating to find it just by moving it blindly. Instead, press Alt+Space to open the window menu and reveal the cursor, move the cursor into the PICO-8 area, then press Escape to close the menu.
To have PICO-8 open in a window instead of full screen, you can use a command line option when starting PICO-8, like so:
~/pico-8/pico8 -windowed 1 |
You can tell PICO-8 to open in a window every time by updating its configuration file. This file is located at the path ~/.lexaloffle/pico-8/config.txt. (It is not in the pico-8 directory with the app.) Open this file in a text editor, such as the pico editor (no relation) that's included with Raspian:
pico -w ~/.lexaloffle/pico-8/config.txt |
I recommend the following settings for running PICO-8 windowed on DevTerm. This puts the window on the right side of the screen and obscures the borders.
window_size 478 478 windowed 1 window_position 808 -26 |
To position the window centered on the screen with the window bar visible, use this window_position:
window_position 430 0 |
Save the file then exit the editor: in the pico editor, save with Ctrl-O and press enter when prompted for a filename, then exit with Ctrl-X. Quit PICO-8 if it is running, then restart it to pick up the new settings.
When PICO-8 uses the automatic window size (0 0) and position (-1 -1), Raspian opens a window that's a bit too big for DevTerm. Moreover, the window borders are obscured, so you can't drag them to resize! To reposition the PICO-8 window when this happens:
- Press Alt+Space to open the window menu, then select Move.
- Use the trackball to move the window down so you can see the window bar, then click the left mouse button to release the window.
- Drag a corner to resize the window.
Setting up the gamepad buttons
The DevTerm gamepad buttons work with PICO-8, but not out of the box. You must configure them with the SDL controllermap utility and PICO-8's controller configuration file.
Open this article in a browser on your DevTerm, then copy the configuration line from here:
03000000af1e00002400000010010000,ClockworkPI DevTerm,platform:Linux,a:b2,b:b1,x:b3,y:b0,leftx:a0,lefty:a1, |
Select the complete line (from "03000..." to "...lefty:a1," which might be hidden off the right side of the box as it appears on the BBS) and copy it to the clipboard (Ctrl+C from a browser). Back at the command prompt, open the PICO-8 controller configuration file in an editor:
pico -w ~/.lexaloffle/pico-8/sdl_controllers.txt |
Move to the bottom of the file then paste the line (Shift+Ctrl+V). Save and exit. Quit and restart PICO-8, if needed.
I generated the configuration line using the controllermap utility that comes with SDL. This is not installed by default. If you want to try this utility yourself, execute these commands in a Terminal window to download, build, and run the controllermap utility:
wget http://libsdl.org/release/SDL2-2.0.7.tar.gz tar -zxvf SDL2-2.0.7.tar.gz cd SDL2-2.0.7/test ./configure make controllermap ./controllermap 0 |
The last command runs the tool and opens a graphical interface. Press the indicated buttons for the directional pad and action buttons, and press Space for the rest. The tool prints the configuration line to the Terminal window then exits. Select the text in the terminal window, then use Shift+Ctrl+C to copy it to the clipboard. Paste it into the configuration file, as above.
Try it with Splore! Type SPLORE (or just S) at the PICO-8 command prompt and play some games with the gamepad buttons.
Setting up... the printer?
You can print to the thermal printer from any app that knows how to print. If you're using the version of Linux that came on the SD card included with the DevTerm, you already have the printer driver installed. You can test print a simple message like so:
echo "Hi DevTerm!" | lp |
To download and install the CUPS printer driver manually, run the following commands:
sudo apt -y install libcups2-dev git clone https://github.com/clockworkpi/DevTerm.git cd DevTerm/devterm_thermal_printer_cups make sudo make install lpoptions -d devterm_printer |
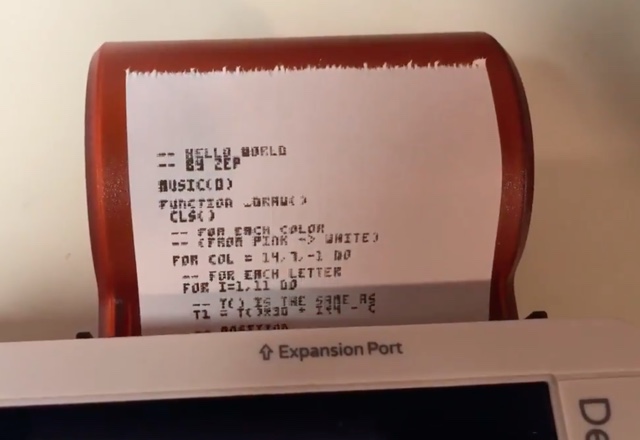
PICO-8 does not have any built-in printing capability. OR DOES IT?? (video)

... Not exactly. For this little hack I wrote a Python script that runs in the background and waits for you to EXPORT XXX.LUA.PNG from PICO-8. When you do this, PICO-8 generates a PNG image of the contents of the source code editor in the PICO-8 font and colors. The Python script does some processing of the image to convert it to black text on a white background, then sends it to the thermal printer.
This hack works even if the contents of the source code editor isn't actually code, so you could use it to print grocery lists or whatever from PICO-8. You can experiment with the script to get different results. I chose elements such as the scaling (180%) mostly for visibility in the tweet video. This method cuts off the page about 1-1/2" in.
A small warning: during my experiments I had the thermal printer trying to print large blocks of dark color (black and grey). Not only is it lousy at this—the paper advance is not very accurate—it tends to trip the power fault circuitry and shut off the DevTerm. Stick to text and sparse images, or at least save your work.
- To list pending print jobs: lpstat -o
- To kill a specific print job: cancel <jobid>
- To kill all pending print jobs: cancel -a devterm_printer
Conclusion
It's difficult to describe the Clockwork DevTerm as much more than a toy. But for nerds like me (and probably you) it's a fun toy. I'm looking forward to carrying this thing around town and doing nerdy nonsense with it. I like that it's a non-serious computer, so I'm encouraged to do non-serious things with it.
The non-seriousness of the thing makes it a serious contender as a PICO-8 development terminal. I wouldn't write prose on this keyboard, but I'd punch out short bursts of code and iterate on gameplay. The trackball isn't enough for major pixel art or map design, but add a portable USB mouse and you're good. It feels just right for PICO-8 music, if you use headphones. Now if only I could take the PICO-8 devkit tabs and spread them out across the ultra-wide screen...
There are dozens of RaspPi-based computer kits targeted at kids. I own several. I'd put DevTerm near the top of the list, if only because I can imagine someone with smaller hands getting more out of the keyboard. And unlike some others, DevTerm actually holds up as portable, compact, and even robust.
I'm excited about expansion capabilities. The open modular design is always rife with possibility, though it takes outside commitment to realize that potential. With a ribbon cable from the RaspPi GPIO connector out the back to a breakout board, DevTerm could become the centerpiece of a fully portable electronics experimentation kit, or a physics/biology/meteorology data gathering kit, or a computer architecture kit, or an appliance repair kit, or a wearable tech programming rig. Or you can use it to make games, that's good too.
For more photos including unboxing and assembly steps (and a few minor misadventures), see this Twitter thread.

I followed your whole Twitter thread with delight, and am even more delighted to see it written up here. I am not particularly handy at assembling things (pretty much the only reason I don't have a Picade), so this is probably not for me, but I want to see ALL the videos from anyone who does PICO-8 dev on one of these :).
I also love the shoutout for the TRS-80 keyboards of yore. I don't know that there have been better ones since. High school me learned some blazing fast two finger typing on those!

This is fascinating. Thank you for the Twitter thread and this write up. It answered a lot of questions I had about this device.

I linked to this thread in the Clockwork Pi wiki but I was wondering if it would be okay to directly copy some of the instructions for configuring windowing, the gamepad, and the printer to the wiki?

@ksbex Go for it! And thanks!
We should fold in info from this ARM64 thread too, as it applies to the non-RaspPi ARM cores. I don't have one myself to verify but it sounds like this does the trick on those newer cores:
sudo dpkg --add-architecture armhf sudo apt-get update sudo apt install libudev1:armhf libsdl2-2.0-0:armhf pico_dyn |

Thanks. The ARM64 post was what made me revisit the wiki. I had already added a link to your post before, and then when I added that arm64 stuff, I thought I should put your actual instructions instead of the link, but it was such a detailed post, it felt like it might be too much just plagiarize without permission.

The DevTerm R01 is now starting to arrive with folks, I don't suppose there's a chance that Pico-8 could be compiled for ARM RISC-V is there...? although at the moment I think libsdl2 is a challenge on these since there's a requirement to use a specific version of mesa.

There are some hints on how to get the ARM build running here: https://www.lexaloffle.com/bbs/?pid=71974 Notice the armhf signifiers.
I don't remember all of the details and I do remember it being difficult to only get a partial result.
[Please log in to post a comment]


