Recently I've been thinking about those old Gameboy color cartridges that had built-in rumble-packs.
I wanted a rumble-pack for Pico-8, and, by a happy coincidence, I had a bunch of tiny rumble-motors left over from when I was prototyping VR accessories for a former job!
So here's my first draft of PICO-8 Rumble :
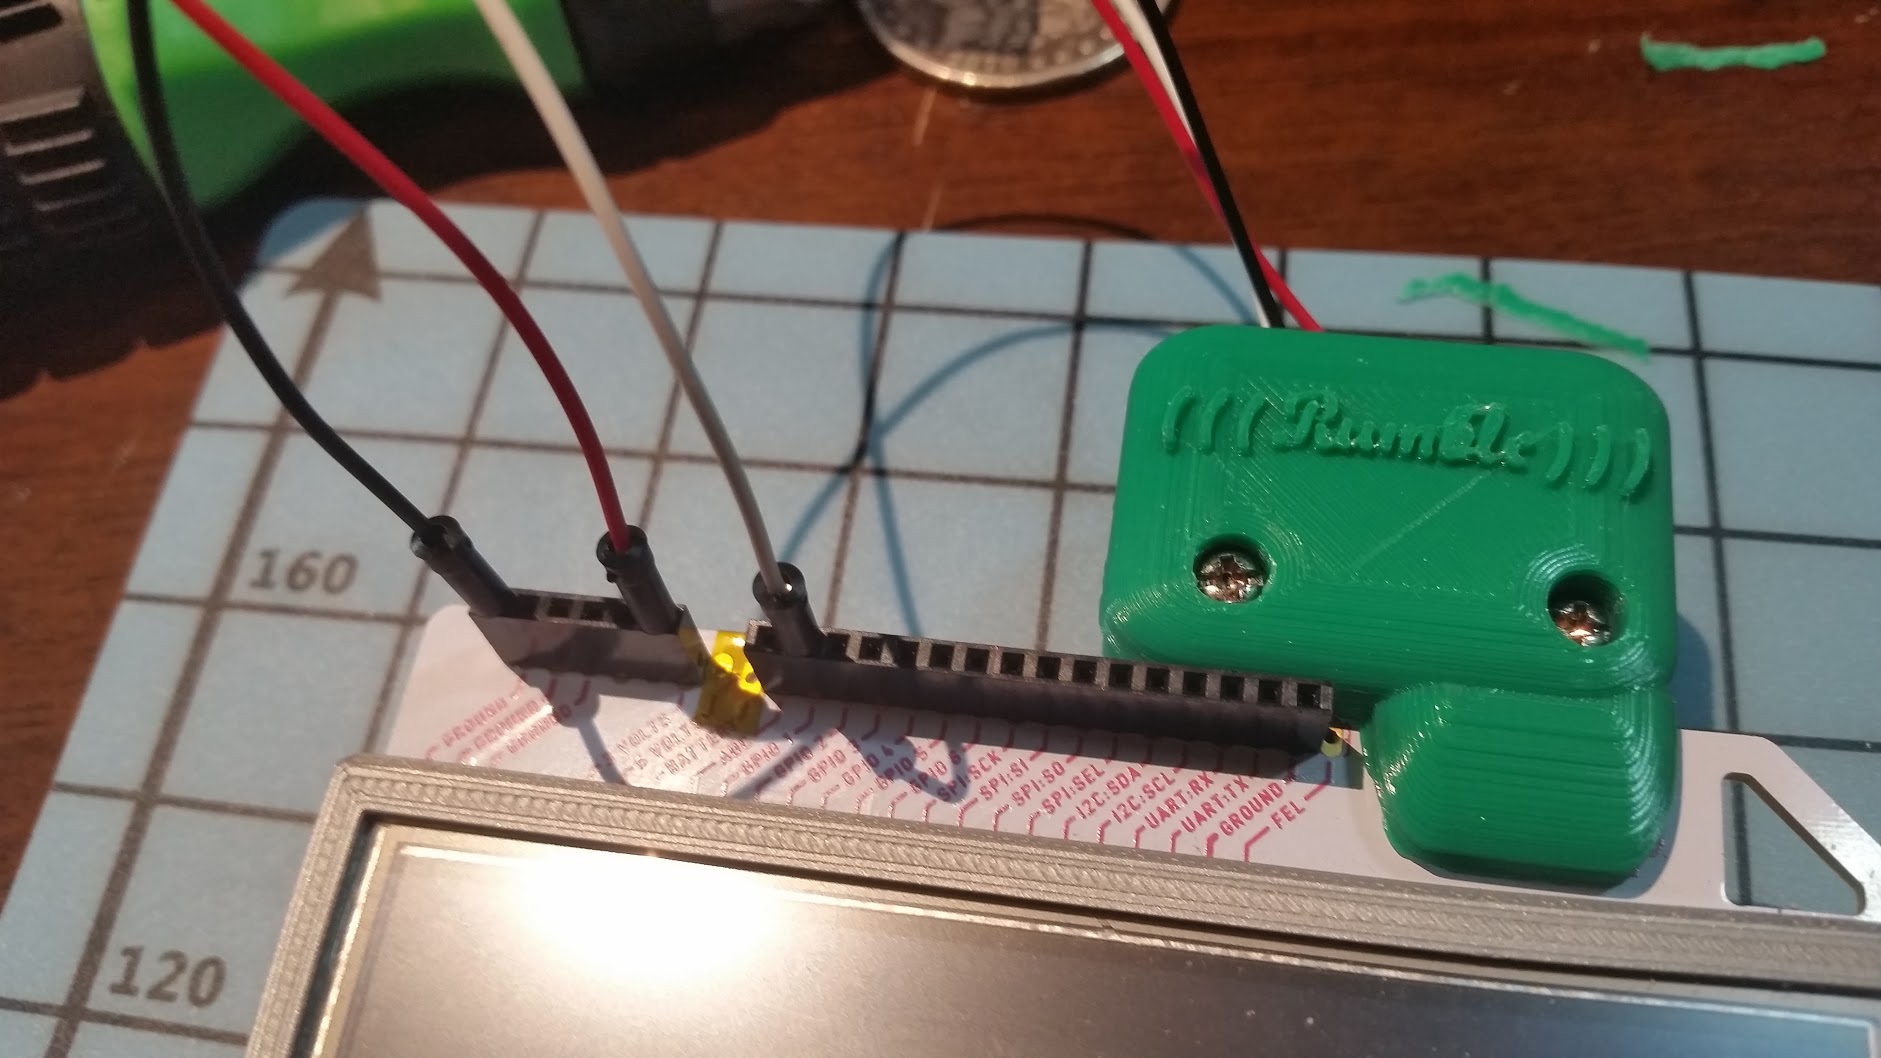
Here's a video of it in action. Obviously you can't feel the rumble through a video, but I put a microphone right up against the rumbler. Actually, I think I put it too close, this video is LOUD.
https://photos.app.goo.gl/jnz5LUBMB16Ds9576
Here's how I did it.
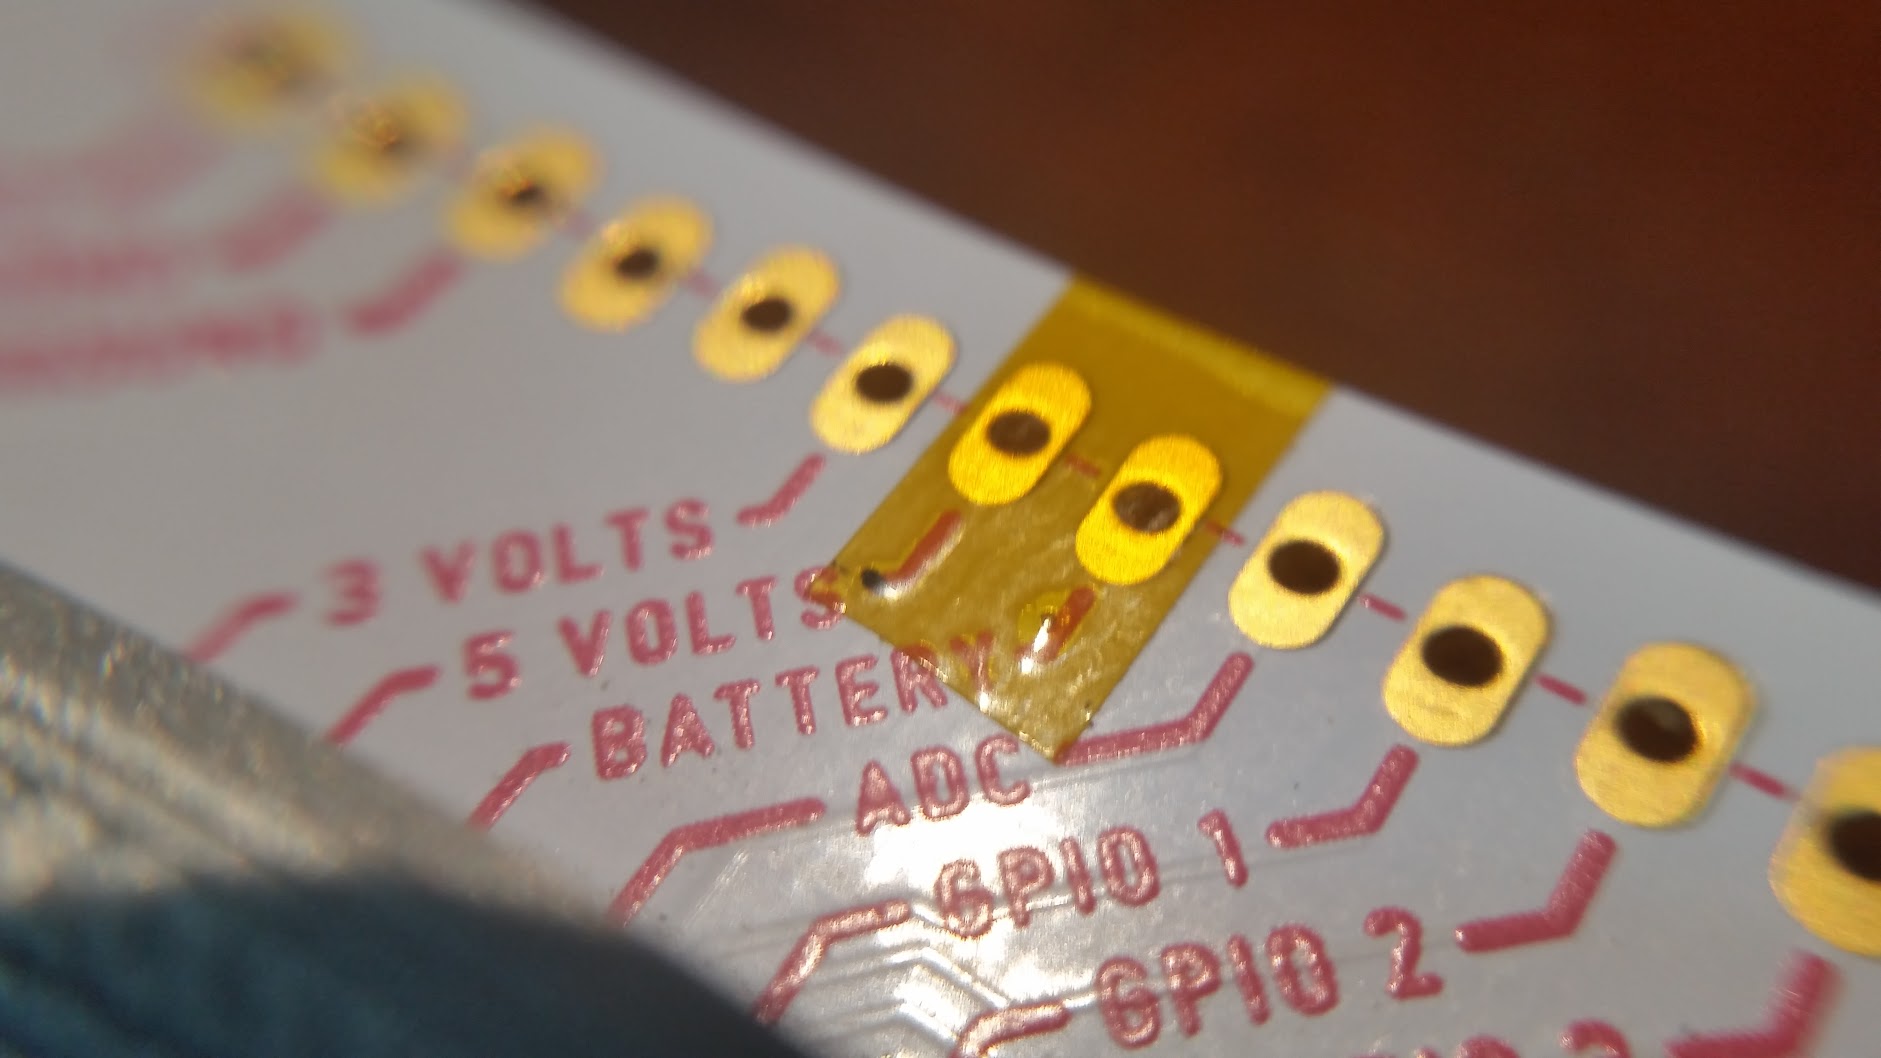
Step Zero : If you've got a pocketCHIP, and especially if you intend to fool around with the GPIO pins, I strongly recommend putting insulating tape over the 5V and BAT pins. If you accidentally connect one of these pins to any of the other pins you could instantly fry your CHIP! They even stay active when the device is off!
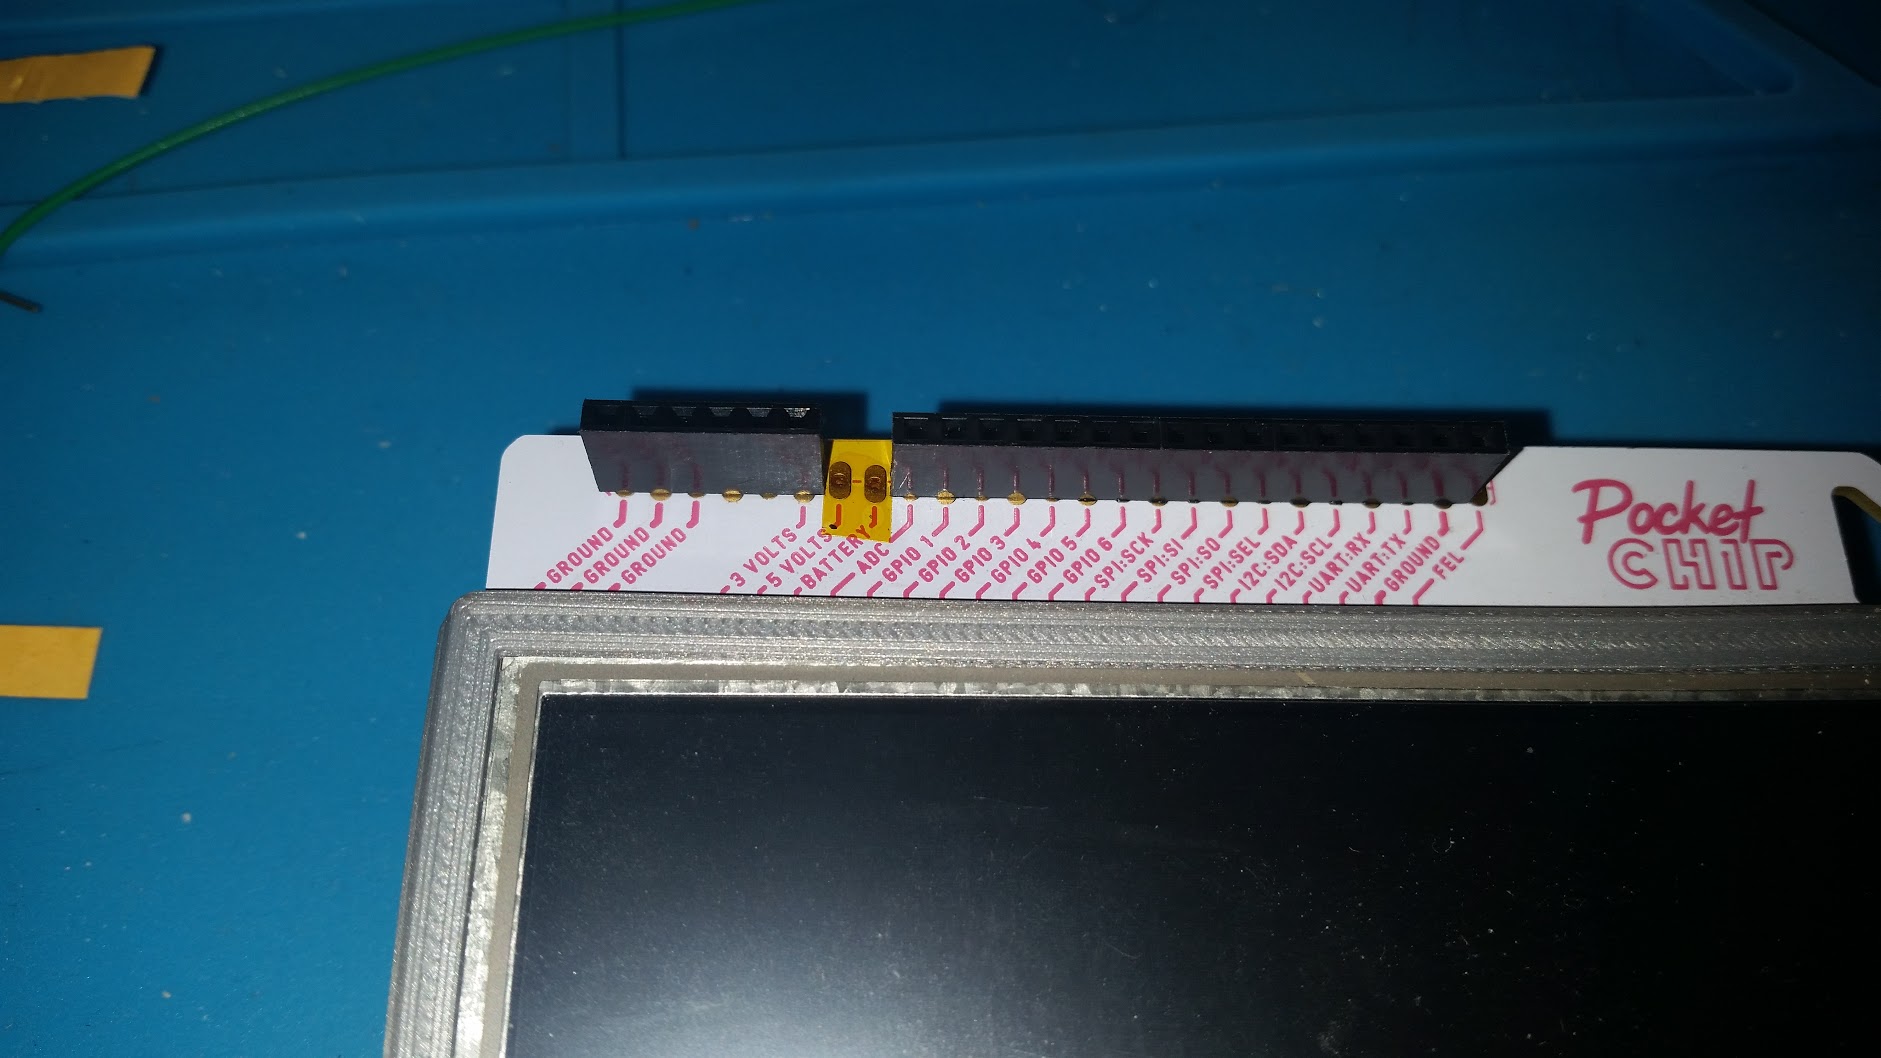
Step one : I added header sockets to my PocketCHIP. This is pretty easy if you're even a little competent with a soldering iron. A 6-pin header and a 16-pin header fit nicely and cover the pins of interest. It leaves out the FEL pin, but you'll probably never need that.
Step two : The circuit.
I'm really bad at electronics, so anybody who knows about this stuff please double-check my work here.
The GPIO pins are normally high, so I've designed this circuit to rumble when the pin goes low.
The diode and capacitor are to protect the pocketCHIP from any interference or voltage spikes caused by the motor. I'm not sure if a motor this tiny needs that, but better safe than sorry.
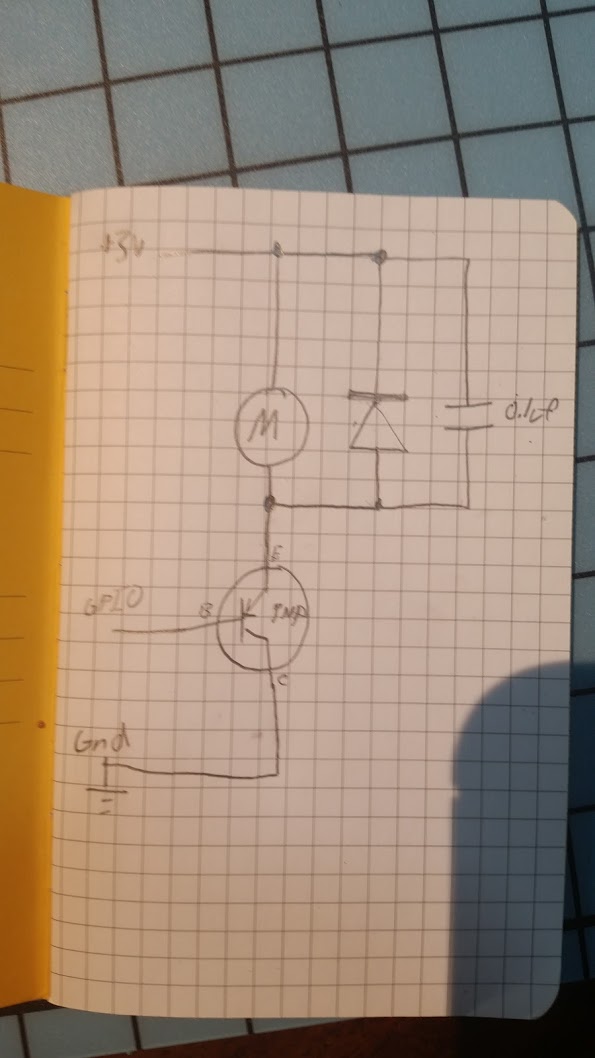
I tested this on a breadboard and it worked great.
Step Three : The casing
I'm also pretty bad at designing objects for 3d printing. But TinkerCAD makes it easy to make something functional, even if it's a bit ugly.
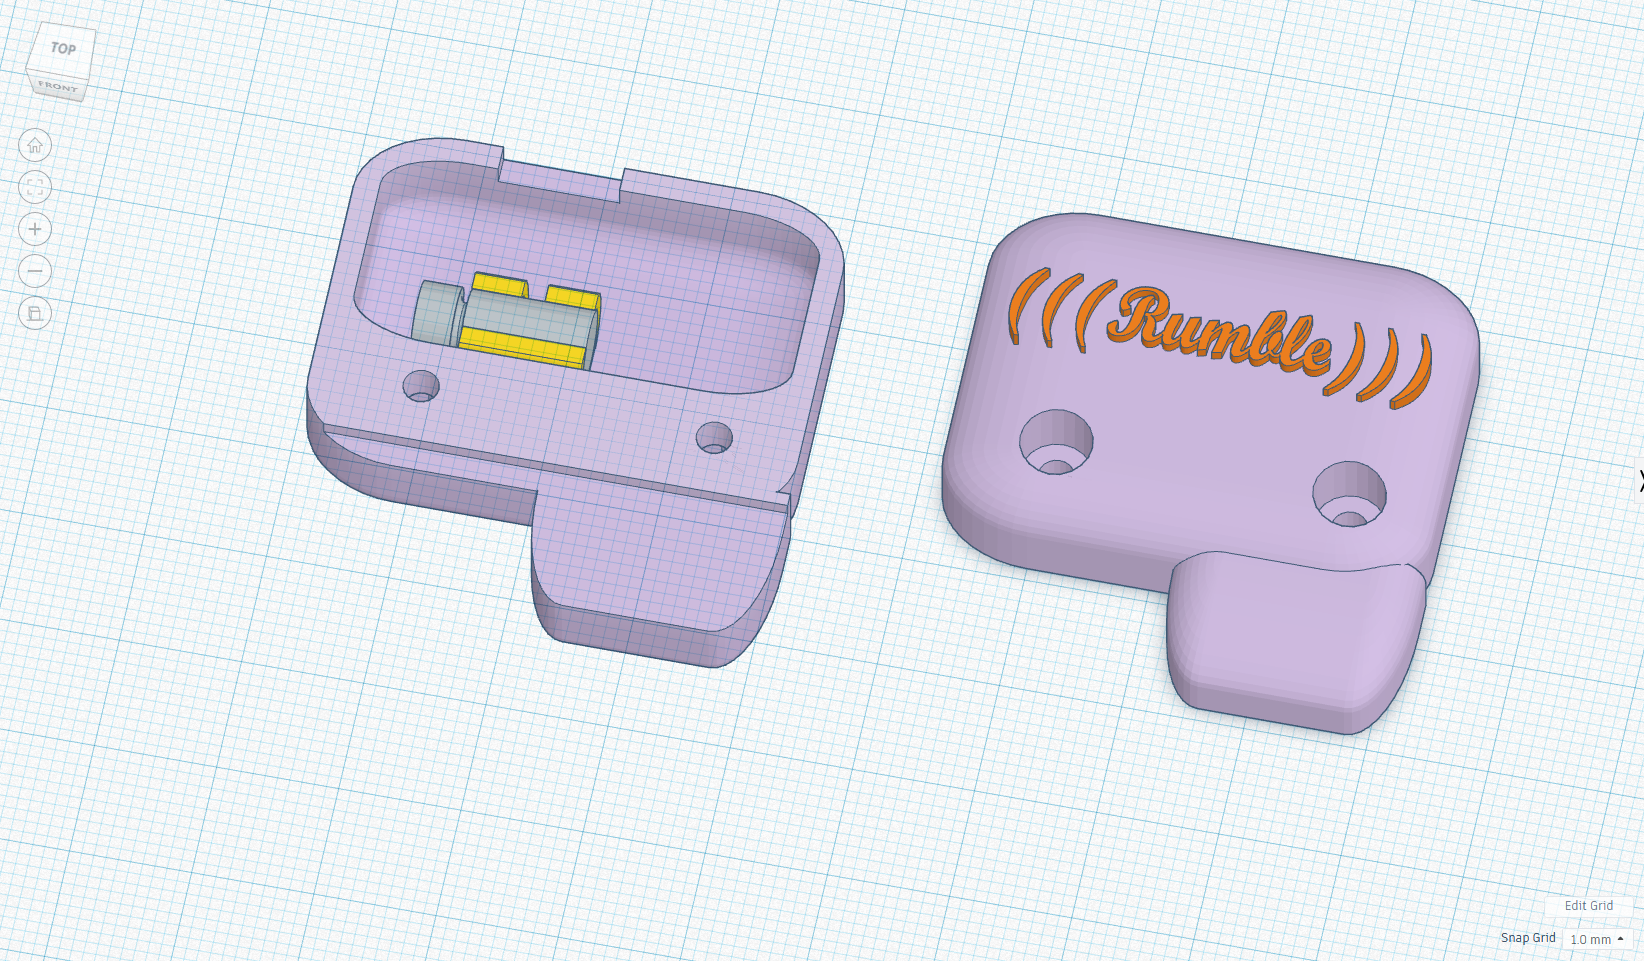
The grey thing is the rumble-motor.
The idea is that you put nuts and bolts through the bolt-holes, and then tighten it onto the top of the PocketCHIP board. The slot in the top is where the wires come out to connect to the pin headers.
Step Four : Assembly
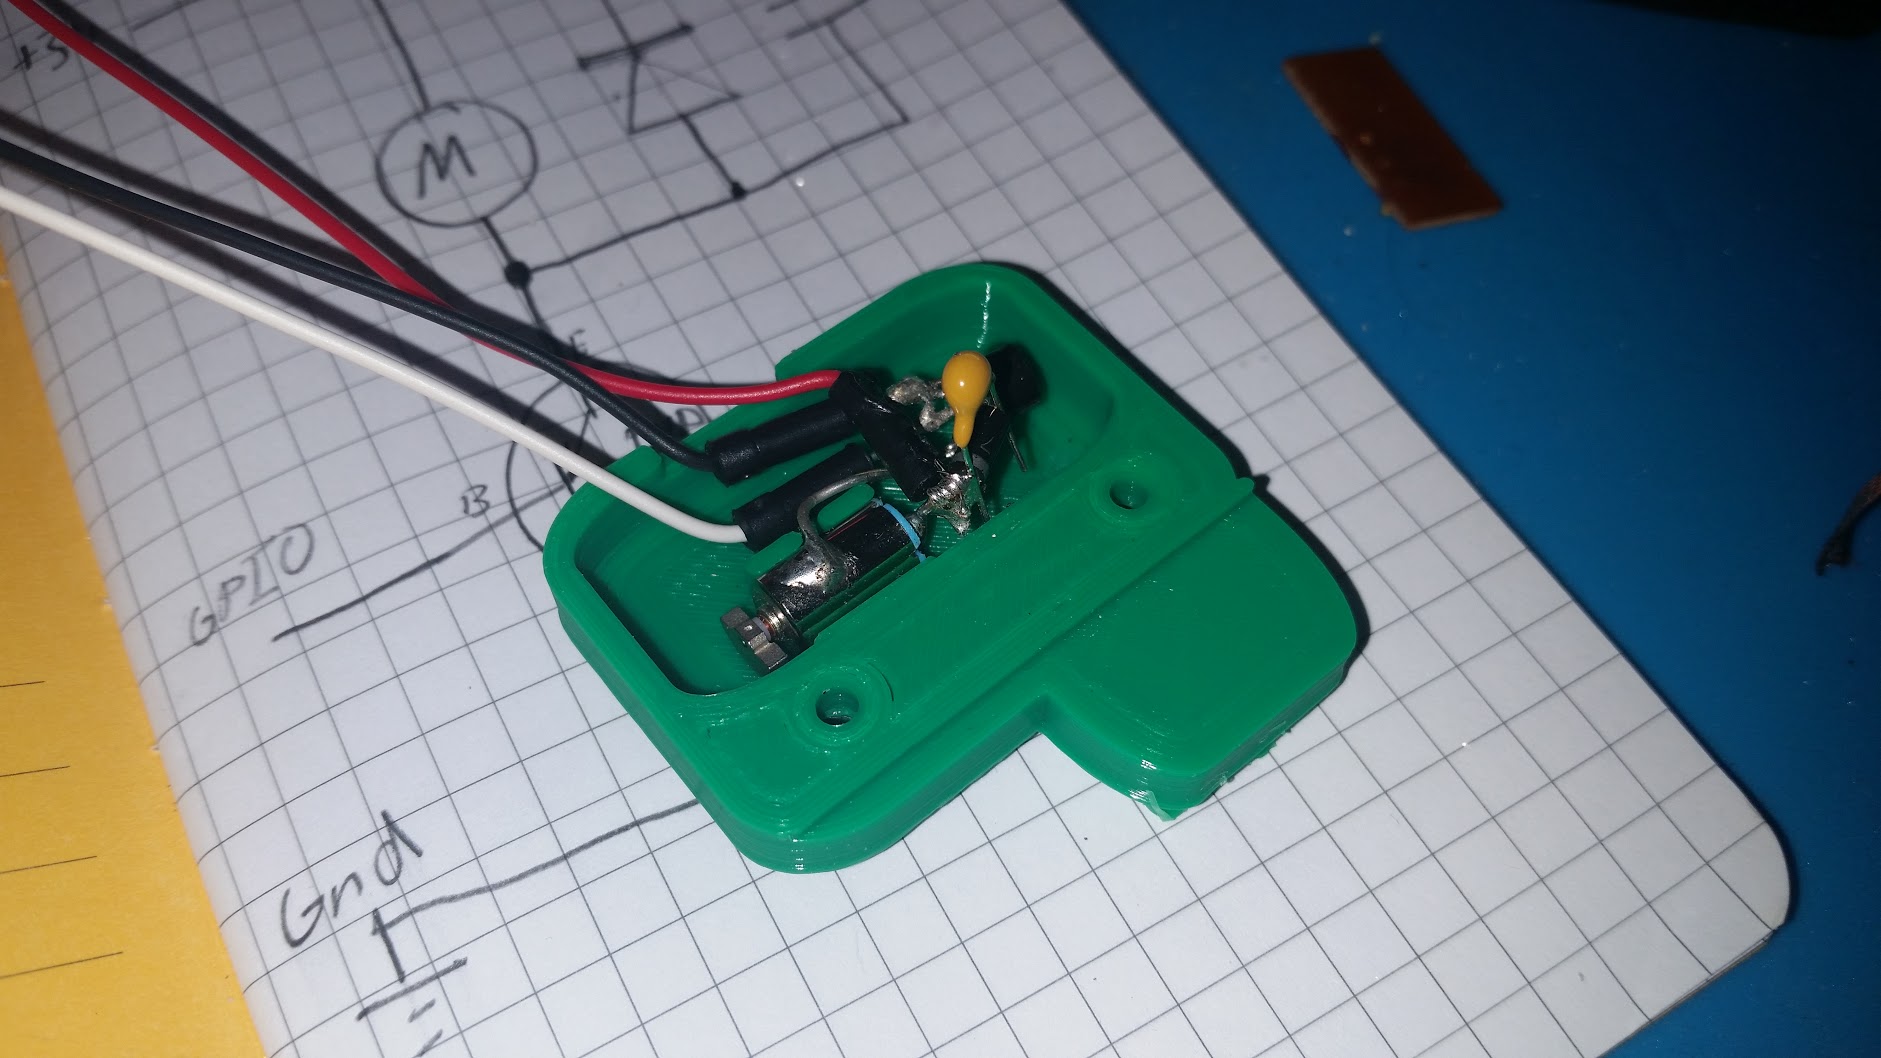
In my mind I was going to lay out all the components neatly. Turns out I didn't leave enough room for that. So I kind of just had to solder them into tangle of components.
Step Five : Programming
One problem here is that only root has access to the GPIO pins. If anyone knows how to change those permissions please tell me. Instead of starting Pico8 from the main menu, you have to start it from the terminal by typing "sudo pico8". It'll ask you for a password. If you don't know it, it's probably "chip".
Activating the rumble-motor through Pico-8 code is surprisingly simple. It was the easiest part of the project.
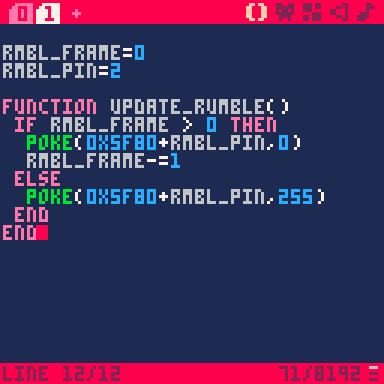
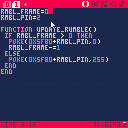
Here's the code. Just call that update_rumble() function once per frame. Any time RMBL_FRAME is greater than zero it will rumble for that many frames.
One trap is that I've got the rumble connected to what's labeled as "GPIO 1", but Pico-8 sees it as pin 2. :shrug:
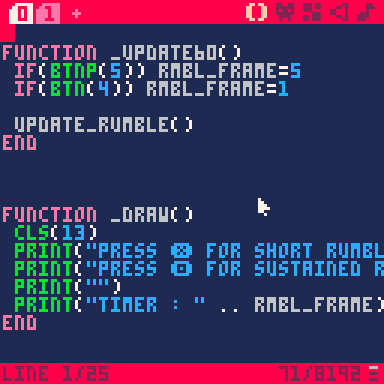
Here's a simple test program.
I modified @guerragames's "Pinballvania" to use the rumble. It took me about 60 seconds to make the mod. I copy/pasted the update function, and added a single line to the existing "Screen shake" function, which already was triggered after every hard collision.
I really hope other people build rumblers into handheld pico-8 devices. It'd be great if we could come up with a loose standard for how rumble in Pico games works.
Here's a parts list :
And a case to put it all in. If you've got a 3d printer, you can use the case I designed, but I'll bet you could design a better one.

Here's the test cart with the code.
Obviously, it won't do anything interesting unless you have a rumble motor hooked up to your GPIO pin.

I don't have a PocketChip, rumble motors, 3D printer or clue how to do any of what you just said, but it sounds seriously cool :-)

Likewise! Admire the skills many folk here have. Wouldn't have a clue where to start with this, but sounds impressive!
Just out of interest, are PocketChips still available (in the UK)? Thanks

Thanks!
To answer your question, no. The company that made the CHIP and PocketCHIP is now out of business.
I believe this would also work on a Raspi-based machine.
[Please log in to post a comment]


