So, I noticed a lot of you are eager to start working on your own, custom Voxatron characters but don't really know where to start. I felt the same way too. Luckily, I overcame the learning curve and I'm here to make sure the same thing happens for you!
First of all, let's explain how custom characters work.
A custom character consists of 12 frames (frame 0 to 11). Each frame has the size of 15x15x16 voxels.
Frame 0 - neutral, not shooting or equipping the sword and armor.
Frame 1 - shooting, right (your character's right; your left)
Frame 2 - shooting, left (your character's left)
Frame 3 - sword and armor, neutral
Frame 4 - sword and armor, swipe 1
Frame 5 - sword and armor, swipe 2
Frame 6, 7, 8, 9 and 10 - your character's legs. I'll explain how this works below.
Frame 11 - sword and armor, drops. This is what your character will drop upon taking damage and losing the sword and armor and is purely eye candy.
*your character always swings the sword from right to left, so keep that in mind when working on these frames.
But hey, why are character's legs separate from the rest of the body? To prevent you from having to re-draw the frames over and over! If your body and legs weren't separate you would have to make walking animations for every action in the game - shooting, equipping the sword and armor... Having it set up like this saves a lot of time.
This also means that the upper body frames should not have any legs within them as the legd are positioned there automatically in-game and that you should save some space for the legs below the body.
The legs are animated in a "pingpong" movement (6, 7, 8, 9, 10, 9, 8, 7 etc.) Frame 8 is the frame where your legs are positioned right below your character. I'm sure you'll figure out the rest :]

This is an example of how a character and its frames look in the editor.
Now that you know how that works, let's get started.
Start up Voxatron and go to the editor. I assume you are already familiar with the editor. If not, hit "Esc" and type in "help". The console will tell you all you need to know.
Go to the Objects tab in the item browser. See those numbers ranging from 1 to 6 to the left of the Edit and New buttons? Those are Voxel Object Banks, or VOBs in short. These act like "folders" and can be utilized for easy organization within the Objects tab.
However, the sixth VOB gets special properties if the first object (Prop 0) is named "_char". This tells the game to use props 0 to 11 as frames for the custom character.

This is how you access VOB 6.
Now, hit the New button and start editing VOB 6 Prop 0. Before you begin, make sure to name the prop "_char", or the game won't understand that it's supposed to be used as a character. Also, don't forget to set the canvas size to "15 15 16", otherwise the animations will most likely not play properly.

All frames should have these exact properties.
Only Frame 0 is required to be named "_char" though.
There's also a third thing you have to keep in mind before you start editing: try to keep your character smaller than 5x5x10, or you will experience (harmless, but sometimes unpleasant) clipping issues with other props. Keep the character as centered in the canvas as possible.

Try to stay within this "box" to avoid clipping issues.
Once you've done that, begin unleashing your creativity! Who will be the hero of your adventure? A cyclops? A dwarf? An alien? The possibilities are endless!
A few tips and tricks:
- Frame 2 is essentially a mirrored frame 1.
- Frame 9 is essentially a mirrored frame 7.
- Frame 10 is essentially a mirrored frame 6.
- Frame 11 is essentially a copy of frame 3 with the character removed, so that the sword and armor appear to be "hovering" in the air.
- When copy-pasting (CTRL+C / CTRL+V) one frame to another, make sure that nothing is selected and that the message "copied voxmap" appears in the console instead of "copied selection". If you just copy a selection the editor will auto-crop whatever you copied which will require you to manually re-position the character and re-size the canvas. Copying the voxmap will give you exactly what you see.
If you have any questions, don't hesitate - ask me.
Cheers! :]
I uploaded a custom character template due to popular demand. Perfect if you just want to do basic recolors of the default robot character.
Also, if any of you developers happen to pass by, I'd like to propose a suggestion: custom hitboxes. This to prevent those nasty clipping issues. Just a cuboid in frame 12 or something similar which would make larger custom characters more viable. Think about it ;]

Have you considered adding this to the wiki? I would guess it would either go on a sub-page under the one for VOXDE, or in the "Tips and Tricks" section.
I would add it myself if Wikia's registration page worked properly.

what if i wanted my character to only use the right hand to shoot?

I added pictures!
@Cubic Meter: I'll see what I can do in terms of adding this to the wiki later this weekend. The Wikia wiki isn't the official Voxatron wiki though, the official one is https://lexaloffle.com/voxwiki.
@JT Sentinel: If that's what you want to do, then make both shooting frames the same. Nothing's forcing your character to dual wield :]
Keep in mind though that the bullets will still go "left, right, left, right".


Shes as big as that actor that shoots disc projectiles. I hope it works when I get it all done :x

As it is now, you can only edit the playable robot character - not any of the monsters. That Samus looks great, but it's way bigger than 5x5x10 and will clip horribly :[

as a fallback plan this character can be one of the future edited mob because its the same size as that one Actor. One of Zep's demo mob is larger than 5x5x10 I think. Im almost done with this one and if it doesnt work I'll make a smaller version.
edit:
i meant demo "char" not mob

Having a bit too much fun with this feature.. Again, Clipping issues but it's my first model. X3 The gunner actually 'leans forwards' when firing and the lil gun and lights alternate. being able to use another character to define a bounding box could be useful. :D


I finished mine too and i cant really notice any clipping issues woot. I'll upload it on Models and Objects section so you guys can test. I was going to make Samus transform into Dark Samus when she gets a sword but the feet models must be the same for all frames Dx

Request:
It would be great if someone could upload the default robot frames to the models page, -just because I imagine a lot of people would just want to recolour rather than build a new model from scratch, and also it's a handy reference as to what frames need what information anyway.

@jakew1999: Which, The city one I posted up in the WIP section or the random assemblage of default blocks in the above one..?

For some reason my armor never shows up whenever I get the sword, which is a bit sad so I basically edit in the armor on the 'sword' frames..

eamon yeah but you can get the map with the fox on it and then you'll have a fox model to play around with.

@GnomeSlice: I've never heard of that site and probably won't re-post it there. What's wrong with just linking it?
@JT Sentinel: I found your character on the BBS Levels List, and it looks really pretty :D
@eamonn: I'll see if I can upload something like that, unless someone beats me to it.

@DR4IG that is brilliant release it! I demand! make a torn city too.
It looks like the little robot got pissed at the creatures and decided to get a tank, it be great if in the future you'd be able to make his infinite and default weapon the blaster

@voxels>Pixels: The tank is a full 16 16 16 so it clips a bit (Next to blocks, Jumping) and it sorta feels 'huge' given the size of the arena rooms, But I'll stick it up as a .vob shortly in the models/vobs section.
I'd like to eventually make a level similar to the olllld game 'Battle City' though in the future it'd be nice if we could define 'vehicles' with a 'occupied' and 'unoccupied' character frame to reflect boarding/leaving it. Was kind of playing on an old Ikari Warriors machine the other day when I made the tank, Was kind of inspired.
LATER EDIT: The tank has been posted and can be found on the thread HERE!

I made a template myself as well. This level is not a VOB, so there's no copy/pasting or importing involved. Just load up the level in the editor, edit the character frames and start making levels as usual.

I made a test character within the given parameters. Though I really want to make a mecha character (maybe half of it being a tank).
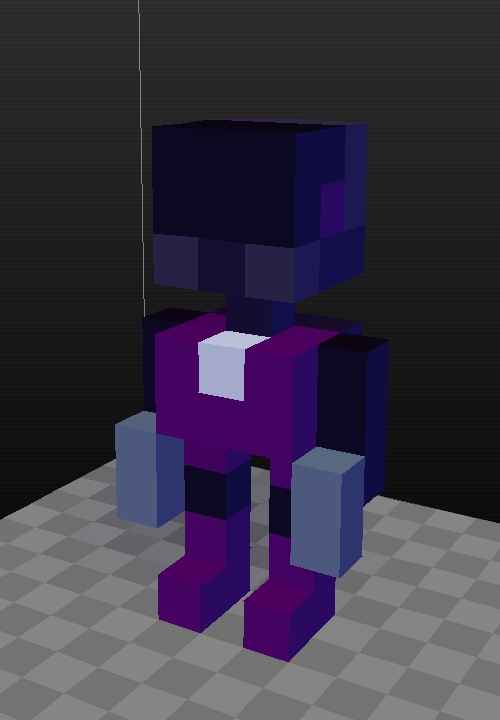

Thanks a lot, this helped and, because of this, I was able to make an awesome character. If I remember, I'll post the link here after I make all the levels for him too.


Why don't you update it with the character properties? You can just copy and paste this below:
To set the speed, jump height and base weapon of a custom character, you can also supply 3 numbers after the "_char". They are:
speed (256 for the robot's speed)
jump height (256 for the robot's jump height)
base weapon (0 for nothing, 1 for peagun (the default), 2 for sword
For example: "_char 400 128 0" gives you a fast guy who can't jump and starts with no weapon.

oh my god this is old!
the way a character is made is now completely different, I would recomend you to use the manual and editing the character that is already there.

Another reminder that character editing has evolved quite a lot since 0.1.6.
You can find the most recent version of the manual here:
[Please log in to post a comment]


