


PICO DAW is a digital audio workstation for creating PICO-8 tunes. If you've ever been frustrated by the piano style layout keyboard layout of the music editor or just wished you could draw your music, PICO DAW is for you. It's a mouse-based alternative for tune creation.
Quick Start Guide
- Open the PICO-8 console and enter load #daw.
- Save the cart under a new name.
- Optional: Add any desired custom instruments in SFX slots 0 through 7.
- Run the cart.
- Hold down the left mouse button and drag to draw a note.
- Select the active track by scrolling the mouse wheel.
- Pan through music patterns with left and right arrows.
- Edit notes by right clicking on them.
There are many more keyboard shortcuts and tools. Keep reading to get the most out of PICO DAW.
Preliminaries
While you can use the version of PICO DAW embedded in this page, it is better to run the cartridge directly from PICO-8. Open the PICO-8 console and enter <kbd>LOAD #DAW</kbd>. Then save the cart under a new name so that you have a dedicated cart in which to store your tunes. Optionally, add any desired custom instruments in SFX slots 0 through 7.
PICO DAW assumes that you will use all 4 channels, 56 SFXs (8 through 64), and music patterns 0 through 13. If this does not reflect your wishes, go into the PICO-8 music editor and configure the music patterns to suit your project.
Once PICO DAW is configured according to your needs, run the cart to begin composing.
Saving
PICO DAW automatically saves your work every 5 minutes. You can force a save anytime by pressing Ctrl-S. Be sure to press Ctrl-S before exiting PICO DAW. If you forget to press Ctrl-S before exiting, enter <kbd>RESUME</kbd> in the console, press Ctrl-S, and then exit again.
Navigating
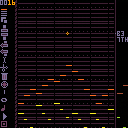
Composing is done one music pattern at a time. The music pattern occupies the major portion of the screen with a few notes of the previous and next music patterns displayed at the left and right margins. The current pattern number displays in the upper left of the screen at the top of the toolbar.
Each data-entry tub is 3 pixels wide. The tubs are arrange horizontally across the screen in sequence from tub 0 to 31, left to right. This is the time axis. The pitch axis is vertical. The potential pitch values are arranged sequentially from highest at the top to lowest at the bottom. The horizontal lines are <dfn>staff lines</dfn> corresponding to the currently selected scale and indicate potential pitch values that fit the chosen scale.
Change the active music pattern with the ⬅️ and ➡️ arrow keys or by left clicking in the left and right margins. Press Home or End to jump to the beginning or end of the tune.
Undoing and Redoing
Ctrl-Z and Ctrl-Y undo and redo editing actions. The size of the undo buffer is limited by PICO-8's memory. Cut and insert actions are especially memory intensive operations and decrease the number of actions that can be held in the undo buffer.
Drawing Notes
Compose by drawing notes. Notes are drawn one channel at a time. The cross-hair color reflects the current channel. Channel 0 is orange; channel 1, yellow; channel 2, green; and channel 3, blue. To change the active channel, scroll the mouse wheel while hovering over the pattern.
Notes may be placed on staff lines for scale notes or between staff lines for non-scale notes. To place a note, move the cross-hair anywhere within the current music pattern. Press the left mouse button to lock in a pitch. Then drag from left to right to elongate the note and finally release the mouse button to finish placing a note in the currently active channel.
Erasing Notes
Hover the cursor over the note to be erased. Hold down the ctrl key, click and drag across the note to erase it. Only notes in the current channel are erased. (See also the delete tool below.
Selecting
Some actions require selecting a group of data-entry tubs from the pattern. Hold down the shift key while dragging with the left mouse button to draw a rectangle over the selected notes. Release the mouse button and Shift key to finalize the selection. To cancel a selection, right-click outside of it.
Transposing
Select a group of notes and use the ⬆️ and ⬇️ keys to transpose the notes up and down the scale. Hold down the Ctrl key while transposing to transpose without regard to the scale. Move the mouse to cancel transposition mode.
Setting Note Options

To view or change the instrument, volume, and/or effect options for an individual note, right-click on a note to open the note options menu. To edit the options for a group of notes, first select them and then right-click on a note in the selection to serve as the model note. Changes will only be applied to notes that are in the same channel as the model note and only the actual changes to the model note are applied to the selected notes. Any unchanged options from the model note are ignored.
Hover over the first icon and use the mouse wheel to change the note's instrument. The standard instruments are represented with the same waveform icons found in the SFX editor. Custom instruments are represented by the numbers 0 through 7.
The next icon is the effect icon. Use the mouse wheel to change the effect.
The third icon is the volume icon. Use the mouse wheel to set the volume. A note's volume cannot be set to zero with the note options menu; erase or delete the note instead.
Click on the last icon, the speaker, to listen to the selected note(s) in the current channel. (See also playback.)
To close the note option menu, cancel the selection by right-clicking outside of the selection.
To see the current options for a note without opening the note menu, hover over the note with the cursor.
Toolbar
Right-click in the left margin to toggle the toolbar on or off.
Channel Tool

Each channel cursor has default attack, sustain, and release options for instrument, volume, and effect. When drawing a note, the attack settings are applied to the first tub of note, release settings to the last tub, and sustain settings to any tubs in between. To change the default note options for the current channel cursor, select a contiguous group of tubs from the current channel to use as a model. Then, click the channel tool to assign attack, sustain, and release settings to the channel based on the selected notes. The instrument, volume, and effect settings from the first tub in the selection is used for the attack, the last tub settings for the release, and the second tub settings for the sustain. To set all four channels to the same set of defaults, hold down the shift key while clicking on the channel tool.

Clicking the channel tool without a selected group of notes, reveals the SFX options menu for the current channel and music pattern. Hover over the menu items to reveal the settings and scroll the mouse wheel to change them. Setting changes are applied immediately to the current channel displayed by the channel icon.
The noiz and buzz filter icons are on/off switches. A switch is off when it is slid to the left and on when slid to the right. The detune, reverb, dampen filter icons are three way switches. The left position indicates no effect, the right position indicates moderate effect, and a completely filled switch indicates maximum effect.
The metronome icon indicates the SFX spd setting and the brackets icon indicates the SFX len setting.
To change settings for all the SFXs associated with the current pattern (instead of just the SFX associated with the current channel,) hold down the shift key while adjusting a setting.
To apply the current channel's SFX settings to the same channel's SFXs in all the patterns from the current pattern through the end of the tune, click the end icon in the settings menu. You will hear a confirmation "bloop" to let you know the settings have been applied. To apply all the channels' SFX setting to all the patterns from the current pattern through the end of the tune, hold down the shift key while clicking the end icon.
Copy Tool

Select a group of notes and click the copy icon to copy the notes for stamping. The cursor automatically changes to the repetition/transposition stamp. Ctrl-C may also be used to copy.
Stamp Tools
 Click one of the stamp icons to stamp with previously copied notes. The stamps are, from top to bottom: repetition/transposition, inversion, retrograde, and retrograde inversion.
Move the mouse to position the stamp pattern. Note intervals automatically adjust to the scale you are currently using. Hold down the Ctrl key while stamping to ignore the current scale and stamp chromatically. Left-click to place notes. If you click near the left or right margin, any notes that do not fit the current music pattern will spill into the previous or next pattern.
Optionally, scroll the mouse wheel before stamping to change which channel(s) the notes are assigned to.
Right-click anywhere in the music pattern to cancel stamp mode and return to draw mode.
Insert Tool

To insert empty data-entry tubs in the current music pattern, draw a selection rectangle from the desired insertion point to the desired width of the inserted space. Left-click the insert icon to push notes right from the insertion point to the end tune by the width of the selection. Right-click the insert icon to limit inserting to the current channel.
For this tool the selection height has no meaning, only the selection width. There must be space in the music patterns for the shifted notes to flow into. Otherwise, notes at the end of the composition will be lost. Also, if some channels are muted downstream of the current music pattern, the notes in some channels may be stopped from shifting while continuing to shift for unmuted channels. Take care that you know the structure of your composition and that you understand how the notes will flow prior to using insert.
The Insert key may be used instead of left-clicking the insert icon.
Cut Tool

To cut notes from a music pattern, Select a group of notes and left-click the cut icon. The selected notes are copied and ready for stamping with any of the stamp tools. The notes to the right of the cut section are shifted left to replace the cut section. For this tool, the selection height only applies to the notes copied for stamping and otherwise has no meaning. Right-click the cut tool to limit cutting to the current channel.
Ctrl-X may also be used be used left-clicking the cut icon.
Delete Tool

Select a group of notes and click the delete icon to delete them. You may also press the Delete key. (See also erasing notes.)
Scale Dial

By default PICO DAW shows staff lines for the Natural C Major scale. To select a different scale, hover over the scale dial and scroll the mouse wheel. To shift the scale mode, hover over the scale dial and hold down the Shift key while scrolling the mouse wheel. To change the tonic, hover over the scale dial and hold down the Ctrl key while scrolling the mouse wheel.
To create a custom scale, draw a group of ascending notes with the current channel cursor to represent the custom scale and select them. Then left-click the scale dial icon. The new scale is added to the scale dial tool and the staff lines are updated to reflect the new scale.
Chord Tool

Hover over the chord icon and scroll the mouse wheel to change the chord number. The root of the chord is displayed as a dotted line. (When the chord number is set to I, the root of the chord and the tonic are the same. So, the chord icon may also be used to highlight the tonic.)
Press the 3, 5, and/or 7 keys to toggle on display of the 3rd, 5th, and/or 7th intervals. Press the keys again to toggle them off.
Press shift-3 repeatedly to rotate between display the major, minor, or scale third interval.
Press shift-5 repeatedly to rotate between display the diminished, perfect, augmented or scale fifth interval.
Press shift-7 repeatedly to display the major, minor, or scale seventh interval.
Click the chord icon to toggle interval highlighting on and off as a group.
Measure Tool

Click the measure icon (whole note symbol) to toggle measure markers on and off. By default there are 4 measures of eight notes per music pattern.
To change the measure width, select a group of data-entry tubs equal to the width of the new measure and click the measure icon. It's usually best to do this on the first music pattern of the tune and select tub zero through the desired width.
Subdivision Tool

Click the subdivision icon (quarter note symbol) to display subdivision markers when the measure markers are displayed. Click the icon again to toggle off the subdivision markers.
To change the subdivision width, select a group of data-entry tubs equal to the width of the new subdivision and click the subdivision icon.
The measure will be divided as evenly as possible with any remainder appearing as the width of the last subdivision. You may adjust the width of individual subdivisions by holding down the Alt key. (This is helpful for odd meters and swing rhythms.) The cursor will change to the divider icon. Move the mouse over a subdivider (lavender dots), and drag with the left mouse button to resize the subdivision. Individual subdivisions cannot be deleted. Instead, change the number of subdivisions by changing the width.
Play Tool

To listen to your composition, left-click the play icon. To record, right-click the play button. The composition will play from the current music pattern to the last music pattern for the tune. If recording, a wave file will be created on the computer's desktop.
Select a group of notes prior to clicking the play icon to limit playback to the selection.
The Spacebar may also be used instead of the playback icon.
Stop Tool

To stop playback, click the stop icon or press Spacebar.

This is insane!
I found a bug though, if you restart the cart while the music is playing, the cart will be permanently corrupted. (Well, I guess we can just don't do that?)
Also check out the soundtrack I uploaded on this post, it looks cool:


Congrats @bikibird! I know u worked super hard on this and I'm sure it will be a great gift to the community!
@lilly.kensa, thanks for reporting the bug. I'm committed to fixing all bugs. I tried to reproduce the bug hitting the play button, pressing escape, and then entering resume, but everything worked fine. What are your exact steps for reproducing this bug?
@lily.kensa, okay was able to reproduce and fix. Will hold off on posting the update for a few days in case more bugs come in. By the way, you can stop playback anytime by pressing the space bar.
@lily.kensa
I just updated the cart to fix the bug your reported. Thanks!
[Please log in to post a comment]